How to Clean Paint Brushes After Using Deck Stain
You’ll need to act quickly since water-based stains dry within 1-6 hours, while oil-based stains create sticky residue. For water-based stains, squeeze excess product back into the container, then rinse under warm running water with dish soap until clean. For oil-based stains, submerge bristles in mineral spirits and swirl to loosen the finish, repeating through three to four cleaning cycles with fresh solvent. Proper disposal at hazardous waste facilities prevents environmental damage. Understanding the specific techniques for each stain type guarantees your brushes remain in peak condition.
Identify the Type of Deck Stain Used
Why does identifying your deck stain matter when cleaning brushes? The stain’s base formulation—whether water-based or oil-based—directly determines your cleaning approach and solvent selection.
You’ll need to examine your product label first, as manufacturers clearly specify the stain type. If the label’s unavailable, inspect residue characteristics on dried brushes. Water-based stains create brittle, easily crumbling residue that softens quickly in water. Oil-based stains produce sticky, pliable residue requiring mineral spirits for removal.
Deck stain identification also influences drying time and cleanup urgency. Water-based formulations demand immediate cleaning since they dry rapidly once exposed to air, with drying times of 1-6 hours to the touch. Oil-based stains allow extended working windows but necessitate solvent-based cleaning methods. Proper brush maintenance prevents damage that could compromise your application tools during future deck staining projects.
Understanding these distinctions prevents brush damage and guarantees effective cleaning, ultimately extending brush longevity and maintaining application quality for future projects.
Immediate Post-Application Brush Cleaning Steps
Once you’ve finished applying deck stain, you’ll want to act quickly to preserve your brush’s condition and minimize solvent waste during cleanup. Start by wiping excess stain from your brush using a paper towel or rag immediately after application. This essential first step prevents stain from drying on the bristles and reduces the solvent you’ll need later.
Next, move your brush and supplies to a well-ventilated area away from plants, animals, and ignition sources. Protect your work surface with a plastic tarp. Pour mineral spirits into a small container and submerge the stained bristles. Swirl the brush to loosen dried stain, then agitate it up and down to dislodge trapped particles. Wipe with a clean rag between soaks until stain removal is complete. For optimal results, use the same fan-tip spray patterns and techniques that work best for application to ensure consistent stain coverage throughout your project. Consider using quality brushes or applicators suited for your specific stain type, as they help achieve better results and are easier to clean after application.

PROFESSIONAL-GRADE OIL PAINT THINNER: Our odorless mineral spirits is made from high-quality, pure, odorless mineral oil, free of aromatic solvents. This premium formula effectively thins oil paints, colorants, and varnishes, ensuring a smooth mix without affecting color or finish

Cleans and Restores Paint Brushes and Rollers Helps remove dried paint, coatings, and residue from brushes and rollers, supporting better performance and extending tool life.
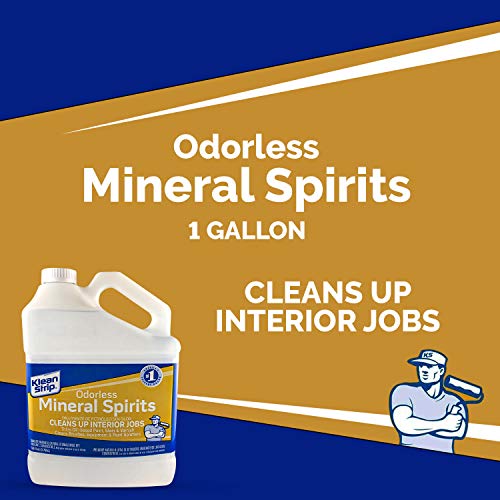
Cleans up interior jobs
Multi-Stage Cleaning Process for Oil-Based Stains
After you’ve removed the excess stain, you’ll need to move beyond simple wiping and employ a systematic cleaning approach that dissolves oil-based residue trapped deep within the bristles. You’ll conduct three to four successive cleaning cycles using fresh mineral spirits in each stage. Begin by fully submerging your brush and allowing extended soaking duration to break down dried finish. After soaking, transfer the dirty solvent to a waste container and repeat with fresh mineral spirits. Continue this process until paper towels emerge completely clean. Each successive cycle requires progressively shorter soaking duration as less finish remains. This multi-stage approach maximizes solvent effectiveness while ensuring complete stain removal, preparing your brush for the final soap and water rinse. For extended brush lifespan and reusability, consider that proper maintenance of your tools mirrors the care required for outdoor projects, such as applying waterproofing sprays to preserve materials exposed to the elements. Proper brush maintenance extends the life of your tools and allows you to reuse them for future projects, just as thorough deck preparation ensures a lasting stain finish.

✅ GENTLE ON HANDS, TOUGH ON PAINT: No paint thinner, no turpentine — just a powerful natural cleaner that removes wet or dry paint in seconds. Safe to use directly on your hands and brushes.

PROFESSIONAL-GRADE ODORLESS MINERAL SPIRITS: Erigathe odorless mineral spirits features a refined, high-purity formula designed for artists and studio use. This versatile mineral spirits paint thinner helps adjust oil paint consistency while maintaining the natural appearance of colors, making it a reliable oil paint solvent and thinner for everyday painting

Not for sale in California and other VOC restricted areas
Water-Based Stain Cleaning Procedures
Water-based stains require a fundamentally different cleaning approach than oil-based finishes, primarily because they’ll harden quickly on your bristles if you don’t act immediately. Start stain removal by squeezing excess product back into the container while the brush remains wet. Work quickly—dried stain becomes nearly impossible to remove.
Rinse your brush thoroughly under warm running water, working the bristles carefully to dislodge residual stain. Next, wash with dish soap or shampoo using generous amounts to penetrate all bristles. Multiple washings are necessary; by the second or third application, soap should foam readily, confirming complete solvent removal.
Finally, rinse repeatedly in clean water until all soap residue disappears. Spin out excess water, then hang your brush bristles-down to dry. This process preserves your cleaning tools and prepares them for future use.

"The Masters" Brush Cleaner is the world's finest total care product for brushes that cleans and conditions in one step.

Effective Paint Removal: Specially formulated to wash away water-based paints, stains, and primers from brushes, rollers, sprayers, and paint tools.

MADE IN THE USA - Proudly made right here in the USA at our Wisconsin headquarters and formulated with cutting-edge German ingredients, Flitz delivers unbeatable quality you can trust. Flitz brushed nickel cleaner and wax for sinks are made to last and perform each time
Prevention of Brush Deterioration During Cleaning
Proper brush maintenance doesn’t end with effective cleaning—it requires you to protect your tools from deterioration during the process itself. You’ll want to employ gentle cleaning techniques that preserve bristle integrity. Avoid harsh chemicals like vinegar and abrasive cleaners that damage bristles and weaken the ferrule’s adhesive bond. Instead, use mild dish soap or brush-specific cleaners for general maintenance.
During brush care, minimize soaking time in water or solvents, as extended submersion compromises the glue holding bristles in place. Rinse under running water rather than leaving brushes submerged. After cleaning, stand brushes upright or hang them bristles-up while wet to prevent water from seeping into the ferrule and causing rust. Avoid laying them flat, which impedes airflow and promotes moisture damage. Similar to how concrete footings must be positioned below the frost line to prevent shifting, brush ferrules need proper positioning to avoid moisture damage. For metal brush components, ensure you’re protecting surfaces from oxidation by employing protective gear and proper ventilation similar to metal furniture restoration practices. Guarantee complete dryness before storage.

ONE SCRUBBING DISHWAND: One package of Scotch-Brite Soap Control Dishwand; one pack contains one scrubbing wand.

Brush dispenses soap with the light push of a button

Dispenses soap on demand with the light push of a button
Waste Disposal and Environmental Considerations
Once you’ve finished cleaning your brushes and completed your staining project, you’ll face the critical task of disposing of the waste materials responsibly. You must take leftover oil-based stain to a household hazardous waste collection site, as pouring it down drains causes environmental contamination. Allow dried paint residue from your cleaning bucket to harden completely before trashing it—never pour contaminated water into drains, as it creates blockages and harms ecosystems. Oil-stained rags require special handling due to spontaneous combustion risks; dry them flat in ventilated areas before sealing in metal containers. Strained solvents you’ve reused should eventually reach hazardous waste facilities when too contaminated for further use. These practices minimize your environmental impact while ensuring safe disposal of toxic materials.
Brush Maintenance for Long-Term Performance
After you’ve disposed of your waste materials safely, keeping your brushes in prime condition guarantees they’ll perform reliably for future projects. Brush longevity depends on consistent maintenance practices that protect your investment and promote peak performance.
Store your brushes flat or hang them bristle-down in cool, dry environments away from direct sunlight. Never leave brushes standing upright on their bristles, as this causes permanent deformation. Wrap them in brown paper bags or cardboard keepers that allow moisture to wick away naturally.
Before each project, inspect your brushes for residue or stiffness. Deep clean brushes that haven’t been used for several weeks by reconditioning them in appropriate thinner. Proper bristle care prevents brittleness, splaying, and excessive shedding. Replace brushes showing these signs to maintain application quality.

Bates deck stain brush set includes 2 high-quality brushes designed specifically for staining decks and other large wood surfaces.

Bates deck stain brush features a 7.5-inch width for expansive and even application, ideal for efficiently staining decks, fences, and other large wooden areas.

Stains flat surfaces and between boards at the same time