The Easiest Ways to Paint Deck Boards Like a Pro
You’ll paint deck boards like a pro by following this sequence: thoroughly clean and sweep your deck, then pressure wash at 1000–1500 psi. Next, sand with progressive grits—60–80, then 120–150—along the wood grain. Apply primer with 3/8-inch nap rollers using thick, consistent coats. Finally, apply two to three thin paint coats, sanding lightly between each. Monitor weather conditions and allow proper drying time between applications. This methodical approach guarantees professional results that last for years.
Surface Preparation and Cleaning
You’ll find that proper surface preparation is the foundation of a professional-looking painted deck. Start by sweeping thoroughly to remove loose dirt, leaves, and debris. Use a stiff brush to scrub away stubborn surface grime and buildup. Apply a commercial deck cleaner or bleach-water mixture to eliminate mold and mildew, following manufacturer instructions carefully. Allow the cleaner to sit for 10–15 minutes before scrubbing with the wood grain. Rinse completely using a pressure washer set to 1000–1500 psi, spraying with the grain to prevent damage. For deck cleaning, avoid holding the nozzle too close to prevent gouging. To protect your decking surface during this process, consider using specialized pressure washer attachments designed for delicate materials. Let the deck dry completely for 24–48 hours before proceeding. After drying, inspect the deck surface and make any necessary repairs to ensure a smooth foundation for paint application. Proper drying guarantees excellent paint adhesion and prevents peeling or blistering.
Repair and Pre-Treatment Work
Before applying paint, thoroughly inspect your deck’s structural integrity and address any damage that could compromise both safety and the longevity of your finish.
Start with an extensive structural assessment, examining joists for separation from beams and checking for loose nails in joist hangers. Next, perform damage identification by locating cracked, splintering, and rotted boards. Mark pressure-treated surfaces showing wavy or rough textures for treatment.
Remove peeling paint completely before recoating. Replace boards exhibiting significant rot or structural weakness using exact thickness measurements. Extract all fasteners with appropriate tools like pry bars or nail pullers, taking care to work gradually and protect surrounding boards from damage during the removal process. Address dried-out wood with specialized repair products, applying adequate thickness to seal surface cracks and prevent water infiltration. Create drainage paths in severely damaged areas. Allow proper drying time between cleaning and treatment application before proceeding with painting. For optimal paint adhesion, use a quality deck cleaner to remove dirt, mold, and residues that prevent new finishes from adhering properly.

Gorilla tough: Gorilla Wood Filler is the go-to product for strong water resistant repairs on cracks, gouges and holes
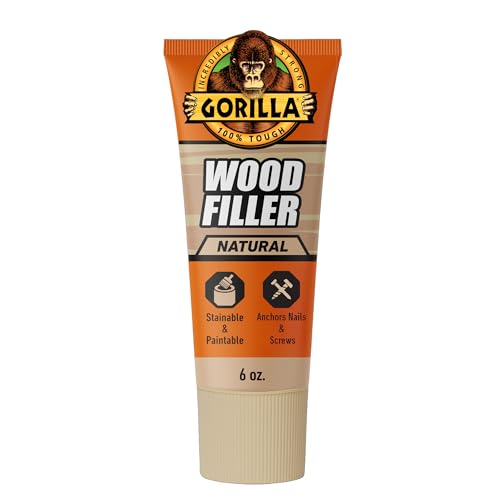
Gorilla tough: Gorilla Wood Filler is the go-to product for strong water resistant repairs on cracks, gouges and holes

TWO-PART FORMULA chemically bonds with surface to adhere permanently
Sanding and Surface Smoothing
Once you’ve addressed structural damage and allowed proper drying time, sanding becomes the critical next step for preparing your deck’s surface to receive paint. Your sandpaper selection and grit progression determine efficiency and finish quality. Start with coarse 60–80 grit to eliminate old finishes and deep scratches, then advance to medium 80–100 grit for smoothing. Finish with fine 120–150 grit for a silky surface. Always sand along the wood grain using long, overlapping strokes with consistent pressure. Avoid letting sanders sit stationary to prevent gouging. Electric random orbital sanders work well for large areas, while detail sanders handle corners and railings. Replace worn sandpaper regularly and vacuum thoroughly between passes to maintain ideal results. After sanding is complete, thoroughly clean your deck with a pressure washer or deck cleaner to remove all dust and debris before applying your chosen finish.

HIGH PERFORMANCE ORBIT SANDER - 2.0 Amp corded electric random orbit sander for a swirl-free finish
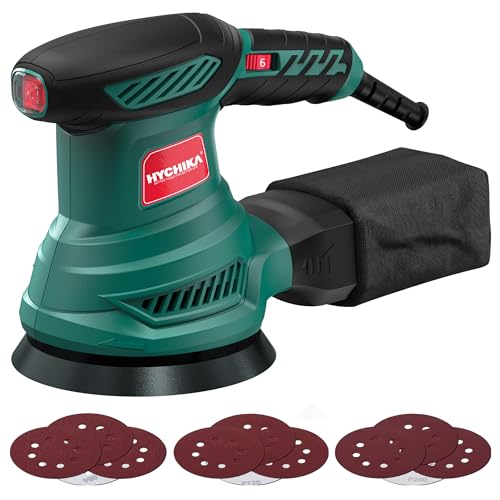
【13000 RPM & 6 VARIABLE SPEED】This electric random orbital sander is driven by a high-performance 300W motor and equipped with 6-speed control, delivering a maximum output of 13,000 RPM. It is 30% more efficient than other standard hand orbital sanders, making it suitable for polishing and sanding all types of materials.

【POWERFUL PERFORMANCE】DEKOPRO 2.5A Orbital Sander is assembled with a powerful DEKO motor that can reach speeds of up to 14,000 RPM, allowing it to provide smooth performance in a variety of sanding applications.
Priming Application Techniques
After sanding your deck to a smooth finish, selecting the right primer becomes essential for establishing a durable paint foundation. Choose between water-based acrylic primers like RockSolid Deck Start or oil-based polyurethane primers, depending on your moisture resistance needs. Both primer types require thorough mixing before application and shouldn’t be thinned or diluted.
For application tools, use 3/8-inch nap rollers or synthetic paintbrushes to achieve ideal coverage. Apply primer in thick, consistent coats that saturate all surfaces—including undersides and edges of boards. Generously cover rails and posts alongside your main deck surface. Allow two hours for complete drying before applying your top coat. Your primer’s appearance will shift from milky white to clear when properly cured, ensuring superior paint adhesion and durability. To maximize paint longevity, allow the primer to cure for several days before exposing the deck to moisture or heavy use. Applying multiple coats will further enhance the durability and longevity of your deck’s finish.

Works on weathered, worn or previously coated exterior wood including wood decks, fences, docks and furniture, use under a solid exterior stain, paint or other solid topcoat

Premium Brush-On Acrylic Paint – High-quality, water-based formula designed for smooth, even application

Multipurpose, 100% acrylic primer sealer that provides excellent adhesion to a variety of interior & exterior surfaces.
Paint Application and Coverage Methods
With your primer cured and ready, you’re prepared to begin the paint application phase that’ll bring your deck’s final appearance to life. You’ll choose between rolling techniques and spraying techniques based on your deck’s size and complexity. Rolling techniques with synthetic fiber rollers work efficiently for water-based paints, covering approximately one yard square per dip while maintaining consistent pressure. Spraying techniques deliver faster coverage on expansive surfaces; adjust variable speed settings to prevent buildup and runs, using quick wrist flicks at direction changes. For both methods, apply paint following wood grain direction for maximum absorption. Use angled brushes for edges and detail work between boards. Plan for two to three thin coats with 4-6 hour drying intervals, sanding lightly between applications for professional results. Pay close attention to drying times between coats to ensure proper adhesion and avoid peeling. To prevent lap marks and ensure even coverage, employ back-brushing techniques after applying paint to create a seamless, uniform finish across all deck surfaces.

Our no-shed microfiber roller covers ensure a perfect paint or stain finish for stunning results.

Bates paint roller kit includes 19 essential pieces for home painting, prep, and cleanup projects.

Efficient Performance: 3/8-inch nap holds an ample amount of paint for time-saving convenience and fast, even paint application
Weather Conditions and Drying Timeline
Since environmental factors dramatically influence paint adhesion and curing success, you’ll need to monitor temperature, humidity, rainfall, and sunlight before and during your deck painting project. Maintain temperatures between 50°F and 85°F for best results; extremes cause blistering or incomplete curing. Control humidity effects by painting when relative humidity stays between 40-60%. Levels above 60% prolong drying and risk defects like peeling. Avoid painting within 24-48 hours after rainfall to guarantee proper wood moisture content. Your newly painted deck requires 48 hours of dry weather for complete curing. Plan applications for early morning or late afternoon to minimize direct sunlight exposure, which can cause rapid surface drying while interiors remain wet. For oil-based paints, expect slower drying times compared to water-based alternatives, so adjust your project schedule accordingly. Most experts recommend waiting at least 48 hours before placing furniture back on your deck to ensure full curing and protection. These weather variables demand careful planning for professional outcomes.
Professional Tools and Equipment Selection
Selecting the right tools fundamentally determines your deck painting efficiency and finish quality. You’ll find that natural China bristle brushes excel with oil-based stains, while rollers with 3/8-inch nap covers apply stain nearly twice as fast as traditional methods. Stain pads hold more product than rollers, reducing bucket dipping frequency on well-maintained surfaces. For sprayer techniques, HVLP systems like FLEXiO models offer adjustable pattern control and complete coverage in minutes without brush marks. Tool compatibility matters greatly: rollers work well with solid color stains but splatter with transparent formulations, whereas brushes perform universally across all stain types. Before you begin applying any stain, ensure your deck surface is properly prepared through thorough cleaning and sanding to achieve the best results. The Woodmates 9″ Deck Stain Roller Cover is highly recommended for its superior ability to hold more stain and deliver an even finish across larger deck areas. Match your brush types, roller options, and pad performance to your specific stain formulation for superior results on your deck project.

Proprietary golden yellow fabric provides exceptional capacity with all flat or satin paints stains and waterproofing

Proprietary golden yellow fabric provides exceptional capacity with all flat or satin paints stains and waterproofing

Proprietary golden yellow fabric provides exceptional capacity with all flat or satin paints stains and waterproofing
Maintenance Tips for Long-Lasting Results
Once you’ve invested time and materials in painting your deck, establishing a consistent maintenance routine becomes critical to preserving your work and protecting your investment. You’ll want to conduct seasonal inspections to identify loose boards, protruding nails, and early rot signs before they escalate. Sweep debris regularly and wash your deck with mild soap every few weeks during warmer months, clearing accumulated grime from corners and board spaces. Before repainting or refreshing your deck’s appearance, ensure the surface is properly prepared by using a wood brightener to restore the wood’s natural pH balance and promote better paint adhesion. Implement deck longevity tips by reapplying protective sealant every two to three years, ensuring UV and moisture resistance remains ideal. When refreshing your deck’s appearance, remember that new and old wood may require different preparation techniques to achieve uniform color results. Address spills promptly to prevent staining. Replace compromised boards immediately to maintain structural integrity. You’ll maximize your painted deck’s lifespan through methodical, proactive care and vigilant monitoring.