
The Best Way to Sand Between Deck Boards for Maintenance
You’ll start by cleaning your deck thoroughly and allowing 24–48 hours of drying time before sanding. Use detail sanders or hand-sanding blocks for tight spaces, progressing from coarse grit (60–80) through fine grit (120–150) while sanding with the grain. Apply light, even pressure with overlapping strokes, clearing dust regularly between passes. Wear safety glasses and a particle mask throughout. Verify your deck’s moisture content stays below 15% before beginning. The specific techniques and tools you’ll need vary based on your deck’s unique conditions.
Preparation Before Sanding Between Deck Boards
Before you begin sanding, you’ll need to thoroughly prepare your deck by removing all debris and cleaning the surface. Start by sweeping away leaves, dirt, and loose particles to establish a clean working area. Apply a deck cleaner or mild detergent to eliminate mold, mildew, and trapped dirt between boards. Pressure wash the entire deck to remove embedded grime and old finish residues, then rinse thoroughly to eliminate cleaning solution traces. When using a pressure washer, employ low pressure settings with specialized attachments to protect your decking surface from damage. For optimal results, allow a brightening solution to open up the wood’s pores after rinsing and while the surface is still wet. Assess your deck’s condition by inspecting for damaged, rotten, or warped boards that could compromise sanding effectiveness. Replace loose fasteners and repair broken sections to guarantee a flat surface. Examine gaps between boards for debris buildup. Allow 24 to 48 hours of complete drying time before sanding—moisture prevents proper sanding results and damages wood. These preparation methods guarantee the best deck condition for effective sanding.

Professional concentrate cleans decks, siding, driveways, and patios - perfect for homeowners preparing for BBQs, real estate agents staging homes, or contractors finishing jobs.
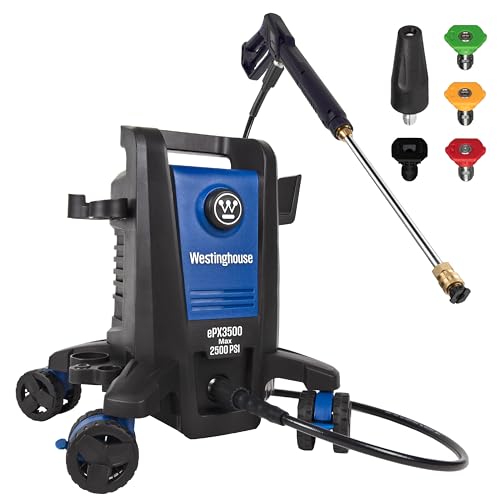
Delivers 2500 max PSI and 1.76 max GPM (at lowest pressure), and 2000 rated PSI and 1.2 rated GPM of water flow; Pro-style steel extendable 17.5” wand with quick-connect nozzles (0°, 15°, 25°, turbo and soap applicator)

[2100 PSI @ 1.2 GPM] - Great for medium-duty cleaning tasks. Great for medium-duty cleaning tasks. Ideal for use on fencing, decking, concrete patios, siding, sidewalks, patio furniture, small driveways & more.
Sandpaper Grit Selection and Usage
Selecting the right sandpaper grit is essential to achieving a smooth, professionally finished deck surface, and you’ll want to follow a strategic progression rather than jumping between grits haphazardly. Understanding grit differences helps you avoid unevenness and visible sanding marks. Start with coarse grit (60–80) to strip old finishes and remove deep imperfections. Progress to medium grit (80–120) using consistent, even passes to refine the surface and eliminate coarse scratches. Finish with fine grit (120–150) for ideal stain absorption and a silky texture. Your sanding techniques should always move with the grain. Be cautious not to over-sand your deck surface, as excessive sanding can make the wood too smooth and reduce its ability to properly absorb stain. Clean the surface between grit changes to remove dust, ensuring better adhesion for subsequent passes and a professional result.

Detail Sander Sandpaper: 50 pcs 220 grit palm sander sandpaper with 12 holes 5-1/4 x 3-3/4” (13.5cm x 9.5cm), suitable for Black and Decker mouse detail sanders including BDCMS20C, BDEMS600...

Detail Sander Sandpaper: 50 pcs 120 grit palm sander sandpaper with 12 holes 5-1/4 x 3-3/4” (13.5cm x 9.5cm), suitable for Black and Decker mouse detail sanders including BDCMS20C, BDEMS600...

Detail Sander Sandpaper: 50 pcs 80 grit palm sander sandpaper with 12 holes 5-1/4 x 3-3/4” (13.5cm x 9.5cm), suitable for Black and Decker mouse detail sanders including BDCMS20C, BDEMS600...
Tools and Techniques for Sanding Between Boards
Three primary tool categories—detail sanders, hand sanding blocks, and specialized orbital sanders—will handle the unique challenges of narrow gaps between deck boards. Detail sanders excel in tight spaces with their narrow heads, while hand sanding blocks provide manual control for precision work. Small orbital sanders address broader but shallow gaps effectively.
Your sanding techniques require directional consistency—always sand with the wood grain to prevent cross-grain scratches. Apply light, even pressure using long, overlapping strokes for uniform results. Replace worn abrasives frequently to maintain efficiency and check progress regularly by hand.
Employ a vacuum or leaf blower to clear dust from gaps during the process. Work systematically across your deck, ensuring thorough coverage and smooth surfaces between all boards before finishing.
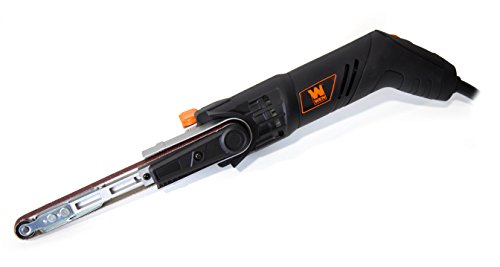
Variable speed dial powers the belt anywhere from 1080 to 1800 feet per minute
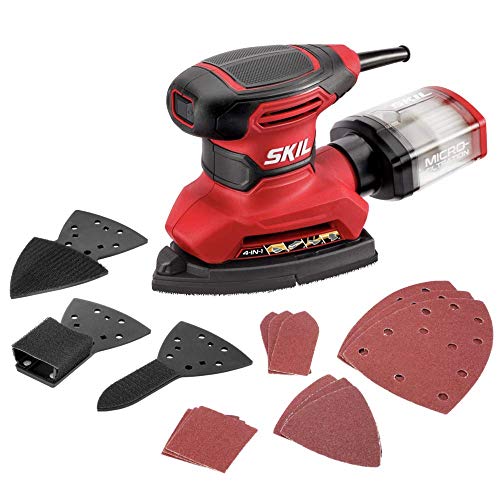
POWERFUL - With a 1. 2 amp motor and 13,500 orbits per minute, it's able to deliver a smooth performance over a variety of sanding applications.

Features a 3.75 x 5.5 inch pad with an angled tip for precision work
Timing and Environmental Considerations
Since moisture content directly impacts sanding effectiveness and wood stability, you’ll need to wait a minimum of 24-48 hours after power washing before beginning your deck sanding project. Weather conditions notably influence this timeline—dry air accelerates evaporation between boards, while humidity prolongs drying periods.
Spring offers ideal conditions, with temperatures around 60-70 degrees Fahrenheit preventing warping and uneven expansion. Seasonal scheduling minimizes weather-related delays and environmental impact by concentrating maintenance during stable climate periods. Temperature stability guarantees consistent results across your deck’s surface. For optimal results, ensure your deck’s moisture content falls below 15% before you begin sanding.
Before sanding, conduct water drop testing to verify adequate dryness. Inspect boards for residual moisture and standing water. Complete debris removal between boards facilitates even coverage. Choosing the right deck finish option beforehand ensures your sanding preparation aligns with your long-term maintenance strategy. This timing approach protects wood integrity while optimizing sanding effectiveness and reducing environmental stress on your deck materials.
Cleaning and Post-Sanding Preparation
Once you’ve confirmed your deck’s moisture levels and weather conditions align with your sanding timeline, you’ll need to thoroughly clean the surface to remove debris that can compromise both sanding quality and wood longevity. Use hand-cleaning techniques with specialty tools like angled weeders to extract compacted material from between boards—pressure washers risk wood damage. Follow with sweeping, vacuuming, and blowing to eliminate loose debris. Work in small sections to prevent recontamination. After cleaning, conduct a debris inspection to verify all gaps are clear and check for rot, mold, or loose boards. Proper cleaning also removes old stain and contaminants that interfere with stain adhesion during future finishing work. Allow your deck to dry completely, then remove remaining dust with a tack cloth before sanding begins.

EASILY CLEARS AWAY THE DIRT AND WEEDS: The Crack and Crevice Cleaner is a weed remover that is the perfect tool for weeding driveways, sidewalks, lawn pathways, decks, yard brick-work, walkways, patios, and anywhere weeds are growing in the cracks and crevices

Crevice Weeding Tool: Designed with a sharp scraper on the brush head for removing grass, moss, and weeds from gaps between the walkway to your front door, the cracks in your driveway, the joints in your patio pavers, the slats in your deck, or corners of the wall side easily

Dual-Bristle Construction: The only deck brush to effectively clean both deck boards and seams at once! With Unger Professional's Wood & Composite Deck Brush, one tool is all you need to thoroughly clean your standard sized deck with ease
Safety and Material Handling
Before you’ll need to prioritize thorough safety measures that protect both your health and your equipment’s integrity. You’ll require essential protective equipment including safety glasses, particle masks or respirators, ear protection, gloves, and knee pads to shield against wood dust and noise exposure.
Identify hazardous materials before starting work. Older pressure-treated lumber manufactured before 2003 may contain arsenic, which becomes dangerous during sanding. When using oxalic acid or chemical brighteners, establish proper ventilation systems. Consider how climbing plants and natural canopies can provide shade alternatives for outdoor work areas, reducing heat exposure during extended projects.
Clear your workspace entirely of flammable materials and debris. Secure all loose boards, nails, and screws by countersinking them at least 1 mm below the surface. This preparation prevents equipment damage and guarantees safe, efficient sanding operations while maintaining workspace cleanliness and visibility. When working on decks with railing systems, ensure posts and railings are also properly secured to prevent any movement that could compromise your safety during the sanding process.
Regular Maintenance to Extend Deck Lifespan
While sanding restores your deck’s surface, you’ll find that consistent maintenance is what truly determines its deck longevity and structural integrity. You’ll extend your deck’s lifespan to 25–50 years by implementing practical maintenance tips that address issues before they escalate.
Inspect your deck twice yearly for loose fasteners, wood rot, and structural damage. You should sweep weekly to prevent moisture retention and deep clean annually using appropriate cleaners. Reseal your wood deck every 1–3 years using UV-blocking sealants, testing water absorption to determine necessity. Proper surface preparation before resealing ensures optimal stain adhesion and finish durability. When resealing around metal balusters or railings, use careful application techniques to avoid stain overspray on metal components.
You’ll protect your investment through seasonal upkeep: spring inspections, summer spill management, fall debris removal, and winter protection. These maintenance tips prevent minor problems from becoming costly repairs. Regular attention to drainage, fasteners, and weatherproofing preserves both aesthetics and structural stability, ensuring your deck remains safe and functional for decades.

ADVANCED PROTECTION FOR OUTDOOR WOOD: DEFY Extreme wood stains offer high-performance deck stain and sealer products that prevent graying & weathering while also extending the life of exterior wood surfaces

ADVANCED PROTECTION FOR OUTDOOR WOOD: DEFY Extreme wood stains offer high-performance deck stain and sealer products that prevent graying & weathering while also extending the life of exterior wood surfaces

Rubberized Protective Waterproofing Membrane