How to Build a Floating Deck With Railings: a DIY Guide
You’ll start by planning your deck’s dimensions and verifying the layout with the 3-4-5 rule. Then excavate 3-6 inches at each block location and lay 6 inches of compacted paver base. Assemble your pressure-treated 2×6 frame with exterior screws and corner brackets, checking for square by measuring diagonals. Install decking boards with 1/8-inch spacing for expansion, stagger end joints, and secure with corrosion-resistant screws. Finally, mount railing posts with through-bolts, maintaining consistent spacing and plumb alignment. The detailed steps ahead’ll walk you through each phase.
Planning and Design Your Floating Deck
Before you break ground on your floating deck project, you’ll need to establish a solid design foundation that balances your property’s constraints with your intended use. Start by evaluating your available space and determining practical deck dimensions that align with standard decking material lengths—typically 8, 12, 16, or 20 feet—to minimize waste and reduce costs.
Next, verify your layout’s squareness using the 3-4-5 rule or diagonal measurements between corners. Incorporate aesthetic considerations like accent borders or picture frames if desired, but account for additional blocking these features require. When selecting materials for railings and trim, consider finishes like painted vinyl straps for a refreshed, durable appearance.
Before finalizing your design, consult local building codes regarding height restrictions, railing requirements, and foundation specifications. Identify utility locations to avoid conflicts during construction. After construction, protect your deck investment by regularly maintaining the wood and cushions, as UV rays from direct sunlight can help preserve materials and prevent mold growth on outdoor furnishings. This preliminary planning phase guarantees compliance, structural integrity, and a successful build.
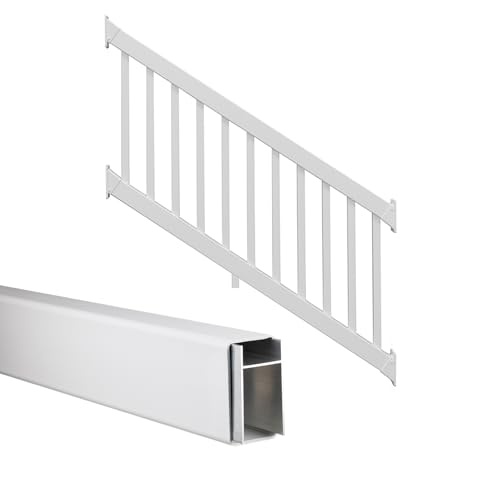
REFRESH YOUR OUTDOOR SPACE: Transform your porch, deck, patio, or balcony railing with the Weatherables Greenwich Deck and Porch Railing Kit. Our vinyl rail kit offers a sophisticated look, is easy to install, and is made to withstand time and weather.

REFRESH YOUR OUTDOOR SPACE: Transform your porch, deck, patio, or balcony railing with the Weatherables Yorkshire Deck and Porch Railing Kit. Our vinyl rail kit offers a sophisticated look, is easy to install, and made is to withstand time and weather.

Complete Set Includes: 4 stair connectors, 2 upper connectors, 2 lower connectors, 20 additional hole covers, 20 long screws, and 8 short screws; All accessories are available, eliminating the need to purchase them separately, making installation easier
Ground Preparation and Block Installation
With your design finalized and utility locations identified, you’re ready to prepare the ground for your floating deck’s foundation. Start by clearing vegetation and grading the site to slope away from footing locations, preventing moisture accumulation and freeze-thaw damage.
Excavate 3 to 6 inches at each block location, removing earth in horizontal layers to maintain ground compaction. Mark block positions with spray paint using a 4-foot grid pattern before digging. Before installing your foundation blocks, inspect the existing deck structure if replacing boards to ensure the base can support new decking materials and hidden fastener systems appropriate for your deck type.
For foundation installation, lay 6 inches of compacted paver base—a mixture of jagged rocks, gravel, and sand. Wet the material before tamping with a rubber mallet to aid compaction. Add leveling sand to fine-tune block height, then position cement blocks directly on the prepared base. Verify level alignment across all rows using a long straightedge board. Proper foundation preparation is critical because moisture accumulation can lead to rot and structural failure over time, significantly reducing your deck’s lifespan.
Materials and Tools You’ll Need
Once you’ve established your foundation blocks and confirmed they’re level, you’ll need to gather the right materials and tools to build your floating deck’s frame and railings.
For lumber, you’ll want pressure-treated wood for structural components and explore decking options like composite boards for durability and low maintenance. Select 2″ x 6″ dimensions for framing and railings.
For railing styles, consider wood, metal, glass, or mixed-material combinations. You’ll also need galvanized screws, joist hangers, and specialized rail bracket hardware for secure assembly.
Essential tools include a circular saw, tape measure, 4-foot level, cordless drill, and safety glasses. Grab a shovel and tamper for any final ground work adjustments. For metal railing components, aluminum furniture offers excellent durability and rust resistance, making it an ideal choice for outdoor railings that require minimal maintenance. These materials and tools guarantee structural integrity and code compliance throughout your project.

PENETRATING OIL-BASED WOOD STAIN – Advanced conditioning oils penetrate deep into wood fibers while drying oils lock in protection, helping prevent cracking, peeling, and premature wood deterioration.

Dimensions: Screw Diameter .195" - Head Width 0.266" - Head Height .133" Use T20 Torx/Star Diver Bit
Self-Drilling Point: Together, coarse screw threads and a self-drilling point design eliminate the need for a pilot hole
Frame Construction and Assembly
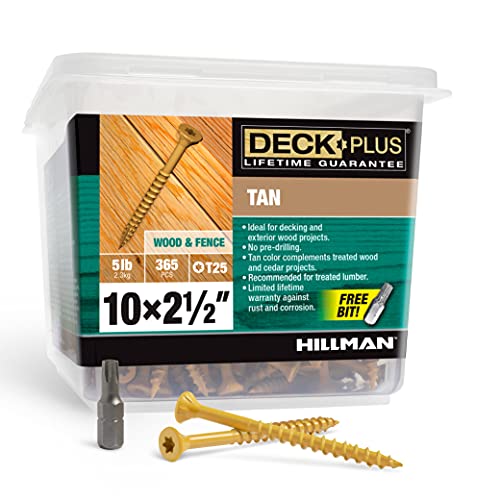
The foundation you’ve prepared now supports the critical next phase: constructing the frame that’ll bear your deck’s entire load. You’ll cut pressure-treated 2×6 or 2×8 lumber to length—typically 117 inches for standard decks—using a cutting saw. Assemble the outer frame with 2½-inch exterior decking screws driven through pre-drilled pilot holes, reinforcing corners with brackets for frame stability. Build the complete assembly in a separate location before moving it into position, as fully assembled frames weigh several hundred pounds. Position your frame so it rests centered on concrete support blocks, then check for square by measuring diagonals across opposite corners. Equal measurements confirm perfect alignment. The specific joist size you choose should account for joist spacing and load requirements as determined by your local building codes. Add shims as needed to achieve proper height and level, balancing both structural integrity and design aesthetics for your floating deck. Once your frame is perfectly positioned and leveled, sand all exposed wood surfaces with progressive grit progression to prepare them for staining or finishing.

Bugle Head Design: This #12 x 6 In multi-purpose wood screws features a precision drive and flush-fit design.underhead cutting teeth reduce wobble, prevent stripping, and ensure clean, flush seating and countersinking. Engineered for low torque and fast driving to boost productivity in wood-to-wood fastening and framing.

Package Information: 25 counts framing nails provide you with a sufficient supply for multiple projects, with a length of approximately 2 inches and a diameter of 0.113 inches, 21 degree ring handle electric galvanized plastic with sheath nails, suitable for a wide range of applications, including construction and woodworking

Installing Decking Boards and Adding Railings
Your leveled frame now provides the stable platform needed to begin laying decking boards and installing railings. For decking installation, arrange boards with 1/8-inch spacing to allow natural expansion and contraction. Stagger end joints for enhanced stability, and drill pilot holes before securing with corrosion-resistant deck screws. Place one screw per end and two along intermediate joists, countersinking slightly below the surface. Use corrosion-resistant finishes on all metal fasteners and hardware to prevent rust and ensure long-term durability.
For railing construction, mark precise post positions according to code requirements, typically 36″ or 42″ height spacing. Most wood railing systems with 4×4 posts should be spaced 6 feet on center to maintain structural integrity and safety compliance. Secure posts with through-bolts and blocking underneath joists to distribute loads effectively. Pre-drill holes to prevent splitting. Attach handrails and balusters with consistent spacing—usually 4 inches maximum between balusters—ensuring they’re plumb and level throughout installation.

137PCS 3-INCH DECK SCREWS: The 2-pound package includes approximately 137 pieces of #10 x 3-inch deck screws and one matching T25 star drive bit. A practical exterior wood screw set for decks, fences, framing and general outdoor construction projects.

Gray exterior coated deck screws for decking, fencing, and exterior wood projects

BUILT FOR OUTDOOR DURABILITY – 304 STAINLESS STEEL: Made from 304 stainless steel, these stainless steel wood screws resist rust, rain, humidity, and coastal conditions. Ideal exterior deck screws for decks, fences, docks, and outdoor wood projects. 96-hour salt spray tested for reliable corrosion resistance.