
How to Stain a Deck With Both New and Old Wood
You’ll achieve uniform color on mixed-age wood by first identifying each wood type’s absorption rate—new hardwoods absorb slowly while weathered wood penetrates deeper. Apply a pre-stain wood conditioner to equalize absorption across sections. Choose solid stains for consistent coverage that masks color variations between old and new areas. Test your selected color on inconspicuous spots before committing. Ascertain wood moisture stays below 15% and allow 24–72 hours of drying after cleaning. Following these steps sets the foundation for professional results that’ll transform your entire deck.
Preparation Steps
Before you apply stain to your deck, you’ll need to thoroughly prepare the surface to confirm even coverage and long-lasting results. Start with a deck assessment to identify problem areas like loose nails, debris between boards, and existing finish condition. Remove all furniture, planters, and obstructions from the deck. Sweep the entire surface thoroughly, then use a stiff brush or putty knife to clear debris from between boards. Cover nearby vegetation and house siding with plastic sheeting for protection. Your tools checklist should include a pump sprayer, stiff-bristled brush, garden hose or pressure washer, degreaser, and wood cleaner. Inspect for loose hardware and remove it before proceeding. Apply a quality deck cleaner to remove dirt, mold, mill glaze, and old stain residues that prevent new stain from adhering properly. Allowing the wood to fully dry for 24–72 hours after cleaning ensures optimal stain penetration and prevents blotchiness or peeling. This detailed preparation confirms maximum stain adhesion and a professional-quality finish.

HEAVY-DUTY MULTI-PURPOSE CLEANER - Our powdered trisodium phosphate cleaner is a non-sudsing compound that excels in heavy-duty cleaning. Expertly crafted to conquer the toughest jobs, removing stubborn grease, smoke, soot, and chalked paint from almost any type of walls & floors

Industrial strength cleaner, degreaser, and deodorizer removes heavy dirt, grease, food residue and stains from washable surfaces.

CLEANS AND BRIGHTENS IN MINUTES: Microban Outdoor Surface Care removes mold, mildew and algae stains with visible results in minutes. Your exterior surfaces will look bright and new - no ladder or scrubbing required.
Wood Type Considerations
Understanding your deck’s wood type is essential for achieving consistent stain results, since different woods absorb stain at dramatically different rates. You’ll encounter varying wood characteristics and density differences that directly impact how your stain performs.
New wood, particularly hardwoods, is denser and less porous, absorbing stain more slowly and producing lighter finishes. Conversely, old weathered wood becomes increasingly porous, absorbing stain deeper and appearing darker. Pressure-treated pine presents absorption challenges due to chemical treatments and moisture content, while cedar and redwood’s natural oils slow penetration.
Exotic hardwoods like ipe resist deep stain penetration because of their extreme density. If your deck contains mixed wood types, you’ll face uneven absorption and color variation. Pre-stain wood conditioners help equalize absorption rates across these different surfaces, promoting more uniform results. For optimal protection and appearance, transparent or semi-transparent stains with UV filters and fungicides will help control mold and mildew on various wood types.

Pre-stain wood conditioner preps wood for even color
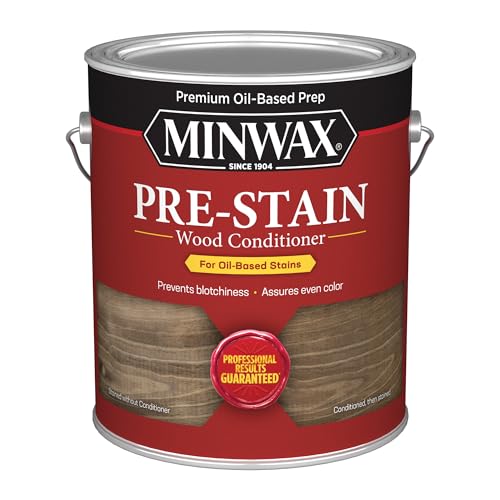
PRE-STAIN TREATMENT FOR ALL WOOD – Ensure wood projects look great with Minwax Pre-Stain Wood Conditioner. Use prior to applying oil-based wood stains to help prevent streaks. It works by evening out the absorption of oil-based wood stain.

Water-based wood stain creates rich, even color in 1 coat on most surfaces
Stain Selection
Which stain type you choose will fundamentally determine how well your deck performs and looks over time. For mixed-age wood, solid stains are your best option—they deliver uniform coverage and mask color differences between new and old boards effectively. Semi-transparent stains won’t hide these variations and can create an uneven appearance.
Before selecting your stain, verify what’s currently on your deck. If it’s coated with solid stain, you must reapply solid stain only; mixing types causes poor adhesion and finish failure.
Regarding color consistency, lean toward neutral or darker shades. They blend mixed-age sections better than lighter options. Most manufacturers offer sample kits, so test your color choice on inconspicuous areas first. This prevents costly mistakes on your entire deck. Testing stain color on a small area helps you avoid staining in direct sunlight and allows you to evaluate the true appearance before application. Ensure favorable weather conditions with at least 24 hours of dry, mild weather for optimal stain absorption and drying.

Waterproofing deck stain & sealer with all-in-one protection

SOLID COLOR DECK & FENCE STAIN: Olympic solid color stain and sealer delivers rich, opaque waterproofing color for decks, fences, siding and railings. Ready for Rain in 2 hours.

SOLID COLOR STAIN & SEALER IN ONE: Olympic Maximum solid color stain delivers rich, opaque color plus waterproofing for decks, fences and siding in one step.
Application Techniques
Once you’ve selected your stain and understand your deck’s current condition, proper surface preparation becomes your foundation for success. You’ll find several application methods available for your project. Traditional brush techniques work well for detailed areas and seams, allowing you to work stain directly into the wood. For larger surfaces, you can employ standard paint rollers or stain pads to increase efficiency. HVLP sprayers paired with lambswool pads enable you to complete two-coat finishing processes quickly. Pump sprayers with fan-tip spray patterns offer another efficient option for covering large deck areas while maintaining consistent pressure throughout application. Regardless of your chosen application method, backbrush to guarantee complete coverage between boards, into seams, and along edges. Apply stain following wood grain in long, smooth strokes, preventing lap marks and guaranteeing uniformity across both new and old wood sections. Before applying stain, ensure all dust from sanding with medium-grit sandpaper has been completely swept or vacuumed away from the deck surface.

Life changing paint sprayer: this paint sprayer requires less thinning compared to finish max or other hand-held paint sprayers

HVLP STAIN SPRAYER FOR DECKS, FENCES & OUTDOOR PROJECTS – The Wagner Control Spray QX2 HVLP stain sprayer applies coatings up to 2X faster than a brush, making it easy to stain decks, fences, lattice, outdoor furniture, pergolas, and other small to medium-sized projects

【Ultra-Smooth Finish Without Brush Marks】 – Powered by an efficient 1000W HVLP motor, this paint sprayer atomizes paint into an ultra-fine, even mist. Eliminate streaks, roller marks, and loose bristles, making it simple to achieve a smooth, professional-grade finish on kitchen cabinets, interior doors, accent walls, and patio furniture.
Blending and Matching
Achieving a seamless finish across new and old wood requires strategic preparation and thoughtful stain selection. You’ll find that old wood absorbs stain differently than new wood, so testing your chosen stain on both surfaces helps predict the final appearance. For effective color blending, apply a base coat to older wood first to shift its color closer to the new wood before applying your final coat. Use semitransparent stains that allow grain visibility while providing uniform color. Apply multiple thin coats rather than one thick application to minimize blotchiness. Back-brush stain to guarantee deep, even penetration. Stain in small sections—two to three boards at a time—maintaining a wet edge to prevent lap marks. Before staining, ensure both wood surfaces are properly prepared by thorough cleaning and sanding to create optimal stain absorption and adhesion. Allow the wood to dry completely, as moisture absorption can affect stain penetration and final appearance. Proper stain matching eliminates visual gaps between old and new materials, creating professional results.
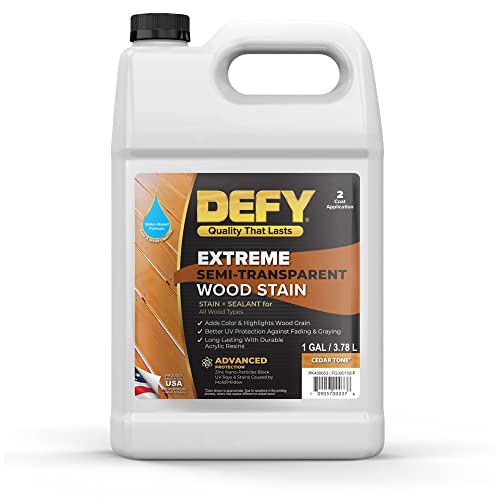
ADVANCED PROTECTION FOR OUTDOOR WOOD: DEFY Extreme wood stains offer high-performance deck stain and sealer products that prevent graying & weathering while also extending the life of exterior wood surfaces

SEMI TRANSPARENT EXTERIOR WOOD STAIN: Our outdoor wood stain and sealer allows the natural wood grain to show through, highlighting the beauty of your decks, fences and sidings and preserving its natural look.

READY-TO-USE DECK STAIN & SEALER: Olympic WaterGuard woodland cedar semi-transparent wood stain and sealant combines color and waterproofing in one water-based, ready-mix coat.
Maintenance and Longevity
Since your deck’s stain won’t last indefinitely, you’ll need to comprehend how long different stain types protect your wood and what factors affect their durability. Semi-transparent stains typically last 2–3 years, while solid stains extend to 5 years with proper care. Semi-solid stains bridge this gap at 4–5 years.
Your maintenance schedule directly impacts stain longevity. UV exposure, foot traffic, water damage, and wood age accelerate deterioration. Watch for fading color, poor water beading, splintering, or cracking—all signals calling for restaining. Proper preparation and cleaning techniques before restaining will ensure the new stain adheres evenly and provides maximum protection. For optimal results, allow proper drying time between coats when applying multiple applications during restaining.
Establish a maintenance routine by sweeping weekly and washing twice yearly with mild soap. Remove debris, guarantee proper ventilation beneath your deck, and inspect regularly for damage. Well-maintained stained decks last 15–20 years, potentially extending wood lifespan by up to 200 percent compared to unstained alternatives.
Common Mistakes to Avoid
Even experienced deck builders can stumble when it comes to staining, and you’ll want to avoid the pitfalls that compromise your results. Start with thorough surface preparation—sand the entire deck and power-wash away debris, then wait 24 hours for complete drying. Skipping test boards is costly; they reveal how stain behaves on your specific wood type and age. Never apply multiple coats; wood absorbs only limited stain, and excess causes pooling and peeling. Always mix all stain batches together in one large bucket to prevent visible color variations across your deck. Finally, timing matters—new wood needs 2–6 weeks before staining, while aged wood shouldn’t wait too long. Just as precise leveling ensures structural stability in outdoor structures, proper surface preparation ensures your stain adheres evenly and lasts longer. Consider selecting the proper stain type based on your climate exposure and desired finish to protect your deck from sun and moisture damage. These fundamentals guarantee uniform, professional results.
Timeline and Expected Results
Your staining process typically spans two weekends. Weekend one involves assessment, repairs, and cleaning—allocating 1-2 days of labor. The intermediate week requires 3-5 days for complete deck drying, depending on weather conditions. Weekend two covers staining and finishing touches, requiring 1-2 days for proper application.
Drying time varies considerably based on wood type. Kiln-dried lumber needs 1-2 months before staining, while pressure-treated wood demands a minimum of 6 months. For optimal results, plan your staining project during moderate temperatures and low humidity to ensure proper stain penetration and curing. Ensure your deck’s moisture content falls below 15% before applying stain to avoid poor adhesion and peeling. Once properly stained, expect your deck to maintain its finish for 2-3 years with semi-transparent stains lasting 2-4 years. You’ll recognize when restaining becomes necessary when water stops beading on the surface or mold appears.