How to Properly Tighten Cable Railings for Your Deck
You’ll tension your deck’s cable railings by starting at the center row and alternating positions to guarantee uniform tightness across all cables. Use cable gauges to verify the 200-pound tension standard, applying hand pressure with Allen wrenches to prevent cross-threading. Inspect for sagging between tensioning cycles and repeat the sequence until you’ve achieved consistent pressure throughout. Maintaining proper tension quarterly with tension gauge tools prevents safety hazards and extends your railing system’s lifespan considerably.
Preparing Your Posts and Framework
Before you install cable railings on your deck, you’ll need to properly prepare your posts and framework to handle the tension these cables create. Start by installing blocking between joists at band joist locations where posts will be placed, using at least 2×8 material matched to your joist size for structural consistency. Secure blocking with screws to both joists for maximum stability. This foundation guarantees post stability and framework integrity when cables tighten. Once blocking’s installed, mark accurate post locations after decking installation, accounting for corner and changeover posts. Use pencil on light decking or tape and Sharpie on dark surfaces. Proper preparation prevents costly mistakes and guarantees your framework withstands cable tension effectively.
Drilling Holes for Cable Installation
Proper hole drilling is critical to your cable railing’s structural integrity and safety compliance. You’ll begin with template creation using a 4-inch-wide by 3/4-inch-thick plywood strip, drilling 1/4-inch-diameter holes spaced 3 inches apart. This guarantees perfectly uniform hole placement across your entire system.
Select the appropriate drill bit for your application—9/16-inch bits handle anchor post base bolts, while 1/4-inch bits accommodate cable connectors. Attach depth gauge tape to prevent over-drilling through deck boards.
Before drilling, verify that every hole location sits directly over wood blocking you’ve installed between joists. Mark post locations with Sharpie on clear tape for visibility on composite surfaces. Drill perpendicular holes, maintaining consistent spacing less than 4 inches apart to meet safety codes.

82˚ point for fast, smooth drilling in wood

High-speed steel tools are good for most general purpose applications, offering a combination of hardness and toughness for wear resistance
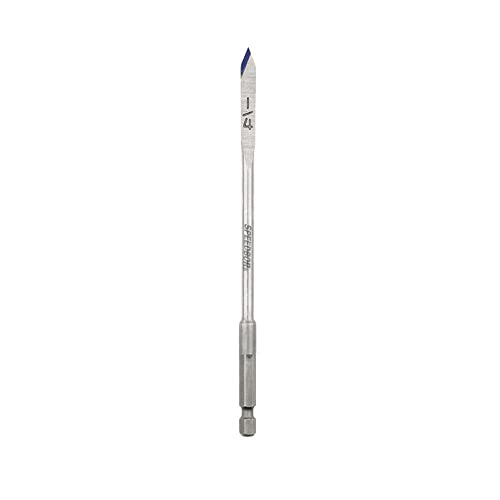
Patented Blue Groove parabolic scoop for faster chip removal
Threading Cables From Bottom to Top
Now that you’ve completed your hole drilling, it’s time to thread the cable through your railing system—this step determines whether your cables’ll hang straight and secure. Begin at the end post’s tensioning fitting, feeding your un-crimped cable end through intermediate posts sequentially. Keep the cable straight and evenly aligned as it passes through each structural element. Spacer bars maintain consistent spacing between posts, preventing deviation during the threading process. Measure your cable run with several extra inches extending beyond your final endpoint. This excess length accommodates the cable route through all posts and prevents premature termination. Using protective sleeves and washers at each post hole will protect your stainless steel cable from friction and corrosion during the threading process. Ensure your cable spacing complies with 4-inch sphere clearance requirements to meet Ohio safety standards. Proper cable alignment during threading guarantees best performance during your tensioning sequence and contributes to long-term railing stability.
Tensioning Techniques for Even Distribution
Once you’ve threaded your cables through all posts, you’ll need to apply tension systematically to achieve even distribution across your railing system. Begin your tensioning sequence at the center row of cables, then alternate between high and low positions using a sequential numbering pattern. This approach prevents uneven load distribution and accounts for greater flex in the post’s center section compared to anchored top and bottom areas.
Use cable gauges to verify you’re meeting the required 200-pound tension standard. Apply hand pressure with appropriately-sized allen wrenches to make subtle adjustments, avoiding power tools that risk cross-threading fasteners. Repeat your tensioning sequence multiple times to ascertain all cables reach uniform tightness levels, visually inspecting for any sagging or looseness that indicates additional adjustment is needed. Proper cable tensioning is particularly important in humid or rainy climates where moisture exposure can affect the structural integrity of your deck system over time. Maintaining proper post spacing, typically no more than 4 feet apart, works in conjunction with correct tensioning to prevent excessive cable movement and ensure your railing meets safety standards.
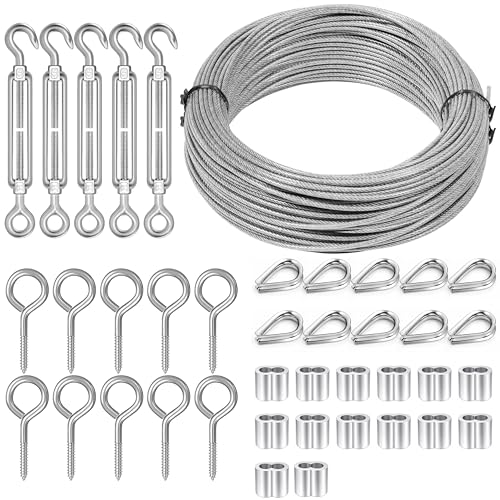
PREMIUM WIRE TURNBUCKLE KIT: Includes 100Ft 1/16 Inch robust stainless steel cable and 5pcs M5 adjustable turnbuckles,10pcs M2 wire rope thimbles, 10pcs M5 screws hooks, and 20pcs M2 aluminum crimping loops designed for secure tensioning in various wire installations; ensures strong, durable support for your projects
![[Patent] Muzata 20Pack Cable Railing Hardware Tensioner & Terminal CR26](https://m.media-amazon.com/images/I/41wPgXjx7pL._SL500_.jpg)
Patented Invisible Design for 4"x4" Wood Post: With the patented invisible flattened tail design, the ugly swaged end can be hidden in the 4"x4" wood post(but cannot be hidden in 2"x2" posts), and get enough tension to pass 4”sphere test to meet code compliance. The customized socket wrench Muzata CT16 is essential for the invisible installation and keeps the cable from spinning when tightening. Package includes: 10 pairs of tensioners and terminals, 1pc allen wrench, 1pc socket wrench

【Applications】Swage lag screw system is a streamline stainless steel wire balustrade systems for straight, stair or angled sections. BLIKA high-quality stainless steel wire balustrade hardware that is suitable for indoor and outdoor applications. Cable railing swage lag screws perfect for planning your DIY cable railing project, staircases, balconies and decking areas. Get the job done effortlessly with our extra-thick wrench—built to outlast others.
Essential Hardware and Assembly Components
Because your cable railing’s performance depends entirely on quality components working in concert, you’ll want to understand the specific hardware that holds everything together. Your tensioners types range from turnbuckles offering adjustability for angled installations to lag screw tensioners that hide swaged ends within posts for seamless aesthetics. Push-Lock threaded bolts and Ultra-tec welded receivers accommodate various cable sizes and pipe configurations. Assembly techniques require proper end fittings with lock jaw housing that eliminate expensive swaging tools while maintaining code compliance. Spacer bars stabilize cable runs and distribute loads evenly across spans. Post-mounting hardware including brackets and caps protects connections from weathering while securing rails to posts. Stainless steel construction throughout resists corrosion, ensuring your system’s longevity and structural integrity.

Marine-Grade Material: Crafted from premium T316 stainless steel, our wire rope boasts exceptional strength, durability, and resistance to rust and corrosion. Designed to withstand the harshest outdoor elements, this marine-grade stainless steel cable improve reliability for all your indoor and outdoor applications.

🔧Applications - DN Mate Swage Lag Screw System is made of T316 stainless steel, helping you create or upgrade a sleek, modern and minimalist look while preserving your view. This cable deck railing hardware is suitable for straight, angled and corner sections, it is ideal for wire railing kit for decks, porches, stair railings, balcony railings and fences, creating stylish indoor and outdoor wood post cable railing systems that enhance your living space.

Durable T316 Stainless Steel Construction: This cable railing kit features high-grade T316 stainless steel, ensuring long-lasting performance and resistance to rust, making it perfect for both indoor and outdoor use.
Safety Compliance and Final Inspections
Your cable railing system’s structural integrity means nothing without proper safety compliance and rigorous final inspections. You’ll need to meet established safety regulations that govern cable spacing, height requirements, and load resistance standards. Inspectors verify your work using a 4-inch sphere test to guarantee cables won’t allow passage, measure railing height from the deck surface to top rail, and confirm 200-pound concentrated load capacity at the top rail. Inspection requirements also mandate verification of proper cable tension, secure hardware fastening, and compliant post spacing not exceeding 4 feet. In New Jersey, decks elevated more than 30 inches above ground require guardrails that meet minimum 36-inch height standards to ensure adequate protection. For multi-family residential buildings, guardrail requirements may increase to 42 inches high to provide enhanced safety protection. You must document all compliance efforts and provide manufacturer specifications or ICC Evaluation Reports. Professional inspectors conduct final visual assessments of all connections, confirming adherence to local building codes before approval.
Long-Term Maintenance and Cable Care
Installing a cable railing system doesn’t conclude your responsibilities—it marks the beginning of an ongoing maintenance commitment that’ll preserve both safety and aesthetics for years to come.
You’ll need to establish regular inspection schedules, checking tension every couple months and documenting findings with dated photos. Monitor cable wear closely, as stretched cables compromise system integrity. Apply marine-grade stainless steel protectant twice yearly and address rust spots immediately using rust inhibitor products.
Environmental factors demand tailored approaches: coastal installations require monthly cleaning to prevent salt accumulation, while warm climates need UV-resistant coatings. Cold weather cycles necessitate post-season inspections due to material expansion and contraction.
Proper drainage around post bases prevents water damage that accelerates deterioration. By maintaining vigilant corrosion prevention practices and addressing cable wear promptly, you’ll extend your railing system’s lifespan considerably.

LONG-LASTING PROTECTION - SiO2 ceramic polymers create a durable barrier against corrosion, pitting, and salt damage, ensuring your metals stay pristine

FOR METAL SURFACES: Stainless steel liquid sealant works on stainless steel, chrome, aluminum clear coated surfaces and diamond plate; Versatile formula

Polishes as it cleans to beautify and protect stainless steel, chrome, and aluminum appliances and metal surfaces