How to Wire Your Deck for Beautiful Outdoor Lighting
You’ll transform your deck by planning zones requiring 200-500 lumens, selecting a properly sized 12V transformer near a GFCI outlet, and running 12-gauge wiring beneath decking or along joists. Install fixtures in pre-drilled holes using outdoor-rated hardware, then protect all connections with waterproof connectors and direct burial cable at 6-12 inches depth. Secure exposed wiring with UV-resistant clips. These fundamentals create safe, reliable lighting that’ll serve you for years—though there’s considerably more to master about optimizing your specific layout.
Planning Your Lighting Layout
Before you install a single fixture, you’ll need to assess your outdoor space and understand how light will interact with your deck’s structure, materials, and layout. Walk through your deck after dark to identify safety-critical zones like steps, walkways, and edges requiring illumination. Note architectural features and landscape elements worth highlighting.
Next, define your lighting goals. Determine whether you’re prioritizing ambiance, safety, or feature enhancement. Sketch a rough site plan dividing your deck into distinct zones—pathways, seating areas, dining spaces, and focal points. Separate these deck zones into independent control areas so you can manage lighting ambience independently. For deck lights specifically, aim for 200 to 500 lumens to provide both adequate safety and inviting atmosphere.
Prioritize zones by functional importance. Allocate brighter illumination to high-traffic areas and task zones, reserving subtle accent lighting for architectural features. This strategic approach guarantees safe, cohesive outdoor lighting. When planning your layout, measure and plan light placement to avoid deck joists so wiring runs smoothly beneath the surface.
![CLOUDY BAY [6 Pack] 3CCT Low Voltage LED Deck Lights Outdoor,2700K/3500K/5000K Selectable,Landscape Step Stair Railing Fence Light Wired,3W,12V-24V AC/DC Deck Lighting Fixtures,White](https://m.media-amazon.com/images/I/31YiAPwFr4L._SL500_.jpg)
✔THREE COLOR TEMPERATURE IN ONE FIXTURE: Cloudy Bay designed the step light with 2700K/3500K/5000K selectable LED to give off the right amount of light in the dark.
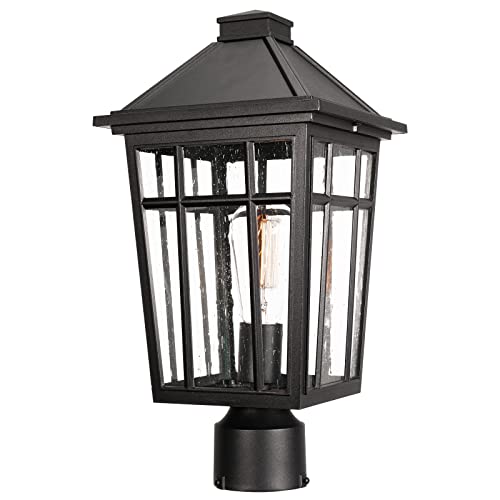
QUALITY OUTDOOR POST LIGHT - This Outdoor post lights crafted of durable aluminum metal and seeded glass, require little to no maintenance. Rust-proof, IP65, shock-resistant and thermally stable, don't worry about any bad weather.

Selecting the Right Transformer and Voltage System
Now that you’ve mapped your deck’s lighting zones, you’ll need to select a transformer and voltage system that can reliably power your fixtures. Calculate your total fixture wattage, then add 25% for future expansion and voltage drop. Most deck lighting uses 12V AC systems, though some LED post caps require 12V DC—always verify your fixture specifications for voltage compatibility.
Choose transformer capacity based on your load calculations, keeping maximum usage at 80% to prevent overheating. Position your transformer close to your light clusters to minimize voltage drop and improve efficiency. Mount it at least 12 inches above ground on a wall, post, or stake.
Install your transformer near a GFCI outlet for code compliance and safety. Guarantee adequate ventilation to prevent premature failure, and use only outdoor-rated equipment designed for wet environments. Proper spacing and airflow around your transformer installation, similar to how consistent spacing between deck boards enhances durability, will extend the lifespan of your electrical components.

[Dusk to Dawn Sensor] Connected to this dusk till dawn transformer, the landscape lighting will turn on automatically at dusk and off at dawn; 60W, convert 120V AC household voltage to 12V DC safety voltage, providing a safer and more practical electrical current level, don't worry about forgetting the switch, energy saving(Please note the transforemr not for Halogen light)

[Built-in Dusk to Dawn Sensor] Landscape lighting that is connected to this transformer will automatically switch on at dusk and off at dawn. By converting household voltage from 120V AC to 12V AC safety voltage using 120W, a safer and more useful electrical current level is produced. Tip: Do not use with a dimmer switch.
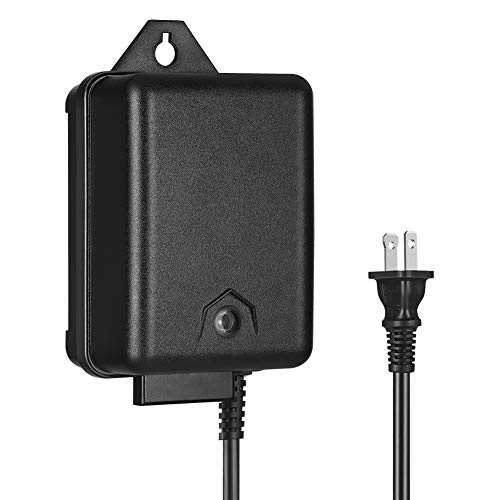
【Built-in Dusk to Dawn Sensor】: Attached with this dewenwils 60w low voltage transformer, your landscape lighting will turn on automatically at dusk and off at dawn. Convert 120V AC household voltage to 12V AC low voltage, providing a safer and more practical electrical current level for your landscape lighting system
Choosing and Installing Your Wiring and Cables
With your transformer positioned and your lighting zones mapped, you’re ready to plan and install the wiring that’ll connect everything together. Start by calculating cable lengths for your entire route, accounting for transformer location and fixture positions. Use low-voltage 12-gauge wiring types appropriate for outdoor installations. Run cables underneath your deck or along joists to hide them from view. Bury any ground-level wiring at least 6 inches deep for protection.
Secure wiring every few feet using cable-safe staples—never regular metal ones that’ll pierce insulation. Avoid laying wire horizontally across joists; instead, drill vertical 1-inch pockets into post sleeves. Feed wiring through 1/4-inch holes for post-mounted fixtures. Check local building codes before beginning installation to guarantee compliance with all electrical requirements.
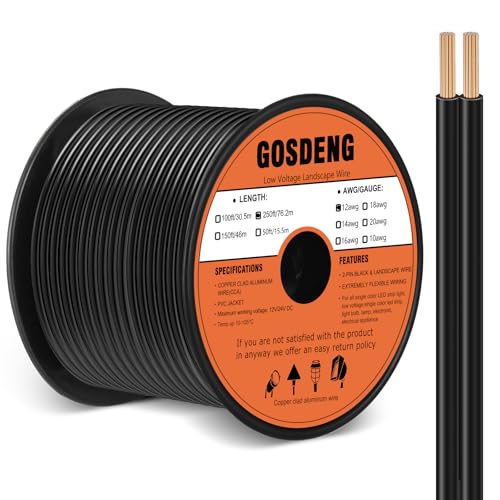
Good Quality: electrical wire is made of 12 AWG 250FT with black 2 conductors and high quality PVC jacket, good conductivity, high mechanical strengthfeatures, flame retardant, anti-aging, acid and alkali resistance and dampproof
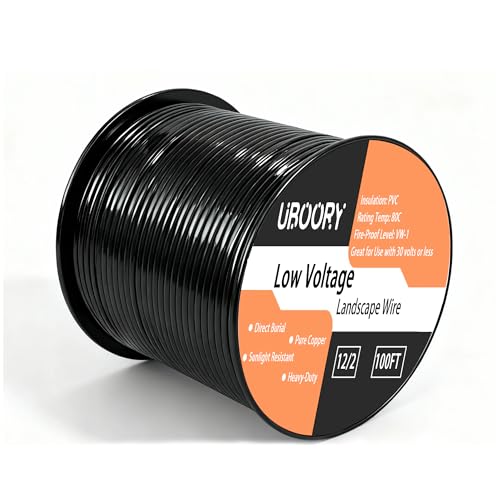
[EASY TO USE] - 100Feet 12AWG*2C, Black, Maximum working voltage: 300V, Great for uses with 30 volts or less, Flexible and easy to strip.

Good Quality: Energeaster electrical wire is made of 12 AWG 250FT with black 2 conductors and high quality PVC jacket, good conductivity, high mechanical strengthfeatures, flame retardant, anti-aging, acid and alkali resistance and dampproof
Installing Your Deck Fixtures Correctly
Your deck fixtures must be installed with precision to verify both safety and longevity. Start by drilling appropriately sized holes—1″ spade bits work well—while avoiding joists and structural elements. For recessed fixtures, make sure holes match the fixture’s diameter so lights sit flush with your deck surface.
Secure surface-mounted lights with manufacturer-recommended screws and brackets rated for outdoor exposure. Post lights require vertical wire pockets created by drilling aligned 1″ holes inside posts; never use horizontal pockets, which risk wire damage.
Consider your deck fixture types and lighting fixture aesthetics when positioning lights. Space them consistently to eliminate dark spots, especially on stairs and pathways. Mount post lights approximately 12″ above the deck surface for best effect. Test all connections with a multimeter before finalizing installations to confirm circuit integrity.

【Important – Designed ONLY for 4x4 & 3.5x3.5 Posts】Kolpop solar post cap light is made to fit 4x4 inch and 3.5x3.5 inch wood or vinyl post caps.❌ DOES NOT fit any other sizes – including posts smaller than 3.5" or larger than 4.0"📏 Quick check: If your post is not exactly 3.5" or 4.0", this solar post light will NOT fit – verify your post dimensions before purchase

QUALITY OUTDOOR POST LIGHT - This Outdoor post lights crafted of durable aluminum metal and water ripple glass, require little to no maintenance. Rust-proof, IP65, shock-resistant and thermally stable, don't worry about any bad weather.

【Product size】The most important point: solar post cap light is a small-sized light - please check the size of your posts first. If you are unsure of any doubts about the size, you can first confirm with our after-sales team. We are very happy to answer your questions! The height of the 4x4 solar post cap light is 2inch/5cm. the length of 4x4 solar fence post cap light is 4.3in/11cm, the width of 4x4 solar deck post cap light is 4.3in/11cm
Protecting Your Wiring and Making Reliable Connections
Once you’ve positioned and secured your fixtures, protecting the wiring that connects them becomes your next priority. You’ll want to implement effective wire concealment techniques by routing cables through deck rails, posts, or flexible conduits to shield them from weather and foot traffic.
For corrosion prevention methods, use waterproof wire connectors like silicone-filled wire nuts or heat-shrink tubing at all connection points. Twist wires securely before applying connectors, ensuring positive matches positive and negative matches negative. Close off unused female connections with manufacturer-provided caps. Proper wire spacing of 24″-30″ between perimeter lights allows joining cables to run under joists without pinching or damage.
When burying wires, use direct burial cable rated for underground conditions at depths of 6 to 12 inches. Secure all exposed wiring with UV-resistant cable clips and ties along framing. Call 811 before digging to locate existing utilities and prevent damage.
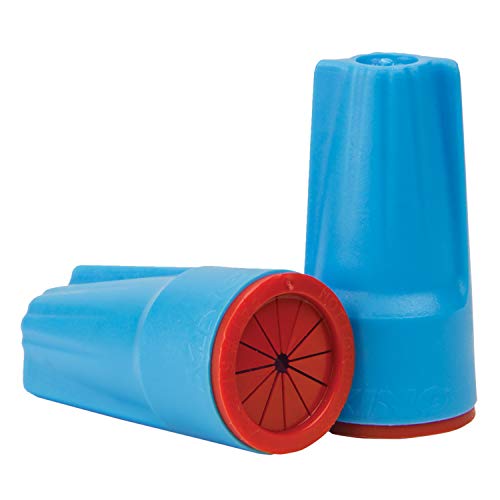
For connections exposed to condensation, water, vapors or dust

UL listed waterproof wire connectors nuts: All Dicio landscape wire connectors have received UL and CE certifications. You can find the certification logo on every Dicio wiring connectors. Dicio weatherproof wire connectors are filled with silicone sealant, which is designed for the waterproof feature.

Rich in quantity: you will receive 40 pieces of landscape connectors, 40 pieces for medium sized connectors, and they are compatible with 12AWG, 14AWG, 16AWG, 18AWG, 20AWG and 22AWG, meeting your different demands for building or daily installations