
How to Install Deck Lighting: A Step-by-Step Guide
You’ll start by evaluating your deck’s structure and identifying functional zones for ideal lighting placement. Next, calculate your power requirements and select an appropriately rated transformer—typically 20-25% higher than your total wattage. Then you’ll prepare posts by drilling access holes, install fixtures securely, and run low-voltage wiring at least 6 inches deep using direct-burial cable. Finally, you’ll set up control systems, test all voltage connections with a digital voltmeter, and weatherproof every splice. The complete installation process involves several critical steps worth exploring further.
Planning Your Deck Lighting Layout
Before you’ll need to assess your deck’s physical characteristics and functional requirements. Start by examining your deck’s structure, dimensions, and materials—these factors determine mounting options and how fixtures interact with surfaces.
Next, identify functional zones: dining areas, lounging spaces, stairs, and walkways. This prioritization guides your lighting design decisions. Evaluate existing ambient light sources and shadows to prevent over or under-lighting problems.
Document surrounding landscape features like trees and water elements for potential accent lighting opportunities. Determine your primary deck functions—entertaining, dining, or relaxation—as this shapes your fixture styles and placement strategy.
Finally, locate power sources and plan cable routing to integrate lighting seamlessly. As part of this planning, identify where your AC power socket locations will support transformer placement for your low-voltage system. Measure and plan light placement to avoid deck joists during the routing process. This thorough assessment guarantees your lighting layout addresses both safety requirements and aesthetic goals effectively.
Assessing Power Requirements and Transformer Selection
Once you’ve mapped out your deck lighting layout, you’ll need to size your power system correctly to secure safe, reliable operation. Start by calculating your total power consumption: multiply each fixture’s wattage by its quantity, then add a 10% safety buffer. Next, determine your voltage requirements—most deck systems use 12V or 24V low-voltage LED lighting.
Calculate amperage by dividing total wattage by voltage. Select a transformer rated 20-25% higher than your calculated total to guarantee longevity and performance. For example, 40 watts of lighting requires a 50-60W transformer minimum.
Choose outdoor-rated transformers housed per electrical code. Verify your power supply matches the system’s total VA load, not just individual fixture ratings, to prevent overloading and fire hazards.

[Built-in Dusk to Dawn Sensor] Landscape lighting that is connected to this transformer will automatically switch on at dusk and off at dawn. By converting household voltage from 120V AC to 12V AC safety voltage using 120W, a safer and more useful electrical current level is produced. Tip: Do not use with a dimmer switch.

◆The Model of LED Driver:Input: 100-265V AC 47-63HZ. Output: 12V DC 10A 120W

High Stability & Reliable Power Conversion Our ac to dc converter (ac dc, ac to dc adapter) adopts integrated SMD components to deliver stable DC 12V power. As a 120 to 12 volt converter (120v to 12v converter, 120 volt to 12 volt converter), it has 96% AC conversion efficiency, suitable for 12V devices like car screens and cameras, reducing power loss and extending service life. Note: It’s mainly ac to dc converter; for dc to ac converter, refer to our dedicated series.
Preparing Your Deck Posts for Light Installation
Proper post preparation guarantees your lighting fixtures mount securely and your wiring remains protected throughout the installation. You’ll start by determining the desired post height—typically 12 inches above the deck surface—and marking the center of each post for consistent fixture placement. Next, sketch a wiring route diagram to plan wire paths from your transformer to each post, accounting for railing brackets or sleeves that may affect wire access.
Before final assembly, drill a 1/4-inch hole through the post at your marked fixture height. For larger fixtures or multiple wires, use a 1/2-inch machine bit instead. Create vertical wire pockets using a Forstner bit to accommodate excess wire safely. To prevent corrosion and extend the lifespan of your wiring connections, consider thoroughly drying all components before assembly, similar to best practices used when maintaining outdoor installations. For added durability, you can employ adhesive cable runners to protect wires from abrasion while maintaining an organized appearance. Always avoid drilling into joists or structural supports, and make certain all connections remain accessible before completing your post preparation.
Installing Post-Mounted Light Fixtures
With your deck posts properly prepared, you’re ready to install the light fixtures themselves. Begin by removing the fixture faceplate or mounting bracket screws for easier handling. Position your light fixture with correct light fixture orientation—top facing upward—and align the screw holes with your marked points on the post. Use your installation tools, typically a screwdriver, to secure the fixture with the provided screws, usually two per fixture for stability. Once mounted, reattach any railing brackets or post caps you removed earlier, using original screws. Insert LED or halogen lamps into the fixture cavity. Finally, reinstall the faceplate or light cover, ensuring all components fit flush against the post surface for a professional, weatherproof installation.

LIGHT SOURCE: The outdoor post light supports all E26, 60w Max. ESL/ LED/ Incandescent bulbs (NOT INCLUDED). It is ETL rated for Wet Location

Dusk to Dawn Sensor: with a built-in photocell sensor, this post lantern features dusk-to-dawn setting that allows it to auto turns on at night and auto-off in the daytime. Free your hands and save your money on electric bills.

3 Lighting Modes Fence Solar Lights: Our solar lights for fence offer 3 lighting modes: warm white/ Neutral White/ Cool White mode. suitable for daily lighting, illuminating your fence or courtyard. If you're looking for an environmentally friendly and economical way to light up your yard, this solar-powered option is sure to impress you
Adding Recessed Deck Lights to Your Surface
After securing your post-mounted fixtures, you’ll shift focus to recessed deck lights that’ll sit flush with your deck surface for a seamless look. When planning recessed lighting placement, space fixtures 12-18 inches apart and avoid joists for easier installation. Select light fixture options suitable for your deck material, considering expansion and contraction of composite decking.
Drill 1-inch diameter holes approximately ¾ inch deep, ensuring perpendicular angles to prevent misshapen openings. Clear debris thoroughly before inserting fixtures. Press each fixture flush with the surface and secure according to manufacturer specifications—typically with clips or adhesive.
Thread wires underneath and connect them to the transformer system. Verify all connections are secure before testing. Seal exposed connections with silicone caulk for weather resistance and durability.

【Plug & Play Deck Lights Kit】Complete kit includes 16 deck stair lights and DC12V power supply. Simply drill, drop, connect, and plug in—four steps, 20 minutes, no electrician needed. Install on deck stairs, floors, eaves, or garden paths with zero extra wiring.

【Upgraded RGBW+IC Smart Deck Lights】 An advanced version of RGB and RGBW — each deck light has a built-in smart IC chip, so every light can show a different color at the same time, like a mini light show across your deck. Enjoy 16 million colors, a separate 3000K warm white channel for daily lighting, 0–100% dimming, and dynamic chasing effects. One kit covers both everyday illumination and festival decoration.
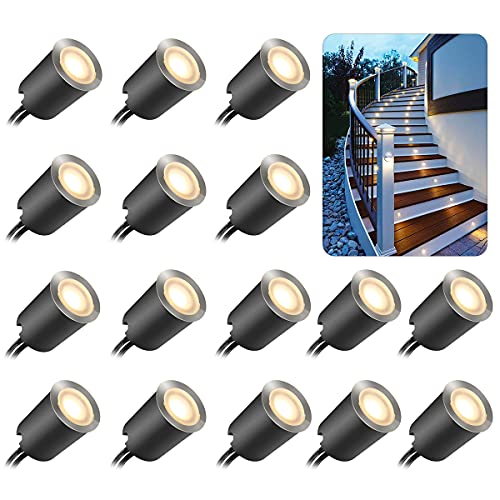
【High Bright &More Safe】Bright warm white LED deck lighting bring impressive starry effect, making you feel sweet and comfortable in your house. Add the black protecting shell for embedded installed on floor/stone stairs will be safer for led deck lights kit.
Running Electrical Wiring Safely Beneath Your Deck
Once you’ve finished installing your recessed and post-mounted fixtures, you’ll need to safely route the electrical wiring beneath your deck to complete the system. For low-voltage wiring carrying no more than 30 volts, you’ll bury cables at least 6 inches deep using only direct-burial rated cable like UF. All other circuits require 24-inch wiring depth. Never mix low-voltage and standard circuits in the same conduit; instead, place each in separate conduit within the same trench. When wiring emerges above ground, conduit protection must extend from the required cover depth or 18 inches—whichever is less—to at least 8 feet above grade. Use smooth granular backfill free of rocks and sharp materials. Always protect splices with waterproof junction boxes to prevent moisture damage and corrosion.
Connecting Lights in Series and Parallel Configurations
Now that you’ve routed and protected your wiring, you’ll need to decide how to connect your lights—and this choice fundamentally affects your deck’s performance and reliability.
Series configurations stack voltage across each LED, requiring current to flow through every light sequentially. If one LED fails, your entire circuit stops. While this reduces amperage draw, it’s unsuitable for deck installations.
Parallel configurations deliver independent voltage to each light, ensuring consistent brightness throughout your installation. If one light fails, others continue operating normally—critical for deck safety and functionality. Voltage remains stable across longer runs, eliminating drop issues.
For complex deck layouts, hybrid series-parallel approaches work best. You’ll create multiple series-connected LED sections wired in parallel, allowing each section to function independently while distributing current evenly across your lighting system.
Installing Lights on Stairs and Steps
Stair and step lighting requires meticulous planning to balance safety, aesthetics, and structural integrity. You’ll want to measure and mark precise installation points, avoiding joists and structural components that could compromise mounting security.
For ideal stair safety and light placement, position fixtures near the bottom and top steps, then space additional lights every 2–3 treads. This guarantees even illumination throughout the stairway. Step lights typically require between 10 to 100 lumens to provide appropriate visibility without excessive brightness.
You should use low-voltage LED options for energy efficiency and weather resistance. Drill pilot holes carefully using specialty bits included in quality kits, then secure fixtures with silicone caulk and waterproof connectors. Test each light before finalizing installation, making sure all connections are weatherproofed and compliant with local building codes. Keep the sprayer moving during installation work in manageable sections to avoid creating heavy spots or uneven coverage on exposed surfaces. This approach assures both functionality and safety.

【30 Degree Tilt on LED Board】The 1 Inch Recessed Step Light is a clean, modern lighting solution for stair and deck lighting applications, with no unwanted glare. A 30° tilt to the internal LED board creates a natural downward beam that eliminates the need for a visor and allows for a sleek, flat design.

Safe 12v low voltage outdoor step lighting – Designed for safe 12V-24V systems, these 5W low voltage landscape lights emit a 2700K warm white glow, ensuring clear nighttime visibility for family safety. An energy-efficient exterior lighting solution for illuminating dark paths, garden steps, and yard perimeters.

𝙎𝙩𝙚𝙖𝙙𝙮 𝙒𝙞𝙧𝙚𝙙 𝙇𝙤𝙬 𝙑𝙤𝙡𝙩𝙖𝙜𝙚 - Designed for 8-12V AC/DC power, each 5W step light works with a compatible transformer for reliable outdoor lighting. Proper wire length helps reduce voltage drop.
Setting Up Control Systems and Timers
With your stair lighting secured and tested, you’ll now establish the control systems that automate and manage your deck’s illumination. Begin by selecting transformers rated to handle your total fixture wattage without overloading. Position control device placement strategically within 30 feet of your power supply, preferably in dry, weather-protected locations. Mount timers vertically with receptacles facing downward, at least one foot above ground. Verify automation compatibility between your transformer, timer, and any dimmers you’re installing. Use exterior-grade, UV-protected 12-gauge wiring to connect components in daisy-chain circuits. Install weatherproof connectors for moisture resistance and leave service loops for maintenance access. Test all devices individually and collectively before finalizing installation, confirming proper polarity and functionality throughout your system.

VERSATILE & CUSTOMIZABLE: Easily set up to 8 on/off programs for the timer's two grounded outlets. Outlets are controlled simultaneously, and settings can be as short as one minute

Low-Voltage Transformer with Photocell Sensor: ETL-certified 300W low-voltage transformer safely converts 120V AC to 12/14V AC, ensuring stable power for outdoor LED and halogen lights, including path, spot, deck, and string lights, enhancing outdoor night-time charm
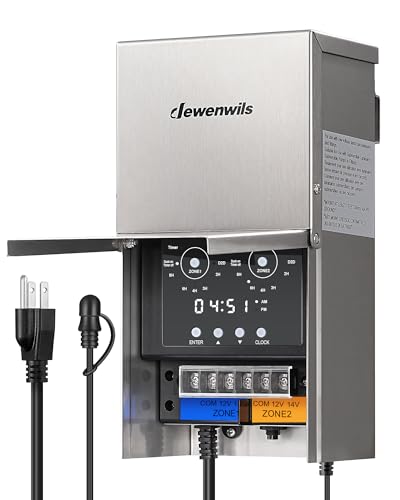
[5 Lighting Modes] This low voltage landscape light transformer offers five customizable modes—Manual ON/OFF, Dusk-to-Dawn, Dusk-to-Countdown (2/3/4/6/8 hours), Dusk-to-Timer OFF, and Timer ON/OFF; simply press a button to select the ideal setting for your outdoor pool lighting needs
Testing and Weatherproofing Your Complete System
Your deck lighting system’s success depends on three critical phases: testing voltage and connections, identifying fixture issues, and weatherproofing against moisture infiltration. Begin voltage testing using a digital voltmeter set to AC and 20V, checking transformer output (11-15V), wire hubs, and each fixture. Readings below 9V indicate wiring or load problems. During fixture inspection, swap suspect bulbs with known working ones and examine housings for physical damage. Test voltage at each fixture; if present but lights don’t activate, replace the fixture or bulb. Seal all wire hubs and splices with waterproof connectors or silicone tape. Confirm fixture gaskets remain intact and position connections above ground. For additional protection against water damage, consider burying wiring at proper depth to prevent moisture infiltration in high-moisture areas. Inspect wiring for cuts or corrosion, then verify grounding integrity before system activation.


