How to Install Roof Deck Railings Without Roof Penetration
You’ll install non-penetrating roof railings by using weighted base systems filled with ballast instead of roof fasteners. Position base plates perpendicular to guardrail runs, spacing them every 20 feet and maintaining 18 inches from edges. Secure them with drop-lock pins or set screws. This approach preserves your roof warranty, eliminates leak risks, and provides OSHA-compliant fall protection. The specifics of positioning, assembly, and long-term maintenance reveal why this method outperforms traditional penetrating installations.
Understanding Non-Penetrating Railing Systems
When you need fall protection on a flat or low-slope commercial roof, non-penetrating railing systems offer a practical solution that doesn’t compromise your roof’s integrity. Unlike traditional anchored systems, these railings use weighted bases filled with ballast instead of drilling through your membrane. From a benefits overview perspective, you’ll preserve your roof warranty, eliminate leak risks, and avoid long-term maintenance headaches. When comparing system options, non-penetrating designs excel for temporary installations and frequently reconfigured work zones. The modular components allow quick assembly without specialized tools or custom engineering. Protective pads safeguard your roof surface while the weighted bases provide stability across various layouts. You can easily relocate or expand the safety perimeter as your needs evolve, making these systems ideal for dynamic rooftop environments.

Ideal for flat-roof mounting TV Antenna or Dish on flat surfaces
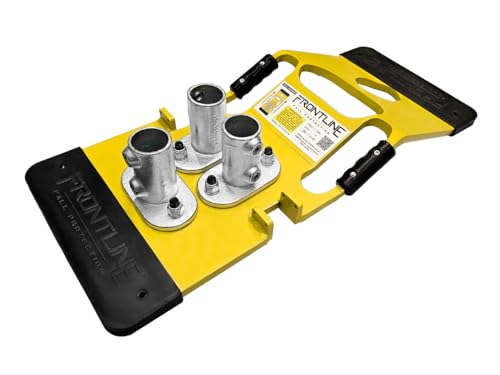
Eliminates fall hazard with our pre-engineering fall prevention system
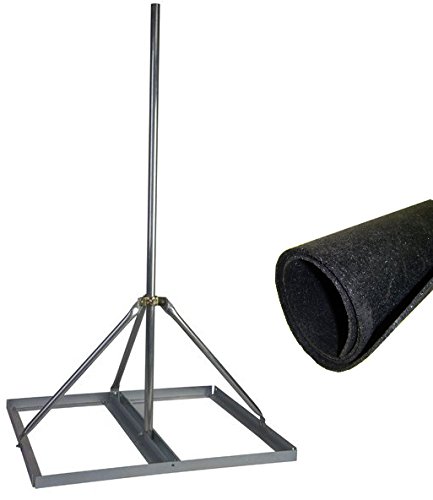
Non-penetrating roof mount for satellite dishes, internet antennas, weather stations, and more.
Key Components and Materials
Five essential structural elements form the foundation of any roof deck railing system: vertical posts, top and bottom rails, infill materials, brackets, and hardware fasteners.
You’ll choose railing materials based on your environment and maintenance preferences. Stainless steel resists corrosion in harsh weather, while aluminum offers lightweight installation with powder-coating protection. Composite materials combine durability with minimal upkeep, and vinyl delivers low-maintenance performance across varied climates.
Your infill options determine the system’s aesthetic and functionality. Cable infills create modern, view-enhancing designs using stainless steel construction. Glass panels mount between rails for minimalistic appearance. Vertical balusters provide traditional styling, while rod railing resists sagging without degradation. Selecting materials with weather-resistant properties ensures your railing system maintains its integrity and appearance throughout years of exposure to the elements.
Quality hardware—cable tensioners, stabilizers, and fasteners—ensures secure assembly and code compliance throughout your installation. For roof deck surfaces, applying clear sealers to wood railings protects against moisture and UV damage while maintaining the natural appearance of the materials.
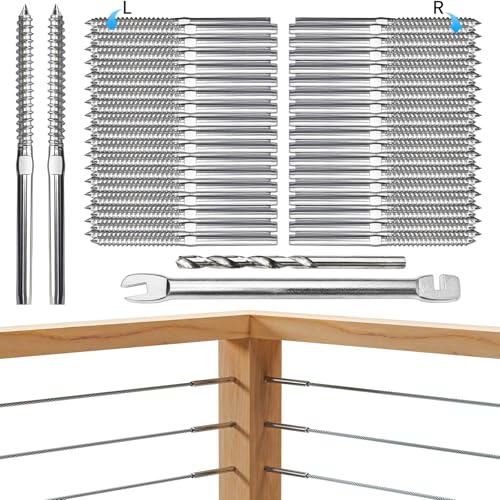
Versatile Cable Tensioning: This deck railing hardware kit is specifically designed for 1/8 inch diameter cable railing systems, these Swage Lag Screws are the ultimate solution for effortlessly adjusting cable tension. The left and right thread ensure that cables rotate in the same direction, preventing any twisting or damage, providing a smooth and secure cable railing installation.
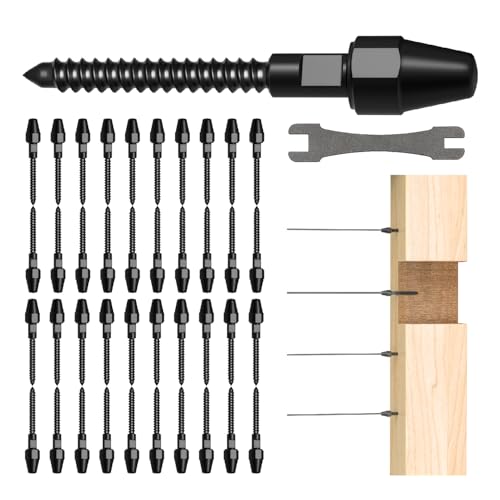
【QuickLock Swageless Technology】: The RiaYer Black Cable Railing Kit employs revolutionary swageless technology for a fast and secure cable attachment; allows for the cable to be firmly installed by mechanical compression with a wrench; suitable for 1/8" wire rope for deck cable railing kit systems, straight railings, level horizontal railings, and indoor/outdoor applications.

Safety & High Impact Resistance – Prioritize the safety of your family and guests. This deck railing kit is designed to comply with strict IBC/IRC/ASTM building codes. The sturdy 10mm solid balusters and reinforced aluminum posts provide exceptional load-bearing capacity (withstands up to 500 lbs impact), preventing dangerous accidents. Ideal for high-traffic areas, preventing children and elderly from falling off stairs or decks.
Pre-Installation Planning and Safety Assessment
Before you install roof deck railings, you’ll need to conduct a thorough safety assessment that identifies hazards, verifies regulatory compliance, and establishes a clear installation plan. Start by measuring your roof perimeter and documenting all potential fall zones, including edges, skylights, hatches, and equipment areas. Review OSHA standards requiring 42-inch guardrails with top rails withstanding 200 pounds of force and midrails withstanding 150 pounds. Check local building codes for additional requirements. In New Hampshire, deck guardrails are required for elevated structures, and your roof system must comply with similar height and spacing standards as ground-level installations. Create a hazard assessment checklist with photos and measurements of high-risk areas. Validate that your non-penetrating railing system meets all load requirements and that posts are securely fastened with proper concrete footings to provide stability and support. Prepare compliance documentation detailing your findings and planned system configuration. This groundwork guarantees your installation meets safety standards and protects workers effectively.
Preparing Your Roof Surface
A solid, damage-free roof deck is the foundation for a stable railing installation, and you’ll need to inspect, clean, and repair your surface systematically before mounting any components.
Begin with a thorough surface inspection to identify cracks, holes, rust, or loose fasteners. Next, perform extensive debris removal using a broom and pressure washer set to 2,000 PSI, avoiding weak areas. Allow the surface to dry completely.
Address any damage by cutting out deteriorated materials and fastening loose sections securely. Replace raised fasteners to guarantee a flush, level surface. For ballast roofs, shift rocks to accommodate base plates without membrane damage. Just as flashing prevents water damage on deck ledger boards, ensuring your roof surface is moisture-free protects the structural integrity of your railing system’s foundation.
Finally, re-inspect your entire deck, confirming it’s moisture-free, stable, and compatible with your non-penetrating railing system’s base design before proceeding with installation.

Professional concentrate cleans decks, siding, driveways, and patios - perfect for homeowners preparing for BBQs, real estate agents staging homes, or contractors finishing jobs.

120 INCH, LATEST 30°, 90° CURVED ROD DESIGN: Available in 2 different ways to spread water, the curved rod is more convenient to be used the out-of-reach areas.

Achieve Professional-Level Cleaning Results with This 16.5” Surface Cleaner, with Up To 4400 PSI of Pressure for Easy Cleaning of Flat Surfaces Like Decks, Patios, Driveways, Walls and More
Positioning and Securing Weighted Base Plates
Now that your roof deck is prepared, you’ll position and secure the weighted base plates—the critical anchoring points that’ll keep your entire railing system stable and compliant with safety standards. Start by establishing correct base plate orientation: position each plate with its long side perpendicular to the guardrail run for ideal load distribution. Space base plates every 20 feet along the rail, adjusting closer intervals for higher wind loads or longer sections. Set them at least 18 inches from unprotected leading edges, then verify full contact with the roof surface. Secure each plate using the manufacturer’s specified method—typically drop-lock pins or set screws tightened to precise torque values. Check all connections after installation to guarantee lasting stability and compliance.

"Base Weights - Rubber weights are made to fit perfectly over base plates for added weight and stability "

Solid Steel - The post bracket of this column is made from solid steel. Black premium powder coating. Absolutely rustproof.

Package: M8 Ceiling Wall Mount Hook Anchor, 2pcs M8 Rhombic U-shaped Ceiling Hook and Base Plate (Include mounting screws) + 2pcs M8 Spring Snap Hook
Assembling and Installing Railing Sections
With your weighted base plates secured and verified, you’re ready to install the mounting brackets that’ll anchor your railing sections. Use template guides to position pre-drilled pilot holes according to manufacturer specifications, then secure brackets with rust-resistant screws. Next, lower your pre-assembled rail sections over the bracket bases, ensuring angle brackets fully engage with connectors. Perform rail alignment by checking that horizontal cables remain parallel to the deck surface and sections are plumb both vertically and end-to-end. Snap anchor pins into place, then lock the assembly with rust-resistant screws using the appropriate socket or Allen wrench. Tighten fasteners sequentially to distribute pressure evenly, avoiding over-tightening that could damage composite materials or strip threads. All fasteners should be exterior-grade and corrosion-resistant to withstand outdoor conditions. Since your deck railings are exposed to environmental elements, regularly inspect fasteners and connections for rust or corrosion, as UV exposure and moisture can compromise the integrity of your installation over time.

All-in-One Outdoor Solution: 110-piece assorted wood deck screws + included T25 star bit—no extra tool purchases needed, ready to use right out of the box for decking, landscaping, and log projects.
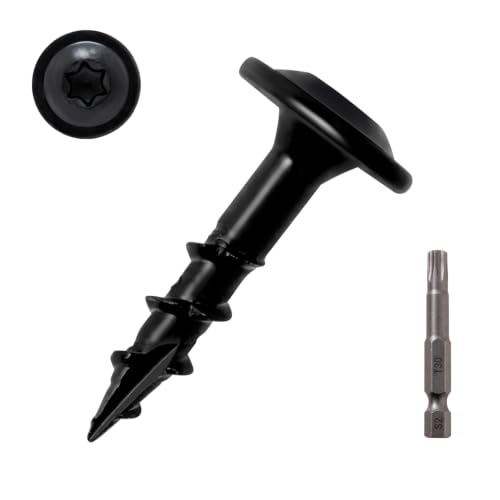
DIMENSIONS & SUPERIOR STRENGTH: Thread Diameter 0.25" - Head Diameter 0.55" - Length 1" - Use with T30 Star Bit. Crafted from heat treated steel, LIONMAX heavy duty lag screws offer unmatched strength and reliability for long-lasting woodworking projects
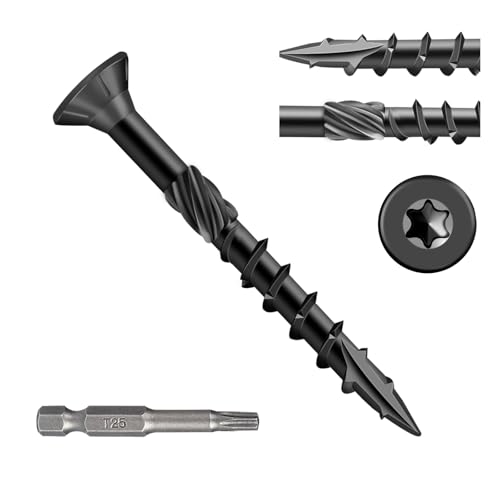
Excellent Anti-Rust Coating: Fmjdnls black epoxy anti-rust coating wood screws, Through up to 1500 hours of salt spray test can prevent rust and corrosion
Adjusting for Roof Features and Layout
Once your railing sections are secured and verified plumb, you’ll need to adapt your installation strategy to the specific roof’s geometry and features. Your railing customization options include adjustable base adapters and modular sections that bend around corners and irregular perimeters. Implement layout adaptation strategies by positioning non-penetrating bases around access hatches, stairways, and mechanical units without compromising coverage or functionality. Use adjustable height and lateral positioning pins to align railings on uneven surfaces. For complex roofs, deploy multi-level configurations with varied post heights to maintain OSHA-compliant guardrail standards across elevation changes. Flexible stanchion designs accommodate roof contours seamlessly. Shift ballast beneath protective pads where necessary, distributing loads evenly across varying substrates while preserving membrane integrity. Ensure all posts are securely installed at key structural points to prevent movement and maintain safety compliance.
Maintenance and Long-Term Performance
Your roof deck railings won’t maintain their safety and appearance without consistent upkeep. Establish maintenance practices by cleaning railings every 3-6 months and inspecting them twice yearly, focusing on joints, fasteners, and structural integrity. Look for rust, corrosion, loose bolts, and wood rot. Address wobbling immediately to prevent safety hazards.
For longevity considerations, apply water-repellent sealants to wood railings every 2-3 years and use rust-resistant coatings on metal components. Guarantee proper drainage around railing bases to prevent water accumulation that accelerates decay. Trim nearby vegetation to reduce moisture retention. Replace damaged balusters promptly and tighten all fasteners during inspections. Maintain cable tension regularly. Proper joist spacing and blocking installation during initial construction provides the foundational structural support necessary for railings to withstand repeated stress and environmental exposure over time. These proactive maintenance practices preserve structural integrity and compliance with safety standards.