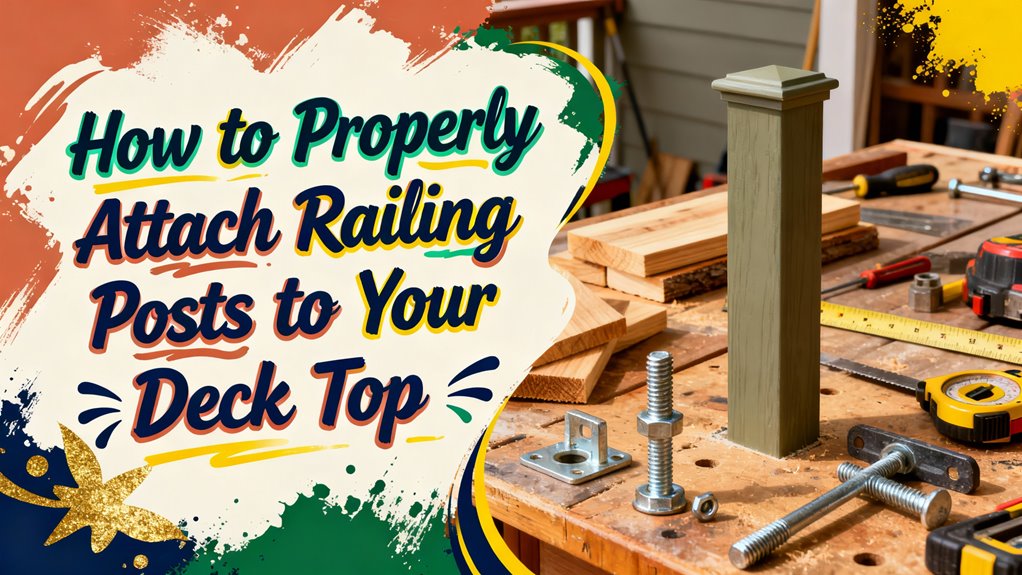
How to Properly Attach Railing Posts to Your Deck Top
You’ll secure your railing posts to deck framing using properly sized blocking between joists, corrosion-resistant bolts, and precise drilling techniques. Install blocking at 4-6 foot intervals, then pre-drill holes using appropriate bit sizes to avoid splitting. Insert hot-dipped galvanized or stainless steel bolts through blocking and posts, securing them with washers and lock nuts. Stagger fasteners in a zigzag pattern, maintaining 2″ spacing from edges. Verify posts are plumb before final tightening. Understanding local building codes—including height and baluster spacing requirements—ensures your installation meets compliance standards and passes inspection.
Understanding Local Building Code Requirements
Why does your railing need to meet specific height and strength standards? You’re required to comply with local code because these regulations protect you and your property’s value. Most jurisdictions adopt the IRC standard of 36-inch railing height for residential decks, but your local code may demand more. California and Washington, for example, require 42 inches. Before you attach any posts, consult your local building department to confirm applicable requirements in your area. You’ll likely need a permit for decks over 30 inches above grade. Check the ICC resource page to identify which IRC version your state’s adopted. In New Jersey specifically, balusters must be spaced no more than 8 inches apart to prevent safety hazards. Georgia code requires that baluster spacing prevent a 4-inch sphere from passing through to ensure child safety. Don’t skip this step—non-compliance risks fines, required modifications, and inspection failures that delay your project.
Assessing Your Deck Structure and Layout
Before you attach railing posts, you’ll need to thoroughly assess your existing deck structure and layout to guarantee they can safely support the additional loads and lateral forces that railings introduce. Verify your post location aligns with beam intersections per your framing plan, ensuring effective load transfer. Check that joist spacing and dimensions match your original design specifications. Common residential decks typically use 2-by-6, 2-by-8, or 2-by-10 joists spaced at 16 inches on center, so confirm your framing meets these standards. Inspect all framing—joists, rim joists, and ledger boards—for sagging, warping, rot, or insect damage that compromises support stability. Examine concrete footings for cracking or shifting. Confirm support posts meet minimum 6×6 nominal sizing and comply with local span requirements. Railing posts must be securely anchored to deck framing using appropriate hardware like through-bolts or hold-down anchors to ensure the entire assembly can support significant weight and lateral stress. Finally, verify all fasteners are corrosion-resistant and secure. These assessments establish whether your deck can reliably accommodate railing post installation.
Installing Blocking Between Joists
Installing blocking between joists is crucial to your deck’s structural integrity and code compliance. You’ll use blocking materials matching your joists’ dimensions—typically 2×8 or 2×10 pressure-treated lumber—cut to fit snugly between them.
Position blocking at code-required intervals, not exceeding 8 feet, though 4-6 foot spacing maximizes stiffness. Stagger blocks across joist lines to increase lateral stability and simplify fastening. Proper blocking ensures your railing posts can withstand lateral force as required by building codes.
For blocking techniques, measure exact distances between joist faces and cut blocks accordingly. Secure each block flush with joist tops using at least two fasteners per end—structural screws or nails work well. Clamp blocks temporarily for precise positioning before final fastening.
Verify alignment with a level and square throughout installation. The specific blocking size needed is influenced by the species of wood and local building codes in your area. This preparation guarantees your railing posts will sit on a solid, stable foundation.

Enhanced joining: the unfinished wood texture, ideal for wood dowels and model making supplies, allows strong connection with other wood block supports or embedded dowel rods wood sticks,wood block,woodworking hardwood planks


Reliable DIY material: easily drilled, or joined, this woodworking board is perfect for small wood planks for crafts, birdhouse stands, handcrafts wood board, or garden model making,ground rated treated wood,woodworking crafting lumber board
Drilling Holes for Hardware Installation
Accurate hole drilling is essential before you install any hardware on your deck’s railing posts. Your drill bit selection directly impacts the quality of your installation. Use 5/32″ metal bits for bracket-to-post attachment, 1/8″ bits for rail screws, and 3/8″ bits for fascia board holes. Pre-drill all fastener holes to prevent wood splitting and misalignment.
Maintain hole alignment by using brackets as templates to guide your drill bit consistently. Position your post against the bracket and match pre-drilled holes exactly. Mark all four corners of the structural mount base plate before drilling commences. Stagger screws up and down through post blocking to prevent fasteners from colliding. Install minimum two attachment points at each rail bracket location using separate pre-drilled holes for structural integrity. Working in manageable sections allows you to maintain precision and avoid fatigue during the drilling process. Ensure your railing posts are securely anchored using approved hardware such as post anchors or saddles to transfer loads properly and prevent wobbling or structural failure.

JOBBER LENGTH: 5/32-Inch cutting diameter, 2-Inch flute length, 3-1/8-Inch overall length, 135 degree split point, straight shank

[5/32 Inch 20PCS] A pack containing 20 pieces 5/32"(Dia 3.969mm) cobalt metal drill bits comes in plastic storage case for easy storage.

13 PACK OF 5/32" COBALT DRILL BITS - 5/32" Diameter with a Flute Length of 1-11/16" and Total length of 3"
Securing Bolts and Hardware
With your post holes drilled and aligned, you’re ready to install the bolts and hardware that’ll lock your railing posts in place permanently. Select hot-dipped galvanized or stainless steel bolt types—1/2″ diameter by 8″ length works best for structural strength. Insert bolts fully through blocking, posts, and joists before securing. Layer washer options strategically: place flat washers and lock washers on both sides of each bolt to distribute pressure evenly and prevent loosening. Tighten lock nuts gradually and evenly using a 3/4″ socket, maintaining post levelness throughout. Avoid over-tightening, which damages wood fibers. After initial settling, reinspect bolts for movement and retighten as needed. For maximum safety, ensure your fasteners are tied back into the joist framing to withstand the required 200-pound load at the top of the handrail. Consider thread-locking compounds for additional vibration resistance in high-movement areas.
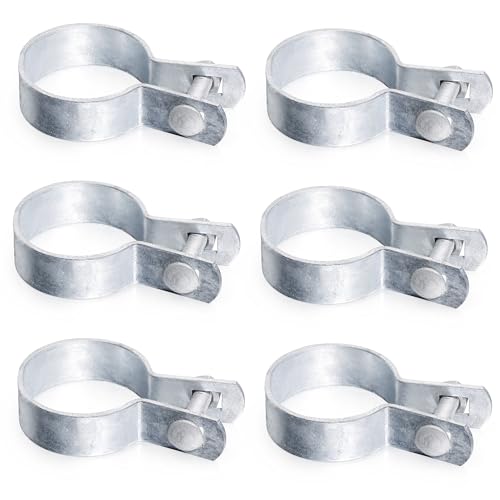
【Product Size】Chain Link Fence Brace Band for 1-7/8" Outside Diameter Pipe or Posts. Please measure the OUTER DIAMETER of your pipe before purchasing to ensure a proper fit

1/2"x5" CONCRETE WEDGE ANCHORS: The package includes 10 complete wedge anchor assemblies, each measuring 1/2" inch in diameter and 5" inches in total length. Each concrete anchor comes with a preassembled nut and washer for convenient installation.

Materials: Double end screws are constructed with carbon steel and treated with galvanization, and they also feature high hardness and a smooth, burr-free surface. The color-coated galvanized finish provides outstanding corrosion resistance and rust prevention, ensuring a long service life.
Checking Post Plumb and Vertical Alignment
After you’ve secured your bolts and tightened your hardware, you’ll need to validate that each railing post stands perfectly vertical before you proceed with rail installation. Use a post level or laser level to check plumbness in both directions—front-to-back and side-to-side. Common alignment issues stem from deck surface irregularities, rim joist misalignment, or post flexing during installation.
Employ post leveling techniques like adjustable leveling plates or shims to correct minor deviations. Recheck plumb after tightening all fasteners, as connections can shift alignment. Use a straight edge across multiple posts to confirm they’re parallel and evenly spaced. Document your verification for code compliance. This critical step guarantees structural integrity, prevents stress on connections, and maintains consistent rail heights throughout your railing system.
Installing and Staggering Fasteners
Once you’ve verified that your posts are perfectly plumb, you’ll need to install fasteners that’ll securely anchor the posts to the rim joist and blocking while preventing wood splitting and failure. Use hot-dipped galvanized or stainless steel fastener materials for corrosion resistance. Select 1/2″ diameter thru-bolts with 5/8″ pre-drilled holes, ensuring full penetration through all components.
Stagger fasteners vertically in a zigzag pattern—position the top fastener 2″ down from the blocking’s top and the bottom fastener 2″ up from its bottom. Maintain at least 2″ spacing between adjacent fasteners. Offset fasteners horizontally from centerlines to maximize thread engagement and optimize load distribution across the connection, reducing pull-out risk and wood failure. For optimal durability, ensure fasteners are made from corrosion-resistant materials similar to those recommended for outdoor furniture exposure. Proper fastener placement ensures your railing can resist concentrated force as required by Massachusetts deck codes to maintain structural safety.

No Pre-Drilling Required: Installs quickly with an 18 volt cordless drill without special drill bits or wrenches required.

Heavy-Duty Galvanized Steel — Built for Secure Level Connections: Made from strong galvanized steel with a protective black coating, these level railing brackets provide dependable support at key connection points while helping resist rust and corrosion outdoors. The durable finish stands up to rain, humidity, and seasonal weather and coordinates cleanly with Guwezoy railing panels, posts, gates, and accessories for a consistent, finished look.

No Pre-Drilling Required: Installs quickly with an 18 volt cordless drill without special drill bits or wrenches required.
Trimming and Finishing Post Sleeves
Post sleeve stock typically arrives in lengths that exceed your deck’s specific requirements, so you’ll need to trim each sleeve to match your post height precisely. Use a fine-tooth or miter saw for clean, straight cuts, and measure twice before cutting to minimize waste.
Perform sleeve trimming before assembly for easier handling. You’ll remove approximately 8 to 14 inches from the sleeve end. When assembling four-piece sleeves, compress the interlocking teeth firmly for a snug fit around your post. Consider using specialized clamps to hold boards tight during assembly and ensure consistent alignment. Proper post installation at corners and stairways requires careful attention to plumb and level during this assembly phase.
For base finishing, wrap the four-piece trim ring around your post’s bottom, aligning it flush with the sleeve. Verify all interlocking connections are secure and level. This base finishing protects against moisture while creating a seamless, professional appearance that completes your railing installation.

Complete Post Trim Kit: includes 4 Post Caps and 4 Post Sleeve base skirts, providing everything needed to refresh and finish your square railing posts; The coordinated top and bottom design creates a clean, professional appearance without purchasing separate accessories

Comprehensive L Bracket Post Fastener Set: the set offers an inclusive solution to mounting tasks with the easy installation of posts or repair of old ones; It contains 4 maple wood post skirt trims, 4 L bracket post fasteners and 28 screws, presenting a comprehensive hardware solution for secure fitting of posts; Wooden skirt trims require you to purchase additional mounting glue kit not included

PERFECT FIT: Designed specifically for 4x4 vinyl, composite, and aluminum posts with a 4-inch interior opening and 5½-inch exterior dimensions
Completing Final Inspection and Adjustments
With your post sleeves trimmed and base finishing complete, you’re ready to verify that your entire railing installation meets code requirements and performs safely under load. Conduct your final inspection by testing guardrails with 180-pound pressure to confirm minimal movement and secure positioning. Verify that balusters maintain proper 4-inch spacing with no bottom openings. Check all fasteners for tightness, rust-free conditions, and proper washer placement on both sides of bolts and lag screws. Inspect posts for vertical plumb alignment and assess diagonal bracing compliance on elevated decks. Document any post adjustments needed for alignment or load-bearing capacity. Consider selecting weather-resistant materials such as aluminum or powder-coated steel for your railing components to ensure long-term resilience and minimal maintenance. Remember that your residential deck railing must meet the standard minimum height of 36 inches measured vertically from the decking to the top rail, though some states may have higher requirements. Record all findings in your inspection report, compile a punch list of deficiencies, and verify corrections before final permit sign-off.