5 Best Ways to Hang String Lights on Your Pergola
You can hang string lights on your pergola using five damage-free methods. Command hooks offer removable installation without nails or screws. Zip ties provide straightforward securing every 12–18 inches with easy seasonal adjustments. Guide wires distribute weight across longer spans, preventing sagging. Draping between vertical posts lets you experiment with various patterns like zig-zag or open-V designs. Integrating lights through climbing vines creates layered visual appeal while supporting plant growth. Each method accommodates different structural needs and aesthetic preferences for your outdoor space.
Using Outdoor Command Hooks
You’ll find that heavy-duty removable Command hooks designed for outdoor use offer a damage-free mounting solution that doesn’t require nails or screws. These Command hook benefits include weather resistance engineered for UV rays, moisture, and temperature fluctuations, plus powder-coated steel construction that prevents corrosion.
Installation tips guarantee maximum holding strength when you follow the process precisely. First, clean your pergola rafters thoroughly to remove dust and debris, similar to how you’d prepare outdoor wood furniture by sanding the surface before applying finishes. Space hooks several feet apart along the rafter lines for best light distribution. Apply the included double-sided adhesive tape directly to the hook base, then press firmly onto the prepared surface.
The temporary installation method lets you reposition lights seasonally or adjust your design without leaving permanent marks, making this approach ideal for rental properties or homeowners prioritizing reversibility. For long-term outdoor durability, consider that powder-coated aluminum and other corrosion-resistant materials used in outdoor fixtures can maintain their integrity through multiple seasons of exposure.

ONE LIGHT CLIP FOR EVERY TWO FEET OF LIGHTS: One package of the Command Clear Outdoor Light Clips includes 20 clear hooks and 24 small water-resistant Command Strips; use one light clip for every two feet of lights

INCLUDES - 40 Clear Command Outdoor Light Clips and 48 Small Command Water-Resistant Strips

INCLUDES – 2 hooks, 4 medium strips, 1 hook holds 3 lbs
Securing With Zip Ties
For a straightforward alternative to adhesive hooks, zip ties deliver quick, damage-free installation that doesn’t require drilling or permanent fasteners. You’ll appreciate the zip tie benefits: they maintain secure holds in windy conditions and work with various light configurations.
For installation tips, space zip ties every 12–18 inches along your pergola beams, wrapping them snugly around both the light string and frame without over-tightening. Start at your power source and work outward sequentially for organized wiring. Like cedar deck installations, pre-drilling can prevent splitting if you’re securing zip tie anchor points into wood.
Select outdoor-rated, UV-resistant zip ties matched to your pergola color for seamless aesthetics. Trim excess ends flush with the locking mechanism to prevent snagging. Keep spares available for adjustments. This method allows easy seasonal changes by simply cutting ties away—ideal for temporary or rotating light displays.

Made with UV resistant industrial strength 6/6 Nylon

Heavy Duty: Karoka black zip tie 12 inch is 0.19 inch(4.8mm), while industry standard is 0.14 inch(3.6mm), Stronger than other wire ties.

Heavy Duty Strength for Tough Jobs: Our 100-pack of 8-inch black zip ties is built to last with a 120-pound tensile strength, making them perfect for both indoor and outdoor projects. Whether you're securing cables, organizing tools, or handling industrial tasks, these durable ties won't break under pressure, ensuring reliable performance every time. Ideal for electricians, landscapers, and DIY enthusiasts.
Installing Guide Wires
When you’re working with longer spans or heavier string light configurations, guide wires—also called support or guy wires—become essential for distributing weight and preventing sagging. You’ll install screw hooks or eye hooks at predetermined locations spaced every one to three feet along your pergola beams and posts, using appropriate fasteners for your surface material.
Thread your guide wire through the hooks, then connect snap hooks at one end while looping the wire back through cable clips for tension adjustment. You’ll achieve taut wire that allows slight movement for wind flexibility without sagging.
Proper cable management prevents safety hazards by securing loose cables with clips or ties. Keep power cords elevated and protected from weather exposure, using waterproof conduit for connections. This guide wire installation method effectively supports heavy patio bulbs and maintains proper light alignment throughout your installation.
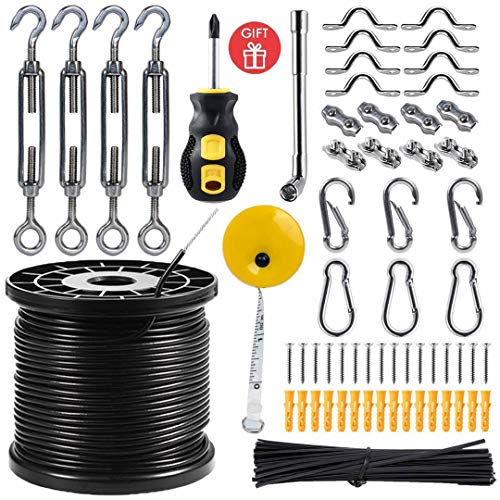
【MULTIPURPOSE USE】Our light hanging kit can be used in multiple ways such as hanging string lights for a romantic party, photos or any hanging needed. And you can design different lighting suspension types to enhance the visual effect according to the layout of your yard. Use your imagination and enjoy the fun of DIY.
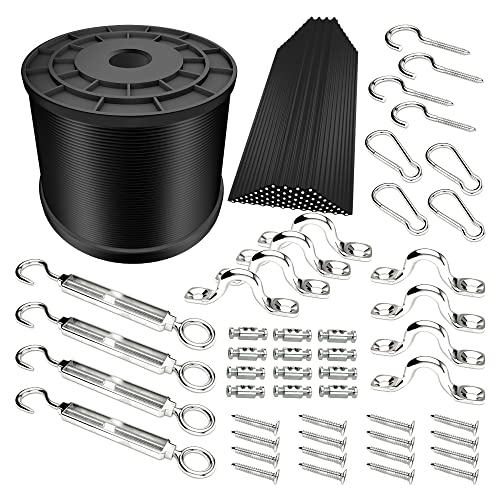
【HEAVY DUTY STAINLESS STEEL CABLE】 Crafted with premium 304 stainless steel cable (1/16" bare OD, 3/32" vinyl coated OD, 7x7 strand construction) offering 480 lbs breaking strength; features strong weather resistance, rustproofing, and waterproof insulation to reliably secure outdoor string lights through wind and storms.

[304 STAINLESS STEEL] The cable is made of black vinyl-coated 304 stainless steel. It is insulated, rust-resistant, waterproof, weatherproof, corrosion-resistant, and highly resilient, making it suitable for outdoor use and any harsh weather conditions, such as intense sunlight and heavy rain. Its 7 x 7 strand structure, with a bare diameter of 1/16 inch and coated diameter of 3/32 inch, boasts a breaking strength of 480 pounds, ensuring reliable support for string lights
Draping Between Vertical Posts
Once you’ve mastered guide wire installation, draping string lights between vertical posts offers a more flexible approach that doesn’t require extensive structural support. You’ll secure strands using heavy-duty outdoor hooks, UV-resistant zip ties, binder clips, or cable clips spaced 1 to 3 feet apart. Keep strands taut but avoid overstretching to reduce stress on wiring.
Experiment with various lighting patterns to achieve your desired effect. Horizontal stringing creates symmetrical illumination, while zig-zag patterns produce a “ceiling of stars” appearance. The open-V pattern cascades dramatically between posts, enhancing intimacy. Vary your hanging heights to create dreamy, scattered starry effects.
For best results, measure your pergola dimensions carefully and mark installation points precisely. Combine different anchor types for enhanced stability, especially in windy conditions with heavier strands. When no existing structures are available, consider using poles or planters to support additional anchor points and ensure your configuration remains secure.

Long Zip Ties 20 Inch Black - Extra Large Zip Ties Heavy Duty Outdoor, long cable ties 20 inch / 500mm with 12mm width, wider, thicker and more durable for use
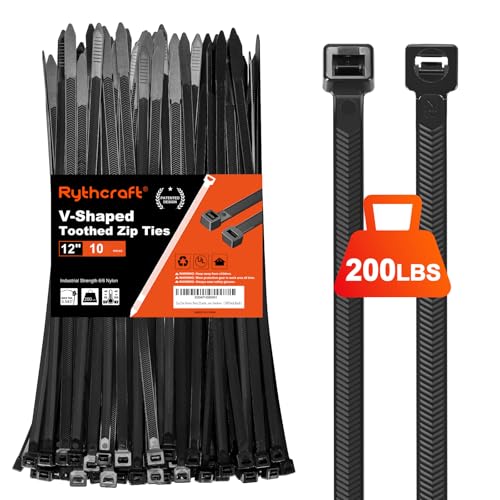
【200lb Tensile Strength】: The more width and Thickness, the more tensile strength. our zip ties 12 inch width is 0.3 inch(7.6mm), while industry standard is 0.19 inch(4.8mm), our zip ties 12 inch Thickness is 0.076" inch(1.95 mm), while industry standard is 0.055 inch(1.38mm),Our Double sided tooted heavy duty zip ties, provide 200 lbs tensile strength.

Great Value: Those zip ties are great value for price, can be used in light-weight applications with 40lbs tensile strength.
Integrating With Climbing Vines
String lights and climbing vines create a naturally layered lighting design that enhances your pergola’s visual depth and atmospheric appeal. You’ll weave lights directly through vine growth patterns, positioning them strategically to accommodate seasonal expansion without restricting plant development. Select warm light temperatures between 2700K–3000K to complement foliage while softening shadows across your garden landscape.
You should space lights carefully around climbing plants to maintain adequate airflow and prevent heat damage to tender shoots. Consider your vine’s mature size when planning light placement—this guarantees ambient lighting remains visible as vegetation fills in. Popular fast-growing vines like Clematis, Wisteria, and Virginia Creeper are excellent choices for pergola coverage and can support integrated lighting designs. Proper fastener spacing and alignment ensures your light installation remains secure as plants grow and shift throughout the seasons. You can interweave lights through hedges, archways, and trellises alongside climbing plants, creating a cohesive nighttime display that highlights both structural and natural elements while supporting healthy plant growth.

🌻 Convenient power supply: The curtain vine light body contains 10 strands of fake vines and 100 LED bulbs , with an actual coverage area of 9.8 ft x 3.2 ft; Equipped with a 6.5ft extension cable to expand the installation range, the USB interface (excluding adapter) can be connected to a laptop or portable power bank, making it portable and flexible to install in any position, easily injecting vitality into the bedroom.

Faux Ivy Garland: Liven up your space with our 12 strands of artificial ivy vines, each almost 7ft long with 80 leaves, totaling 84ft. For added pizazz, we've included a 396in string of warm white LED lights with 80 bulbs, perfect for creative DIY projects. The light strand is not fixed to the ivy vines, maximizing DIY flexibility for any creative settings.

Leave lights for decoration: Say goodbye to the hassle of separately buying vines and lights, as our leave lights comes with both. Whether adorning your fireplace, bedroom, classroom, table, or wall, these leave lights create a charming Christmas atmosphere that's perfect for relaxation or gatherings. The leave lights’ versatile design complements various decor styles, adding a touch of nature indoors