How to Refinish a Deck With Solid Stain: a Complete Guide
To refinish your deck with solid stain, you’ll start with a thorough inspection and structural assessment. Next, you’ll clean the surface with sodium percarbonate-based cleaner and sand with 80-100 grit sandpaper to remove old finish. Choose between oil-based or water-based stains, then apply with brushes, rollers, or sprayers while maintaining a wet edge. Allow proper drying time between coats and avoid rain for 24-48 hours. Reapply every 3-5 years and maintain regularly with furniture pads and debris removal. The specific techniques for each stage will greatly impact your results.
Deck Inspection and Problem Identification
Before you begin refinishing your deck with solid stain, you’ll need to conduct a thorough inspection to identify any structural or surface issues that could compromise the project’s success or your safety. Examine all support posts, beams, and joists for rot, cracks, or damage that affects structural integrity. Check concrete footings for cracking and soil erosion around the foundation. Inspect decking boards for rot, warping, and loose fasteners that create hazards. Pay special attention to moisture and ventilation issues, as these are common root causes of warping that can worsen over time if left unaddressed. Untreated wood decks typically last only about 10 to 12 years, making early detection of damage critical to extending your deck’s lifespan. Verify that railings meet code requirements and don’t shift under pressure. Examine all metal connectors and fasteners for corrosion or rust. Look for insect infestations or wood-boring pest damage. Address any identified problems before staining to guarantee deck safety and proper product adhesion.

Two-part epoxy paste to replace missing or rotted wood is resistant to dry rot, UV light, fresh and salt water

WOOD REPAIR EPOXY: Re-Rot 96 oz is a professional-grade penetrating epoxy system designed to strengthen, stabilize, & restore damaged, soft, or weathered wood for long-lasting structural repairs.
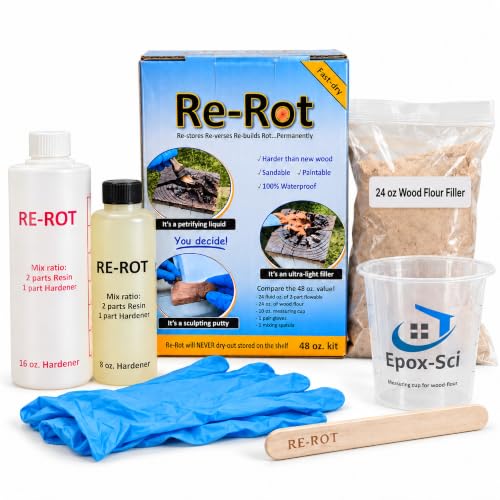
Complete Wood Repair Kit: Includes 48 oz of two-part penetrating epoxy, wood flour filler, a mixing cup, gloves, and a mixing stick.
Cleaning and Surface Preparation
Once you’ve addressed any structural issues identified during your inspection, you’ll need to thoroughly clean and prepare the deck’s surface to guarantee proper stain adhesion and uniform color application.
Start with extensive cleaning techniques by sweeping away all leaves, dirt, and debris using a stiff-bristle broom, ensuring you clear gaps between boards to prevent moisture trapping. Apply a sodium percarbonate-based cleaner liberally in small sections, allowing it to sit for 15–20 minutes. Scrub thoroughly with a synthetic-bristle brush to remove dirt, graying, and mold, then rinse completely with a garden hose or pressure washer at 1200–1400 psi. To prevent stains from dripping onto adjacent surfaces like vinyl siding, keep a wet rag handy during the cleaning process to immediately catch any spills.
Your surface care concludes by applying a wood brightener to neutralize pH and enhance stain adhesion, particularly important for weathered decks. Testing your stain color on a small patch first will help ensure you achieve the desired appearance before committing to the entire deck surface.

Oxygen-Powered Stain Removal:Break down tough stains like wine, coffee, grass, sweat, and blood with our powerful sodium percarbonate formula. Acts as a laundry booster that helps whiten whites, brighten colors, and lift deep-set stains with the natural power of oxygen.

Oxygen-Powered Stain Removal:Break down tough stains like wine, coffee, grass, sweat, and blood with our powerful sodium percarbonate formula. Acts as a laundry booster that helps whiten whites, brighten colors, and lift deep-set stains with the natural power of oxygen.

100% PURE Uncoated Sodium Percarbonate, an excellent multi-purpose cleaning and bleaching agent for many tasks around your home. Uncoated Sodium Percarbonate is the best type for mixing, DIY, and cleaning around the home.
Sanding and Smoothing
After cleaning and brightening your deck, you’ll need to sand the surface to remove any remaining old stain, smooth raised wood fibers, and create an ideal profile for new stain adhesion. Start with 80-100 grit sandpaper, the industry standard for solid stain removal. Your grit selection depends on your deck’s condition and finish goals.
For sanding equipment, electric band sanders and drum sanders handle large flat areas efficiently. Oscillating or random orbit sanders work best for softwoods like cedar and redwood, preventing gouging. Use hand sanders for detailed work on edges, railings, and corners. Consider using specialized clamps to secure boards in place while sanding edges and hard-to-reach areas.
Sand with the wood grain in systematic passes. Remove all loose material completely—dead fibers compromise stain penetration. Vacuum thoroughly between passes to prevent sandpaper clogging and uneven surfaces. Avoid over-sanding, which can make the wood too smooth for adequate stain absorption.

Features four sanding drums and 16 pieces of Sandpaper
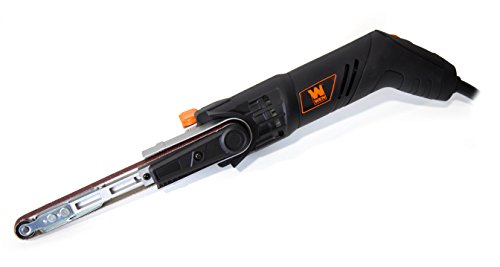
Variable speed dial powers the belt anywhere from 1080 to 1800 feet per minute

Comfort Grip: For enhanced control and reduced fatigue with the ergonomically designed comfort grip
Stain Selection and Product Preparation
Now that you’ve prepared your deck’s surface through sanding, you’ll need to select the right solid stain product for your specific conditions and aesthetic goals. Begin your formulation comparison by evaluating oil-based versus water-based options. Oil-based solid stains penetrate deeper, require less frequent recoating, and excel at mold prevention, though market availability remains limited. Water-based acrylics offer eco-friendly compliance with VOC regulations while performing adequately against outdoor elements. Water-based stains dry faster and have lower odor and VOCs, making them more suitable for DIY projects with quick turnaround times.
Next, assess your color selection preferences. Solid stains deliver uniform, painted finishes with complete coverage. Cabot brand products offer five color options, while DEFY Extreme Wood Stain provides seven shades including clear formulations. Consider your deck’s exposure to sunlight and weather conditions when choosing colors that align with contemporary aesthetic preferences and your home’s design requirements. Applying stain with expert application techniques such as working with the wood grain ensures an even, professional appearance across your entire deck surface.

OPAQUE FINISH W/ UV PROTECTION: #1 Deck Premium wood stains provide full coverage with an opaque finish, completely hiding the natural wood grain while protecting against fading, graying, peeling, and mildew from UV exposure

SOLID COLOR STAIN & SEALER IN ONE: Olympic Maximum solid color stain delivers rich, opaque color plus waterproofing for decks, fences and siding in one step.

Weather-Ready wood stain application allows you to stain in temperatures down to 35°F, and is ready for rain in 2 hours
Application Techniques and Tools
Selecting the proper application tool fundamentally determines how efficiently and evenly you’ll apply your solid stain across the deck’s surface. Your tool selection depends on deck size, texture, and your experience level. Brushes excel at detail work and tight spaces, offering superior control on rails and corners. Rollers provide a middle-ground solution for large, flat surfaces, delivering quick, even coverage with minimal skill requirement. Airless sprayers work fastest but demand expertise to avoid uneven application. For application methods, maintain a wet edge by slightly overlapping strokes, and always work with the grain for a natural appearance. Back-brush after spraying to blend marks. Apply stains in 2-4 board sections, allowing 1-2 hours drying time between coats. When using a pump sprayer, select fan-tip spray patterns rather than cone patterns to maintain control and achieve a finer finish. Quality tools reduce lint shedding and improve finish consistency. Testing your chosen stain color on a small inconspicuous area first helps ensure you’re satisfied with the final appearance before committing to the entire deck surface.
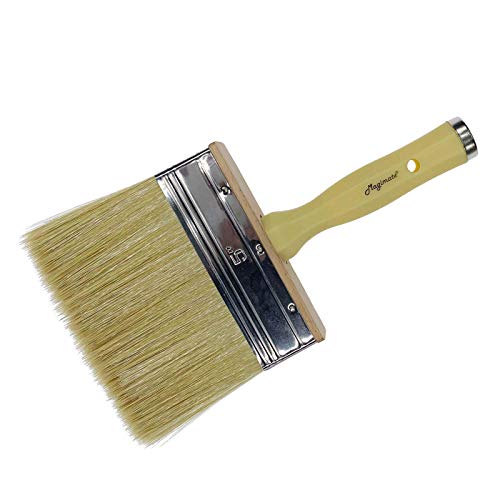
Brush Specs: 5” wide x 1” thick, soft synthetic filament blended with natural bristle. Hold more stain/sealer and paint smoothly, making your home improvement job a breeze.

SIMPLICITY MEETS EFFICIENCY - Our deck stain brush is easy to use with fast application of paints or stains. Just attach it to any standard extension pole for an easy, seamless experience that makes deck staining a breeze for DIYers and professionals alike. Our deck stain applicator works great on wood and concrete.

Bates deck stain brush set includes 2 high-quality brushes designed specifically for staining decks and other large wood surfaces.
Drying, Maintenance, and Longevity
Once you’ve applied your solid stain with proper technique, the critical phase of drying, maintenance, and longevity begins—and it’ll ultimately determine whether your investment delivers years of protection or fails prematurely. Your drying time requires 24–48 hours before walking on the deck and 48–72 hours for full curing before furniture placement. Ideal conditions—50–90°F with 40–70% humidity—accelerate this process; high humidity or rain can cause blotches and uneven finishes. Avoiding rain for at least 24-48 hours after application ensures proper adhesion and protection of your stain.
For maintenance tips, inspect annually for wear, peeling, or fading. Clean regularly with appropriate deck cleaners; avoid frequent power washing. Proper surface preparation before staining is equally important to maintenance afterward, as stain adhesion depends on removing dirt, mold, and old finishes that compromise longevity. Reapply solid stain every 3–5 years to maintain protection and color. Use furniture pads and prevent dragging to reduce abrasion. This disciplined approach maximizes your deck’s durability and aesthetic appeal.