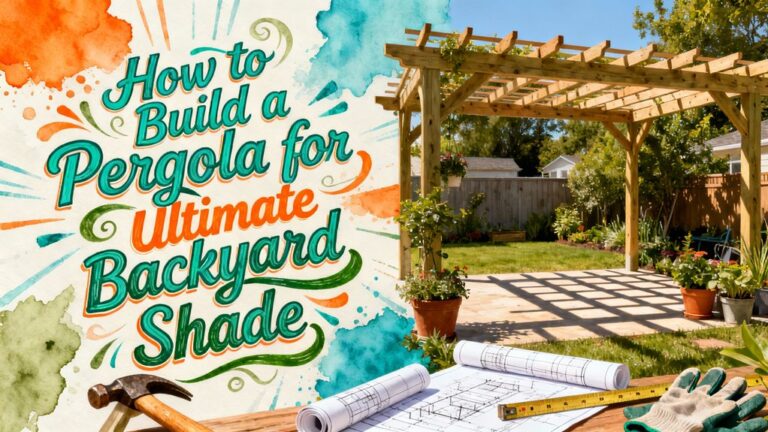
How to Cover a Pergola With Shade Cloth: a Simple Guide
You’ll start by selecting UV-protective shade cloth and calculating material with a 25% surplus. Unroll the fabric loosely over your pergola, maintaining 8–12 inch overhangs on all sides. Secure the longest edge near the house first using heavy-duty staples every 12–18 inches, then work around the structure systematically. Inspect rafters for structural integrity before fastening with galvanized staples or lacing cords. Finally, trim edges precisely and reinforce them with UV-resistant cord and brass grommets. The detailed methodology guarantees lasting protection and professional results.
Preparation and Materials
Before you begin installing shade cloth on your pergola, you’ll need to select an appropriate material and gather the necessary tools and hardware. Your fabric selection determines performance characteristics including UV protection, durability, and maintenance requirements. Polyester offers robust weather resistance, while HDPE provides superior sunlight reflection and airflow. Vinyl-coated polyester delivers enhanced abrasion resistance for architectural applications.
For installation tools, acquire a utility knife or hot knife for precise fabric cutting. Collect durable ties, screws, nails, or one-inch staples for secure attachment without overstretching. Power tools like drills and staple guns expedite the fastening process efficiently. Standard rafter spacing of 18 inches apart provides consistent anchor points for your shade cloth attachment.
Measure your pergola dimensions carefully, calculating fabric quantity with approximately 25% surplus for cutting and attachment. Safety equipment, including protective eyewear, remains essential throughout installation. Similar to winterizing patio furniture, taking time to prepare properly rather than rushing through the installation process ensures better results and longer-lasting protection from weather exposure.
Unrolling and Positioning
Carefully unroll your shade cloth loosely over the pergola frame, positioning it to cover your targeted area without applying tension. Maintain an 8 to 12-inch overhang on all sides for attachment and trimming purposes. Align the fabric’s knitted knot lines straight to prevent distortion, and position the longest edge along the pergola’s longest side for streamlined installation.
Begin positioning from a fixed reference point, such as your house or primary beam. Smooth wrinkles by hand before initiating tension adjustments. Use temporary clips at corners and midway points to stabilize the cloth while you work methodically around the structure.
Verify fabric alignment continuously, ensuring knitted lines remain straight. Apply moderate, incremental pulls from various edges to distribute tension evenly and prevent sagging. Confirm the cloth remains taut yet flexible enough to accommodate wind loads and seasonal movement before final securing.
Attaching the Edges
Once you’ve positioned the shade cloth with proper alignment and temporary stabilization, you’re ready to secure it permanently to your pergola frame. Start with the longest edge closest to the house, applying medium tension while fastening every 12–18 inches using heavy-duty staples, wood screws with washers, or timber fasteners. Maintain 8–12 inches of overhang for trimming. Progress to the shorter edges, guaranteeing knitted knot lines remain straight and fastenings stay slightly inset from beam edges. Your fastening techniques should offset joining points when connecting multiple rolls across support beams. For removable solutions, butterfly clips every 18–24 inches offer flexibility. Wire, cable, or rope threaded through eyelets provides alternative attachment methods. Consistent edge alignment prevents fabric distortion and guarantees structural integrity throughout the installation.
Securing Interior Supports
The interior support structure forms the backbone of your shade cloth installation, demanding careful preparation before you attach any fabric. You’ll need to identify sturdy beams or rafters that can withstand wind tension and fabric weight, ensuring they’re evenly spaced for consistent tension distribution.
Before proceeding, inspect timber supports for rot or weakness and perform interior reinforcement as needed. Check for rough surfaces that could abrade your cloth, adding protective layers where necessary. For pergolas with longer spans, be aware that 2×12 beams can span up to 12 to 13 feet as a single beam, or 17 to 18 feet when doubled, which will influence your support placement and reinforcement strategy. If your pergola is constructed from alder wood, ensure proper sealing and maintenance to prevent moisture damage and decay over time.
For attachment techniques, you can employ galvanized staples spaced every 200mm on timber, use lacing cords around irregular supports, or install grommets for modular attachment points. Consider specialist galvanized steel studs or butterfly clips for secure fastening without permanent damage. Apply weather-resistant sealants to all fasteners and exposed wood to prevent corrosion and extend longevity.
Trimming and Finishing
Your shade cloth installation’s success hinges on meticulous trimming and finishing work that’ll determine both its aesthetic appearance and structural longevity. Employ precise trimming techniques by measuring twice and cutting fabric on a flat surface using sharp scissors or utility knives. Leave extra length initially for test adjustments before final cuts.
Edge reinforcement prevents fraying and guarantees durability. Apply UV-resistant cord with sewing machine hemming or use locking strip V-grips fixed directly to timber. Create 1.5 to 2-inch folds at edges for substantial anchoring points. Double-folded hems provide enhanced strength when mounting hardware. For maximum durability, consider using specialized hardware such as Patio Roof Risers to securely anchor your shade cloth installation to the pergola structure. Ensure your workspace is clean and dry, much like preparing outdoor-friendly locations for proper material handling and finishing work.
Reinforce corners with webbing or reinforcement tape sewn securely, as corners represent the weakest structural points. Install brass grommets at reinforced corners for professional-grade securing and strain prevention.
Alternative Installation Methods
While meticulous hemming and grommet reinforcement establish a durable foundation, you’ll find that alternative installation methods offer distinct advantages depending on your pergola’s structure and operational requirements. Grommet installation paired with rope threading provides adjustable tension and repositioning flexibility, ideal for wooden beam structures. You can employ turnbuckles and hooks for large-span pergolas requiring wind resistance and precise tightening. Cable ties offer seasonal versatility on metal frameworks, though they require frequent replacement. Brackets and clamps eliminate grommet necessity, streamlining installation across both wood and metal substrates. Like hidden fastener systems used in composite decking applications, properly positioned fasteners and clips ensure secure connections without visible hardware. Staples or screws deliver cost-effective temporary solutions but risk fabric degradation. Selecting your method depends on structural composition, durability requirements, and accessibility to anchor points.