How to Build Stone Columns for Your Dream Pergola
You’ll start by marking post locations with stakes and excavating footing pits below the frost line—typically 80 centimeters deep. Create a compacted 6-inch gravel base, then stack flat stones with adhesive, checking alignment constantly with a level. Space columns 8–12 feet apart based on your pergola’s layout. Use through-bolts for structural strength and integrate support posts seamlessly with your beams. Regular maintenance includes inspecting for cracks and applying stone sealer every 2–3 years. The specifics of each phase deserve deeper exploration.
Planning the Layout
Before you’ll need to carefully plan your pergola’s layout to guarantee structural integrity and visual appeal. Start by selecting your location—whether you’ll position it near your house for convenience or as a standalone garden centerpiece. Mark post locations with stakes, ensuring equidistant spacing for symmetrical structure and aesthetic balance.
Establish reference lines perpendicular to your layout, then verify perfect 90° angles using diagonal measurements between marked spots. Your design considerations should account for pergola dimensions: 12′ x 12′ suits smaller spaces, while 14′ x 14′ or 16′ x 16′ options work for expansive patios. Use string lines to maintain alignment during this planning phase. For concrete patios, you’ll drill into the existing surface for secure anchoring, while ground installations require post holes excavated 2-3 feet deep with gravel addition for drainage. Ensure your posts are securely anchored to the footing using approved hardware such as post anchors or saddles to prevent wobbling or structural failure.
Preparing the Foundation
Once you’ve marked your post locations and verified the layout angles, you’ll shift your focus to establishing a solid foundation beneath each stone column.
Start with soil evaluation to assess compaction suitability and identify potential underground hazards. Conduct test excavation to determine bearing capacity and locate utility lines. Clear vegetation and debris from your work area, then excavate footing pits below the frost line—typically 80 centimeters deep.
Using proper excavation techniques, dig pits matching your column footprint with additional width for gravel padding. Maintain clean, squared edges for accurate alignment. Remove loose soil at the bottom and compact the base uniformly.
Layer a minimum 6-inch gravel base in 2-inch lifts, mechanically compacting each lift. Level the gravel using a vibrating plate compactor, then apply a polyethylene moisture barrier to protect your concrete footing from water damage.

Natural Stones: This river rocks are natural lightly polished for smooth effect, comes in a variety of natural colors, Resists fading for long-lasting beauty. The color of this river rock is natural so it may include a variety of different shades of browns, whites and black rocks. (rocks are natural and as a result some may be broken or out of shape, oval or round, thick or thin.

1.5 INCH CRUSHED LIMESTONE – Natural crushed limestone approximately 1.5 inches in size with an angular shape and gray, light gray and natural stone color variations.

NATURAL SLATE - 100% real Slate stone proudly sourced in the USA will add beauty and realism to your creations. Because these are natural stones, each bag is a mix of slate stones from 1/8 to 1/4 inches. This is are second to the smallest size slate and is a BEAUTIFUL addition to your scene or habitat!
Building the Base Course
Your foundation’s quality directly determines your stone column’s stability, so you’ll want to select base course stones with flat, stable surfaces and a minimum thickness of 4 inches for structural integrity. Larger stones up to 12 inches work best for your first course. Inspect each stone carefully, rejecting any with cracks or weak points.
During stone selection, prioritize matching color and texture for visual consistency. When you’re ready to place them, use a spirit level to guarantee perfect horizontal and vertical alignment. Adjust stones with shims or sand as needed.
Apply adhesive application between each stone, keeping joints consistent and fully filled. Press stones firmly into place and allow the adhesive to cure completely before adding subsequent courses. This methodical approach ensures your base course remains stable and properly aligned. Like deck railing installations, attention to local building codes regarding safety requirements will help ensure your stone column meets all structural standards.

【Natural Material】 Handpicked river rocks with smooth surfaces, safe for art projects and perfect for various painting tools.
Natural Material: Handpicked river rocks with smooth surfaces, safe for art projects and suitable for various painting tools

Medium Bubbles: The air stone can produces abundant dense bubbles to aerate your water reservoirs. A great way to increase oxygen solubility in your aquarium and enliven the aquatic lives.
Stacking the Stone Layers
With your base course set and fully cured, you’re ready to begin stacking the subsequent layers that’ll form your stone column’s height and structure. Start the second course by positioning four blocks in the same clockwise pattern, ensuring each sits perfectly level in both directions before proceeding upward.
Use a level tool continuously to verify proper placement. Bang stone pieces into position to achieve tight fitting between adjacent blocks. Apply a slicker tool to fill joints properly beneath and around each stone’s bottom, eliminating gaps at corners.
Select your stone types strategically—larger stones meeting at specific points with smaller stones filling gaps. Verify blocks are plumb and snug before advancing to the next layer. Repeat this joint securing process and measurement verification with each successive course until you’ve reached your desired column height.

4-inch Wet Drilling: Our lightweight handheld core drilling machine can perform wet drilling, and you can feel assured of accuracy when boring holes in a variety of surfaces with a 3.1-4 in / 8-10.2 cm diameter hole capacity. More importantly, a industrial-grade 4in core bit with 1-1/4" thread is thoughtfully included.

Torpedo Level Magnetic: Featuring a magnetic base, Firecore spirit level attaches securely to metal surfaces for a variety of needs.
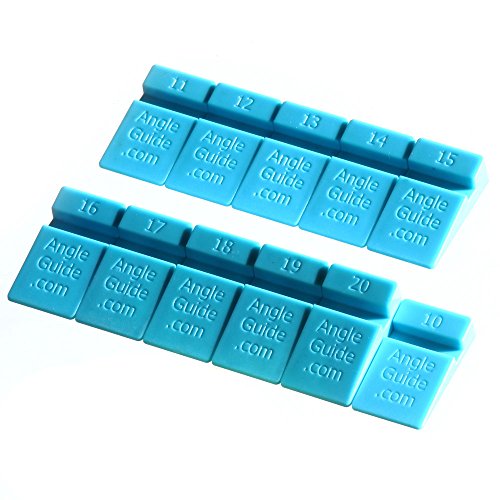
Model: Wedgek AGM Medium size. For larger size model Wedgek LR5 is available.
Adding the Capstone
After you’ve stacked your final course to the desired height, you’ll crown the column with a two-piece capstone that distributes weight evenly and completes the structure’s visual profile.
Select capstone types based on your stone variety and desired aesthetic—flat rectangular pieces work well for most applications. During capstone installation, apply a full mortar bed to your top course, then position the first piece carefully. Verify it’s level and centered before placing the second piece adjacent to it. Press firmly into the mortar, checking alignment frequently. The joint between the two pieces should be consistent and filled with mortar for stability and weather resistance. This final step protects your column from water infiltration while providing a refined finished appearance.

Premium stepping stone mix is a specialized mix of super-fine cement, latex, and curing agents

HIC Kitchen Mortar And Pestle Set: Grinds spices, herbs, nuts, seeds, and grains into fine paste or powder; ideal for cooking, baking, and holistic remedies
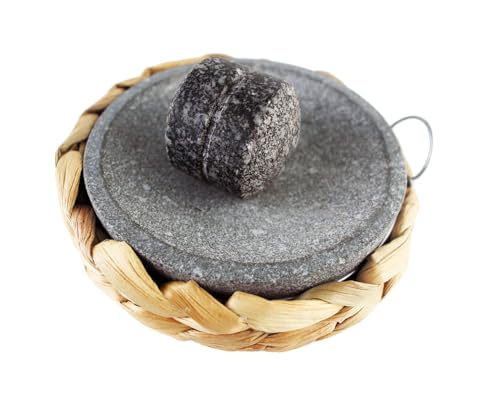
Durable Kitchen Tool:The stone mortar and pestle is a durable and lightweight kitchen tool, for cooking and serving. Its granite material ensures longevity and portability.
Integrating With Pergola Structure
Once your capstone is set, you’ll need to integrate the stone columns with your pergola’s structural framework to guarantee proper load distribution and stability. Verify your underlying support posts extend above the stone column to connect seamlessly with the pergola’s beams. Minimize gaps between panels and posts to prevent water intrusion and maintain structural integrity.
Position columns 8–12 feet apart, aligning them with your pergola’s post-to-post layout. The shift between stone and beams should be smooth, balancing design aesthetics with functionality. Account for both dead load (structure weight) and live load (wind, snow). Use reinforcing rods in concrete-filled columns for high-wind areas. To protect your wood components from staining and weather damage, consider applying prompt and effective cleaning methods during installation to maintain the wood’s appearance and longevity. Before finalizing your installation, ensure proper surface preparation has been completed on all wood components to optimize their durability and appearance. This integrated approach verifies your stone columns reliably support the entire pergola system while maintaining visual cohesion with your landscape design.
Maintaining Your Stone Columns
Your stone columns require consistent maintenance to preserve their structural integrity and appearance over time. Establish a regular maintenance schedule that includes gentle cleaning with mild soap and water while avoiding harsh chemicals that erode surfaces. Perform damage inspection at least twice yearly, checking for cracks, loose stones, and mortar joint erosion. Clean spills immediately to prevent staining, particularly from acidic substances. Apply a breathable stone sealer every 2–3 years to protect against moisture infiltration. Remove vines and trim vegetation near columns to prevent root intrusion and staining. Monitor for signs of water damage, which can cause freeze-thaw problems in cold climates. Address any issues promptly by replacing damaged stones with matching materials. Keep spare stones and mortar available for quick repairs, ensuring your columns remain structurally sound and visually appealing. Consider covering your columns with protective tarps during extreme weather seasons to shield them from environmental damage. Similar to how deck railing posts require through-bolts for structural integrity, stone columns need secure fastening methods and regular inspection to maintain their load-bearing capacity.