Easy Way to Install Cable Railing for Your Deck
You’ll install cable railing successfully by spacing posts 3-4 feet apart and securing them with proper blocking between joists. Thread marine-grade stainless steel cables through posts, then use turnbuckles to tension each cable until a 4-inch sphere can’t pass through—this guarantees code compliance. Alternate tightening from the center outward and verify tension with meters to avoid over-tightening. Check your work after 24-48 hours, as cables settle. The specifics of each step, however, require careful attention to detail.
Planning and Preparation
Before you install cable railing, you’ll need to establish your project’s scope by determining the linear footage required, identifying whether you’re working on level surfaces or stairs, and reviewing local building codes for height and spacing requirements. Next, you’ll select appropriate materials and components. Choose between aluminum, stainless steel, or composite posts and rails, then decide on cable diameter and tensioning systems that comply with railing regulations. Verify hardware compatibility across all components from your manufacturer. Your material selection must align with local codes specifying minimum heights—typically 36″ for decks and 34″ for stairs—and maximum cable gaps of 4″ or less. Ensure your posts are appropriately sized, with 4×4 and 6×6 lumber being the most common options for residential decks. In New Hampshire, deck guardrails are required for decks elevated over 30 inches and must conform to 2021 International Residential Code standards. Finally, gather essential tools: tape measures, levels, drills, cable cutters, and crimpers. Mark post locations at consistent 3-4 foot intervals, accounting for corners and obstructions before drilling.

Marine-Grade Material: Crafted from premium T316 stainless steel, our wire rope boasts exceptional strength, durability, and resistance to rust and corrosion. Designed to withstand the harshest outdoor elements, this marine-grade stainless steel cable improve reliability for all your indoor and outdoor applications.

【What You Get】- Wire rope crimping tool kit includes 1pcs heavy duty crimping plier, 1 roll of wire rope cable whose size is 1/16 inch×328ft, 200pcs aluminum crimping sleeves and 50pcs stainless steel thimbles. You don't need extra accessories for your craft about wires.

Durable T316 Stainless Steel Construction: This cable railing kit features high-grade T316 stainless steel, ensuring long-lasting performance and resistance to rust, making it perfect for both indoor and outdoor use.
Deck Framing and Blocking
Once you’ve marked your post locations and gathered your materials, you’ll need to prepare your deck framing to handle the substantial lateral forces that tensioned cables create. Install solid blocking between joists at each post location—typically two stacked 2×6 boards—centered directly over rim joists for maximum strength. This blocking provides the secure mounting surface your posts demand. Fasten blocking with screws or bolts rated for lateral and vertical loads. Use pressure-treated, rot-resistant wood to withstand outdoor conditions. Your blocking thickness should match or exceed your post base dimensions. Before attaching posts, confirm blocking sits level and flush with deck framing. For added durability, consider applying OxiClean cleaning solutions to your deck framing periodically to remove dirt and mildew that can compromise wood integrity. Proper blocking installation works in conjunction with pressure-treated lumber requirements to ensure your deck’s structural foundation can safely support cable railing systems. These blocking techniques establish the structural integrity essential for safe cable railing performance and long-term durability.
Post Installation
With your blocking firmly in place and level, you’re ready to install the posts that’ll anchor your cable system. Space your posts at regular 3-4 foot intervals, with a maximum of 4 feet apart for ideal cable railing performance. Installation alignment is critical—set each post plumb and level before final tightening. Use four bolts per anchor post, drilling 9/16-inch holes at least 1 inch inside joist locations. Loosely fit bolts initially to allow adjustment during cable tensioning. For intermediate posts, position them vertically and check for plumb alignment. Post measurements should follow spacing guidelines that balance stability with structural requirements. Ensure your posts are positioned to meet minimum railing height requirements mandated by local building codes in your jurisdiction. Before painting, prepare your posts by cleaning and sanding to ensure a smooth finish without imperfections. Stainless steel fasteners prevent corrosion. Don’t fully tighten connections until after cable installation and tension adjustment.
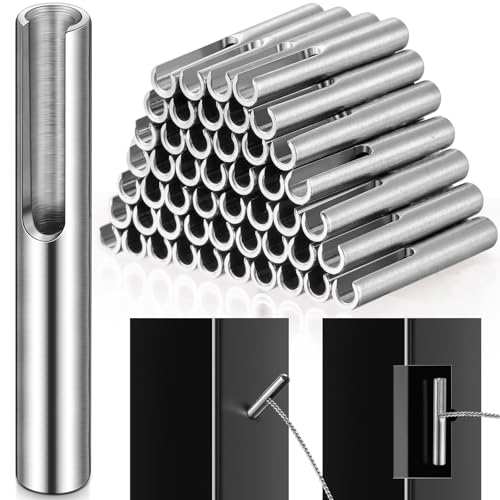
Package Contents: You will receive 50 pieces of 316 stainless steel 1/8 inch invisible terminal fixed end toggle anchor, designed for 1/8 inch cable, suitable for cable railing projects that need to maintain beauty and require a stable installation, whether in residential or commercial environments, it can provide reliable security and elegant appearance

【Application】The stainless steel cable railing anchor terminal, used as fixed end, works for 3/16" cable in horizontal sections. Compared to other products, our design advantage lies in the fack that the crimping section is hidden within post, effectively covering the hole in metal post. A complete cable railing system should consist of both a tensioner and a fixed end. It is compatible with 3/16" invisible cable railing kits(ASIN: B07PK44LL6 or B0BDKGJYW3).

【Application】The stainless steel cable railing anchor terminal, used as fixed end, works for 3/16" cable in horizontal sections. Compared to other products, our design advantage lies in the fack that the crimping section is hidden within post, effectively covering the hole in metal post. A complete cable railing system should consist of both a tensioner and a fixed end. It is compatible with 3/16" invisible cable railing kits(ASIN: B07PK44LL6 or B0BDKGJYW3).
Cable Fitting and Hardware
The right fittings and hardware are what transform your posts into a functional cable railing system. You’ll choose between swageless and swaged fittings based on your installation needs. Swageless fittings offer tool-free installation and adjustability, while swaged fittings provide permanent, professional results requiring specialized equipment.
Your fitting options include through-post designs for minimalist aesthetics or surface-mount varieties for flexibility across materials. For angled installations, multi-angle fittings accommodate stairs seamlessly.
You’ll also need tensioners like turnbuckles to maintain cable tautness, end stops to secure cable ends, and spacers to prevent sagging. Select marine-grade T316 stainless steel hardware for superior corrosion resistance, especially in coastal environments. Consider your cable types and finishing preferences—brushed, polished, or black oxide—to complete your design vision. Like traditional railings, cable systems must adhere to local building codes to ensure safety and compliance with structural requirements. To maintain both safety and visual appeal, aim for proper cable spacing that prevents small objects from passing through while creating an unobstructed view.

Adjustable Angle Design: Fit for 1/8 inch stainless steel cable, this adjustable angle cable railing kit has 180 degree angle freedom adjustable base, max expanding size of the turnbuckle is 10 inch and it can be retract to 7 inch, suitable for outdoor or indoor use

Premium Marine Grade Material: The railing kit is made of high quality marine grade T316 stainless steel Thick Plate, which is rust-proof, more durable and beautiful and easy to maintain
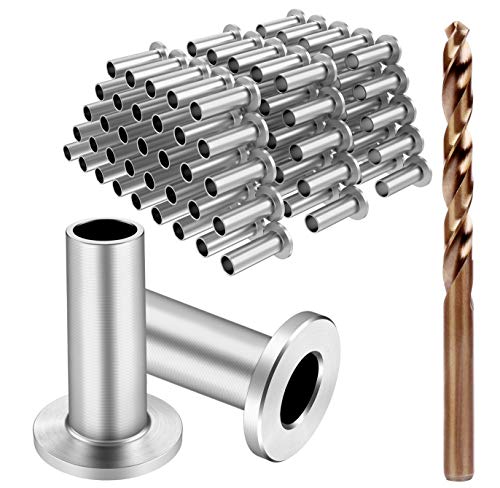
Applications: This Stainless Steel Protector Sleeves for 1/8" 5/32" or 3/16" Cable Railing. And used on wood/composite posts to prevent the cable from wearing into the wood. Perfect for planning your own cable railing project, good for indoor or outdoor applications.
Cable Installation and Tensioning
Proper cable installation and tensioning transforms your railing framework into a safe, stable system that’ll withstand years of use and weather exposure. Begin cable threading from one end post, pulling cables through intermediate posts consecutively for consistent alignment. Use protective sleeves at entry points to prevent abrasion. Attach cables to anchored end posts using cable pins, swage fittings, or turnbuckles. Perform tension adjustment by alternating tightening from center outward and top to bottom for uniform distribution. Use tension meters to confirm code-required loads and avoid over-tightening. Gradually tighten cables in stages, rechecking tension before finalizing cuts and locking nuts. The ideal tension should be tight enough that a 4-inch sphere cannot be pushed through the cables, ensuring compliance with baluster spacing requirements, and maintaining the structural integrity of your deck system. This methodical approach guarantees your deck cables remain parallel, properly spaced, and structurally sound.
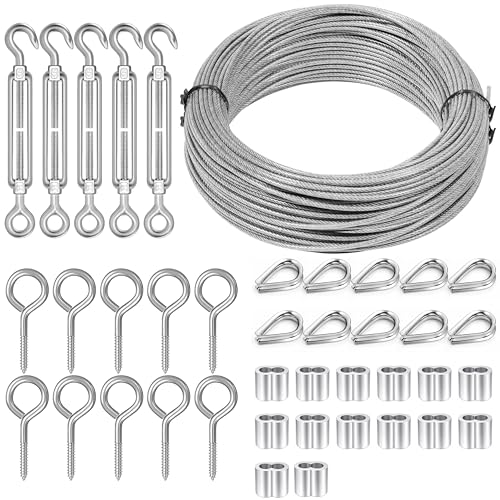
PREMIUM WIRE TURNBUCKLE KIT: Includes 100Ft 1/16 Inch robust stainless steel cable and 5pcs M5 adjustable turnbuckles,10pcs M2 wire rope thimbles, 10pcs M5 screws hooks, and 20pcs M2 aluminum crimping loops designed for secure tensioning in various wire installations; ensures strong, durable support for your projects
![[Patent] Muzata 20Pack Cable Railing Hardware Tensioner & Terminal CR26](https://m.media-amazon.com/images/I/41wPgXjx7pL._SL500_.jpg)
Patented Invisible Design for 4"x4" Wood Post: With the patented invisible flattened tail design, the ugly swaged end can be hidden in the 4"x4" wood post(but cannot be hidden in 2"x2" posts), and get enough tension to pass 4”sphere test to meet code compliance. The customized socket wrench Muzata CT16 is essential for the invisible installation and keeps the cable from spinning when tightening. Package includes: 10 pairs of tensioners and terminals, 1pc allen wrench, 1pc socket wrench

【Applications】Swage lag screw system is a streamline stainless steel wire balustrade systems for straight, stair or angled sections. BLIKA high-quality stainless steel wire balustrade hardware that is suitable for indoor and outdoor applications. Cable railing swage lag screws perfect for planning your DIY cable railing project, staircases, balconies and decking areas. Get the job done effortlessly with our extra-thick wrench—built to outlast others.
Final Inspection and Finishing
Work through your final checklist systematically. Verify all fasteners are tight, cables maintain proper tension without sagging, and posts stand solid under pressure testing. Confirm spacing doesn’t exceed 4 inches and guardrail height meets the 36-inch minimum requirement. Ensure your railing can withstand a 200-pound force in any direction to prevent structural failure and maintain occupant safety.
Add aesthetic enhancements by installing end caps on all posts for a polished, professional appearance. Clean cables and hardware with warm water and non-abrasive dishwashing liquid to remove surface debris. Apply consistent pressure across railings during your final stability test, confirming no movement or looseness occurs anywhere in the system. Using weather-resistant materials protects your cable railing from environmental damage and extends its lifespan.
Document completion with photos and inspection records for warranty verification and future maintenance reference.
Tools and Materials You’ll Need
Once you’ve verified your installation meets all code requirements and safety standards, you’ll need to gather the right tools and materials to execute the project successfully.
Your installation essentials include aluminum or stainless steel posts, high-quality stainless steel cable, tensioners, terminals, and a top rail. You’ll also need a power drill with various bit sets, cable cutters, crimping tools, and wrenches for assembly.
Measurement and layout tools—tape measures, levels, squares, and marking implements—ensure precise alignment and spacing. Drilling jigs improve accuracy when positioning cable holes.
For optimal results, use protective sleeves and washers when threading stainless steel wires through pre-drilled holes to prevent corrosion and ensure long-term durability. The industry standard 1×19 construction, type 316 stainless steel cable is recommended for its low stretch, high breaking strength, and superior corrosion resistance in outdoor environments.
Don’t overlook safety practices. Equip yourself with safety glasses, hearing protection, work gloves, and a dust mask. A stable ladder or scaffolding provides safe access to elevated work areas throughout your installation.
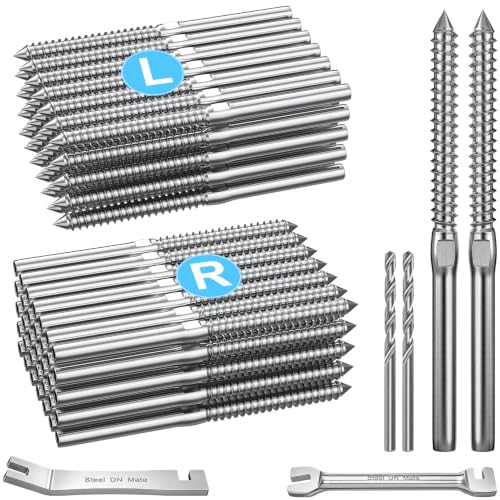
🔧Applications - DN Mate Swage Lag Screw System is made of T316 stainless steel, helping you create or upgrade a sleek, modern and minimalist look while preserving your view. This cable deck railing hardware is suitable for straight, angled and corner sections, it is ideal for wire railing kit for decks, porches, stair railings, balcony railings and fences, creating stylish indoor and outdoor wood post cable railing systems that enhance your living space.

Marine-Grade Material: Crafted from premium T316 stainless steel, treated with oxidation for a sleek black finish, while ensuring strength and durability, it also enhances corrosion and rust resistance. Perfect for indoor and outdoor use including coastal applications.

Package Includes: you will receive 80 pack 3/16” stainless steel invisible receiver swage stud, comes with wrench, sufficient quantity provides support for the completion of your project
Common Mistakes to Avoid
Even with careful planning and quality materials, cable railing installations commonly fail when installers overlook critical details during execution. You’ll encounter problems when post spacing exceeds 4 feet, causing cable sagging and compromised stability. Tensioning errors represent another frequent pitfall—insufficient tension creates slack and rattling, while over-tensioning damages hardware and risks cable failure. You must apply uniform tension across all cables and re-check adjustments 24-48 hours after installation as materials settle. Additionally, you’ll face issues from inaccurate measurements, improper angle cuts on posts, and inadequate hardware fastening. Rushing installation without detailed planning leads to misaligned components and wasted materials. For residential decks, guardrails must reach at least 36 inches in height to meet safety requirements. Verify local building codes beforehand to verify compliance with critical height and spacing requirements, preventing costly inspection failures. Cable railing openings must not allow a 4-inch diameter sphere to pass through, as required by South Carolina building codes to ensure safety.
Maintenance Tips for Long-Lasting Railings
Proper installation sets the foundation for cable railing performance, but ongoing maintenance determines whether your investment withstands years of weather exposure and use. You’ll need to establish a consistent cable maintenance schedule that includes regular cleaning with mild soap and water, followed by thorough drying to prevent corrosion. Inspect cable tension annually, adjusting as needed with specialized tools while avoiding overtightening that damages fittings. Implement rust prevention by applying UV-resistant coatings quarterly and treating visible rust immediately with appropriate removers. In harsh environments, flush contaminants monthly and reapply protective treatments regularly. Ensure your handrail height complies with building codes to maintain both safety and proper structural alignment. Keep detailed inspection records tracking system condition. These proactive steps guarantee your railing remains structurally sound, visually appealing, and safe for years.