Best Way to Clean a Stained Deck for a Fresh Look
To refresh your stained deck, you’ll first assess the surface for cracks, mold, and water damage, then select an appropriate stain stripper based on your coating type. Apply the stripper with even coverage, allowing 15–45 minutes dwell time before scrubbing thoroughly. Rinse completely and neutralize chemical residue with wood brightener to restore pH balance. Once dry, you’re ready for a fresh protective coating. Following a systematic approach throughout this process yields professional results.
Assessing Your Deck’s Current Condition
Before you can effectively clean and restore your stained deck, you’ll need to conduct a thorough assessment of its current condition. Start by examining the deck surface for visible damage—cracks, warping, peeling paint, and splintering boards—that’ll affect your cleaning approach. Check for mold, mildew, and algae growth indicating moisture problems. Your inspection tips should include testing for water pooling and soft spots revealing rot or water infiltration beneath the surface. Identify your deck’s material type, whether wood or composite, since this determines appropriate cleaning methods and the types of cleaning solutions you’ll need to use. Assess existing stain or sealant condition and penetration depth. Use a moisture meter to detect hidden wetness in boards and support structures. Allowing sufficient drying time between cleaning and reapplication of stain will ensure proper adhesion and durability of your deck’s finish. Document findings with photos to track progress. This systematic deck condition evaluation guarantees you’ll select the most effective restoration strategy.
Choosing the Right Stain Stripper for Your Needs
Once you’ve identified your deck’s condition and stain type, selecting the appropriate stripper becomes critical to restoration success. You’ll find that stain compatibility determines your stripper choice considerably. Transparent stains respond well to biodegradable or caustic options like Defy, while solid stains demand stronger solvent-based or gel strippers such as R-A-D PaintStrip. Oil-based stains require solvent strippers specifically engineered to break down oil molecules.
Your application techniques should match the stripper type. Gel products suit vertical surfaces, while liquid or powder formulations work effectively on horizontal decks. You’ll apply most strippers with brushes or rollers, allowing dwell times of 15–45 minutes depending on the product. For optimal results, proper preparation including cleaning and sanding helps remove any mill glazing before applying your chosen stripper. After stripping, allow adequate drying time before applying new stain to ensure proper adhesion and curing. Consider environmental impact by choosing biodegradable options when appropriate, ensuring both deck restoration and ecological responsibility.

DESIGNED TO REMOVE SPECIALTY DECK COATINGS AND PAINTS FROM MULTIPLE SURFACES - Remove Paint, Latex, Polyurethane, Shellac, Varnish, Acrylic, Oil Based Coatings and More in usually a Single Application!

CITRISTRIP Paint & Varnish Stripping & Removing Gel is easy to use.
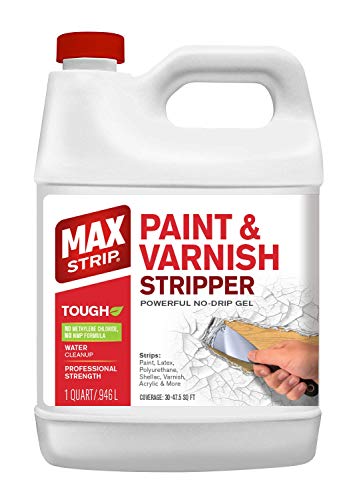
DESIGNED TO REMOVE PAINT AND VARNISH FROM MULTIPLE SURFACES - Remove Aftermarket Paints, Latex, Polyurethane, Shellac, Varnish, Acrylic, Oil Based Coatings and More in usually a Single Application!
Essential Tools and Safety Equipment
Since you’ve selected your stain stripper, gathering the right tools and protective gear becomes your next priority to guarantee both effective cleaning and personal protection. You’ll need a scrub brush with medium-stiffness nylon bristles, a garden hose, and an extension handle to reach all deck areas comfortably. For pressure washing, equip yourself with appropriate nozzles—25-degree for stubborn stains and 40-degree for newer decks. Safety equipment is non-negotiable: wear goggles, chemical-resistant gloves, slip-resistant footwear, and long clothing. If you’re using strong cleaning solutions, a respirator protects your lungs. When disposing of paint debris and cleaning solutions, follow proper environmental precautions to avoid contaminating soil and water sources. Before starting, remove furniture and clear debris from between boards. Pre-rinse with your hose to eliminate loose particles, ensuring your cleaning solutions penetrate effectively for ideal results. A wood brightener will help restore the wood’s natural pH balance for better stain adhesion once you’ve completed the initial cleaning.

VERSATILE CONNECTION - Compatible with any standard 3/4" threaded broom handle, making it an essential addition to any cleaning kit. The scrub brush head can also be used independently as a handheld floor scrub brush. Handle sold separately.

UNIVERSAL SCRUB BRUSH – Handheld nylon scrub brush with firm light-yellow bristles designed for everyday scrubbing on tile, grout, concrete, outdoor steps, entry mats, mudrooms, utility areas, and other durable surfaces.

Comfortable Grip: Patented soft-grip handle reduces hand fatigue during extended scrubbing
Step-by-Step Preparation and Application Process
Now that you’ve gathered your tools and safety equipment, you’re ready to prepare your deck for cleaning. Begin with thorough surface preparation by removing all furniture, plants, and fixtures. Sweep away loose debris using a broom or leaf blower, then inspect boards for damage. Pre-rinse the entire deck with a garden hose or low-pressure washer to eliminate residual dirt and dust. Select a cleaning solution formulated for your deck material—wood, composite, or pressure-treated—and apply it evenly with a pump sprayer. Let the cleaner sit for 15–20 minutes without drying out. Scrub problem areas with a stiff-bristled brush, agitating mildew and stains effectively. To ensure optimal stain absorption, apply a brightening solution while the deck is still wet to open up the wood’s pores. For best results when you’re ready to restain, allow the deck to dry completely before applying any new stain coating. Finally, rinse thoroughly until no suds remain, then allow complete drying before sealing or replacing furniture.

POWERFUL DECK CLEANER & MILDEW REMOVER – This deck cleaner and mildew remover is a professional-grade deck cleaning solution, effectively eliminating black and green stains, mold, and built-up grime on wood and composite surfaces.


POWERFUL DECK CLEANER & MILDEW REMOVER – This deck cleaner and mildew remover is a professional-grade deck cleaning solution, effectively eliminating black and green stains, mold, and built-up grime on wood and composite surfaces.
Removing Stripper Residue and Neutralizing Chemicals
After you’ve applied wood stripper and let it work on the old finish, you’ll need to remove the resulting residue before it dries and hardens on your deck’s surface. Use odorless mineral spirits or specialized Paint Stripper After Wash for effective residue removal. For stubborn goop, apply a mixture of shellac and lacquer thinner, particularly on dark woods.
Following residue removal, chemical neutralization is critical. Immediately apply a wood brightener to balance pH and halt chemical action. Rinsing thoroughly with a garden hose or low-pressure washer (around 750 psi) using a 40-degree nozzle from 8-12 inches away helps open the wood pores for better stain absorption. For projects involving metal components like patio furniture, consider alternative fastening methods beyond traditional approaches to ensure long-lasting durability. This multi-step approach prevents wood fiber damage and guarantees proper surface preparation for your new finish. Multiple applications may be necessary depending on coating thickness.
Selecting the Best Stain for Your Refreshed Deck
Which stain you choose will ultimately determine how well your deck weathers UV exposure, moisture, and fungal growth over the coming years. Consider water-based options like Defy Extreme Wood Stain, which uses nanotechnology for superior stain durability and color retention while remaining environmentally compliant. For oil-based alternatives, Armstrong Clark provides excellent penetration and mold resistance, though it carries higher VOC levels.
Your wood type matters considerably. Cedar decks benefit from semi-transparent stains that preserve grain visibility while protecting against UV damage. Hardwood species like teak or mahogany perform better with penetrating oil-based formulations that enhance durability.
Solid stains offer maximum protection in harsh climates but require more maintenance. Semi-transparent options balance protection with aesthetic appeal. Whatever you select, prioritize formulations with proven mildew resistance and deep wood penetration for lasting results. For the best outcomes, apply stain using the brush on, brush off technique to achieve an even finish across your deck surface. Proper application using quality applicators and even coats following the wood grain will ensure your chosen stain provides the uniform, long-lasting finish your deck deserves.

READY-TO-USE DECK STAIN & SEALER: Olympic WaterGuard woodland cedar semi-transparent wood stain and sealant combines color and waterproofing in one water-based, ready-mix coat.

SEMI TRANSPARENT EXTERIOR WOOD STAIN: Our outdoor wood stain and sealer allows the natural wood grain to show through, highlighting the beauty of your decks, fences and sidings and preserving its natural look.

EFFECTIVE ON ALL WOOD SURFACES and QUICK DRYING: Furniture Clinic Wood Stain is a fast drying and highly concentrated wood stain making it effective on all indoor and outdoor wood surfaces. Our wood stain provides excellent coverage and ensures even color penetration. It's water based, environmentally friendly, and dries to a natural matte finish in only 10 minutes.
Maintaining Your Deck’s Appearance Long-Term
Once you’ve selected and applied the right stain, your deck’s longevity depends on consistent maintenance that addresses cleaning, inspection, and timely repairs. You’ll want to reseal every 1-3 years, adjusting intervals based on climate and wood exposure. Monitor for worn stain and water absorption without beading—signs you’ll need resealing.
Your deck maintenance routine should include annual inspections of fasteners, boards, and the substructure for rot or insect damage. Address splintering and cracks immediately to prevent safety hazards and wood degradation. Consider using wood filler to repair cracks, which will help maintain a smooth surface and prevent further moisture infiltration.
For aesthetic preservation, sand your deck surface every 1-3 years to remove roughness before resealing. Proper surface preparation like sanding ensures the new stain will penetrate well and look even across your deck. Avoid storing heavy, moisture-retentive materials on the deck. Apply UV-blocking sealers to prevent fading. You’ll extend your wood deck’s lifespan to 10-15 years through disciplined, attentive care.

Gorilla tough: Gorilla Wood Filler is the go-to product for strong water resistant repairs on cracks, gouges and holes

TWO-PART FORMULA chemically bonds with surface to adhere permanently
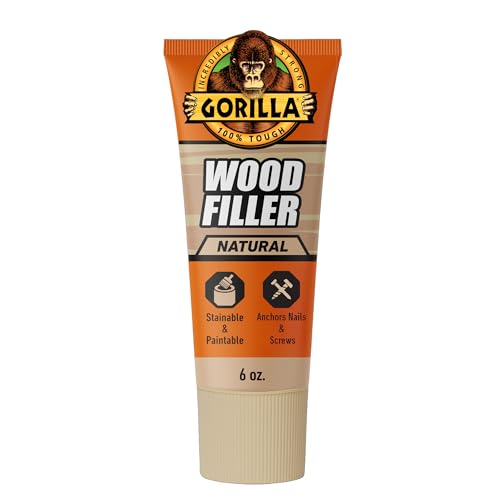
Gorilla tough: Gorilla Wood Filler is the go-to product for strong water resistant repairs on cracks, gouges and holes