

How to Install Trex Decking With Face Screws
You’ll install Trex decking with face screws by first gathering essential tools—speed square, tape measure, drill, and circular saw—plus color-matched composite screws and a fastener installation tool. Pre-drill holes 1/8-inch diameter at least 1 inch from edges, then drive two screws per joist spaced 16 to 24 inches apart. Space screws every 12 inches for fascia applications. Drive screws flush with the board surface slowly to maintain integrity. Following proper countersinking and plug installation techniques guarantees a professional finish and long-lasting durability.
Essential Tools and Materials for Installation
Before you begin installing Trex decking, you’ll need to gather the right tools and materials to guarantee a successful project. Start with essential hand tools: a speed square, 25-foot tape measure, hammer, rubber mallet, chalk line, and utility knife. You’ll also need power tools including a drill with bits, circular saw, jigsaw, and miter saw.
For fastening, procure color-matched composite deck surface screws and universal self-gapping fasteners with stainless steel components. These specialized screw types maintain proper spacing between grooved deck materials. A Trex Universal Fastener Installation Tool notably reduces installation time by holding fasteners hands-free. For areas where side-groove fasteners cannot be used, plug systems offer an alternative option that allows screws to be driven through the top of the board and covered with matching plugs for a cleaner appearance.
Additionally, organize your workspace with sawhorses, clamps, and a 2×4 lumber guide. Stock 1/8-inch drill bits for pre-drilling holes one inch from board edges. Gather protective equipment for safe power tool operation throughout your installation. For a seamless appearance with no visible hardware, consider using hidden fastener systems designed specifically for composite deck boards, which create a professional-looking finished surface where fasteners remain completely concealed.
Understanding Screw Placement and Spacing Requirements
Proper screw placement and spacing are critical to your Trex deck’s structural integrity and longevity. You’ll install two screws per joist for standard deck board fastening, positioning them at least 1 inch from board ends and edges to prevent splitting. For fascia applications, use three screws every 12 inches along the rim joist—placed at top, center, and bottom positions. Your screw types must match manufacturer specifications; Trex-recommended composite decking screws guarantee peak performance. Space screws every 16 to 24 inches along standard boards, maintaining consistent intervals for even support and warping prevention. When fastening to rim joists, place your top screw 1 inch from the top, your second at center, and your third 1 inch from the bottom. For optimal holding power, ensure screws penetrate at least 1 inch into the joist below the board surface. Drive all screws flush with the board surface for a finished appearance.
Pre-drilling and Countersinking Best Practices
With your screw placement and spacing plan established, you’ll now prepare your deck boards for fastening through pre-drilling and countersinking—techniques that protect composite material from splitting and guarantee professional-looking, flush installations.
Start your pre drilling techniques by using a 1/8-inch drill bit perpendicular to the board face, positioning holes at least 1 inch from edges and ends. Clear all debris and moisture from holes before proceeding. Similar to the precision required when cutting and beveling components in woodworking projects, accuracy in pre-drilling ensures structural integrity and prevents material damage.
For countersinking methods, employ color-coded counterbore tools matched to your Trex screws. Drill countersinks at 90 degrees until the tool stops spinning. Remove any debris, then install screws using a depth setter tool for consistent seating. Drive screws slowly to avoid over-driving, which damages boards and compromises the deck’s appearance and structural integrity. Proper installation techniques, similar to those used in deck staining applications, ensure your composite deck maintains its durability and aesthetic appeal for years to come.
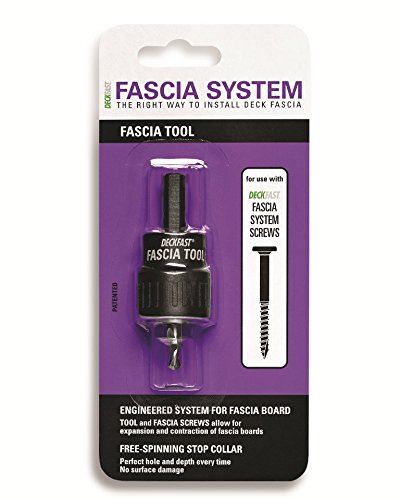
Pre-drills and Countersinks to the Correct Depth Every Time
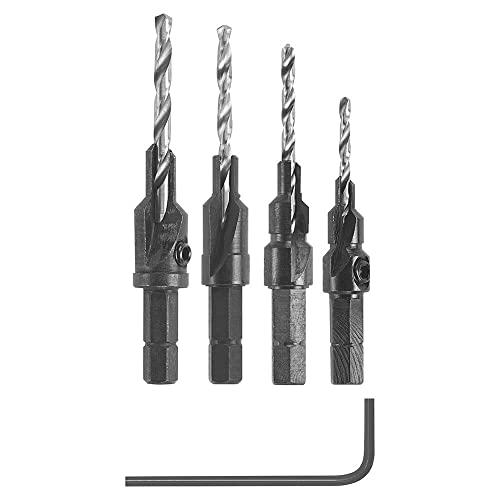
VERSATILITY: Bosch hex shank countersink bits feature adjustable depths and provide precise, clean pilot holes in wood, plastic and composite materials

【Unique Two-Flute Design】Featuring a dual-edge cutting design, these countersink drill bits eliminate chatter and ensure smooth, precise finishes. Compared to single-blade bits, they offer faster cutting, ideal for larger or deeper countersinks.
Techniques for Driving Screws to Proper Depth
Now that you’ve prepared your deck boards through pre-drilling and countersinking, you’ll drive your screws to the precise depth required for both structural integrity and aesthetic appeal. Position your screw at a 90-degree screw angle to the board face, guaranteeing perpendicular insertion. Maintain continuous motion and steady pressure throughout the driving process, allowing your depth setter tool to monitor penetration depth effectively. You can use either an impact driver or standard power drill, though impact drivers require careful handling. The depth setter cup will stop spinning when your fastener reaches the correct penetration depth, accompanied by a distinct sound change. This mechanism guarantees your screw heads sit flush with the board surface, preventing protrusion that’d compromise safety and appearance while enabling proper plug seating. For optimal stability across your deck, aim to place two screws per joist to ensure consistent structural support throughout your installation.

1/4" Bit Holder: This magnetic impact bit holder attaches to impact shafts and high torque drills with a wide adjustment range and no-nonsense bit quick changes for quick work of any project.

Perfect for hand-driving Deck-Drive DCU Composite fasteners when using DCU screw plugs
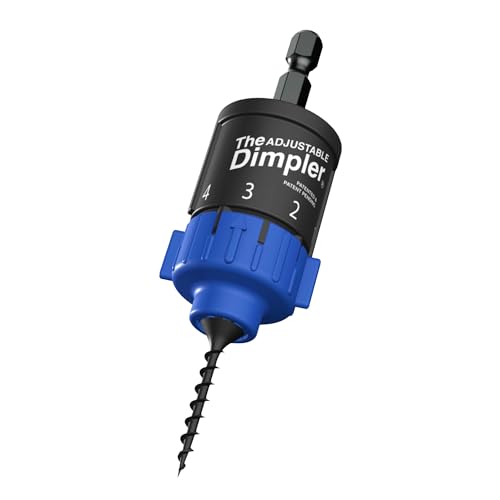
Adjustable DIMPLER for Customized Screw Depth Control: Our innovative adjustable DIMPLER clutch with 4 depth adjustments allows you to fine-tune your screw placements, ensuring your screws are driven exactly as needed for your project, whether it's drywall, deck, particle board or plywood work.
Preparing and Aligning Your Decking Boards
Before you position your first decking board, you’ll need to prepare your deck frame thoroughly—ensuring the joists are clean, dry, and spaced according to Trex specifications (typically 16 inches on center), level, and structurally sound to support the weight without warping. Remove any protruding fasteners that’ll interfere with board seating.
Position your first board along the ledger with a ~1/4 inch expansion gap. Use a spacer to maintain consistent gaps between boards—critical for deck aesthetics and preventing board curvature issues. Employ a chalk line snapped across joists to guide subsequent board placement in a straight line. Use stop blocks at rim joists to prevent shifting during fastening. Temporarily clamp boards to maintain alignment, then tap them lightly with a rubber mallet to snug them into place without damaging the composite material. While face screws are visible, proper spacing and alignment techniques ensure a professional appearance similar to what hidden fastener systems achieve. Face screws deliver superior tensile strength and holding power, which helps prevent decking boards from warping or popping up over time.
Installing Fascia Boards With Face Screws
Once you’ve secured your decking boards, installing fascia requires fasteners specifically engineered for composite materials. You’ll use specialized two-stage pre-drilling bits to create appropriately sized holes that allow your fascia boards to expand and contract naturally without warping.
Position screws one inch inward from board ends and edges to prevent splitting. Space field screws vertically no more than eighteen inches on center. Eight-inch fascia boards need two screws at ends and in the field; twelve-inch boards require three screws for proper support. Following manufacturer-specific guidelines ensures your fascia installation meets quality standards specific to your composite brand.
For fascia aesthetics considerations, select color-matched options like Trex Hideaway Fascia Screws that blend seamlessly with your composite material. Pre-drill on sawhorses before final installation to simplify the process. Remove any debris from counterbore holes, ensuring flush screw head seating for a professional finish. Proper fascia installation complements the structural support provided by pressure-treated lumber used in your deck’s substructure.

BUILT FOR COMPOSITE DECKING: These composite deck screws fasten composite and wood decking securely, with a dual-thread design that pulls boards tight and eliminates the plastic fiber mushrooming common with composite boards.

30 PERCENT FASTER INSTALLATION TIME VERSUS COMPETITION: Power Pro Premium Exterior Trim Screws are engineered to complete fastening projects faster, delivering up to 30 percent faster installation time compared to leading competitive trim screws for improved jobsite efficiency.

Exclusively Trex - Tailored exclusively for Trex fascia installations Unparalleled Color Match - The ultimate color match that blends seamlessly with Trex fascia boards Smooth Drive - STICK-TIGHT technology reduces wobble and makes for smoother drives A Better Installation - Wider head and smooth upper shank decouple the fascia and framing for a reliable install UV Protection - Equipped with top-tier UV inhibitors to safeguard against sun damage Trex Fascia Color Match Screw Tool Kit sold separately
Adding and Finishing Fascia Plugs
To achieve a polished, seamless appearance on your composite fascia, you’ll need to conceal the fastener holes with color-matched Trex Hideaway fascia plugs. Before insertion, clean the counterbore hole thoroughly to remove all debris and water that could interfere with seating.
Center each fascia plug over its hole, aligning the grain direction with your board’s grain pattern. This alignment guarantees a seamless finish that blends with your fascia installation tips. Using a smooth-faced hammer, gently tap the plug flush to the board surface with one continuous motion—don’t apply excessive force, as this risks damaging both the plug and fascia board. Similar to securing hardware in outdoor applications, proper fastener tension ensures long-term stability and performance of your installation.
Your fascia plug options come color-matched to specific Trex product lines. Proper insertion technique avoids future complications if repairs become necessary. For your deck’s longevity, ensure you’re using stainless or coated fasteners throughout your installation to prevent rust and deterioration.

Color-Matched, Toasted Sand (warm tan-brown) - plugs blend with your composite fascia color for a clean, fastener-free finish

Trex screws and the depth setter tool are sold separately. Trex-branded tools are required for installation. Seamless Color-Matched Finish: Precision-molded plugs designed to match Trex composite fascia boards for a clean, professional, and factory-finished look. Conceals Fastener Holes: Covers face-fastened screw holes to create smooth, uniform deck fascia and trim edges. Durable Composite Construction: Made from weather-resistant composite material that resists fading, cracking, moisture, and rot. Easy Press-Fit Installation: Simple push-in design installs quickly after fastening, saving time on job sites and DIY projects.
Color-Matched, Rocky Harbor (medium grey-brown) - plugs blend with your composite fascia color for a clean, fastener-free finish
Long-term Maintenance and Inspection Guidelines
Your Trex deck’s longevity depends on consistent upkeep that goes well beyond the initial installation. Establish a semi-annual inspection schedule during spring and fall to catch issues early. Check face screws for loosening, corrosion, or rust stains, tightening or replacing them as needed. Examine deck boards for cracking, warping, or surface abrasion that could worsen. Clear debris accumulation between boards to maintain proper drainage and airflow. Inspect railing integrity for safety concerns. During deck maintenance routines, monitor for surface scuffs; minor marks typically weather away within 12–16 weeks. Before staining or refinishing your deck surface, ensure you apply a deck cleaner to remove any accumulated dirt or mildew that could affect the finish. When cleaning, use soft bristles on composite decks to avoid damaging the surface while effectively removing buildup. Document findings and address problems promptly. Adhering strictly to these inspection and maintenance protocols preserves your warranty coverage and maximizes your deck’s performance and appearance over time.


