The Ultimate Guide to Cutting Composite Deck Boards
You’ll master cutting composite deck boards by equipping yourself with essential tools: circular saws, miter saws, and jigsaws paired with carbide-tipped blades. Prepare your workspace with proper ventilation, safety gear, and stable board support. Mark cut lines crisply using a utility knife for clean edges. Execute straight, cross, and rip cuts with precision, then finish professionally by installing end caps and applying protective sealants. Understanding blade maintenance and advanced techniques guarantees flawless results every time.
Essential Tools for Cutting Composite Decking
You’ll need five primary cutting tools to handle composite decking efficiently: a decking cutter, circular saw, miter saw, table saw, and jigsaw. Each tool excels at specific cutting techniques. The decking cutter delivers clean, accurate straight and angled cuts. Your circular saw handles both cross-cutting and ripping with a fine-toothed carbide blade. The miter saw produces precise square and angled cuts using carbide-tipped trim blades. Your table saw rips boards to width with consistent results. The jigsaw navigates intricate cuts around obstructions.
Tool compatibility matters greatly. Verify blade sizes match your saw models—standard circular saw blades measure 7-1/4 inches. Invest in carbide-tipped, fine-toothed blades for all tools to prevent splintering and maintain cutting performance. Sharp, well-maintained blades prevent rough cuts and potential decking damage. When working with hidden fastening systems like Tiger Claw or Cortex fasteners, precise cutting preserves the integrity of adjacent boards and waterproof seals. Following manufacturer-specific guidelines for your composite decking brand ensures compatibility with various fastening systems and cutting requirements specific to your chosen product.

SPECIFICATION: Diameter: 5-1/2 inch circular saw blade(140 mm); Arbor size: 10 mm; Max Rpm:8000; Carbide Teeth: 24T&48T

Application - Designed for cutting wood, suitable for all kinds of softwood, hardwood, multilayer, MDF, plywood, laminate, chipboard, and so on. Wood with nails can also be cut

SPECIFICATION: Diameter: 7-1/4 inch circular saw blade(185 mm); Arbor size: 5/8 inch(15.88 mm) ; Max Rpm:8000; Carbide Teeth: 24 T 40 T 60 T
Preparation and Safety Measures
Before making your first cut, proper preparation and safety measures are essential to protect yourself and guarantee quality results. Your workspace organization directly impacts both safety and precision. Arrange a stable, level cutting surface with adequate support along the board’s length, ensuring good ventilation to minimize dust accumulation. Keep your workspace clutter-free and well-lit for accurate marking.
Personal safety requires thorough PPE. Wear safety goggles to guard against flying debris, hearing protection when operating power tools, and a dust mask or respirator to prevent inhalation of composite particles. Use gloves for hand protection and secure long hair to prevent entanglement. Avoid loose clothing that might catch on equipment.
Always clamp boards firmly during cutting and support long pieces fully with multiple sawhorses. Position supports close to cut lines to prevent binding. Never attempt manual stabilization of falling boards. Proper cutting technique also depends on understanding your deck’s joist spacing requirements to ensure boards are cut to appropriate lengths for your specific installation pattern.
Straight and Cross Cuts
With proper preparation complete, you’re ready to execute precise cuts that define your deck’s structural integrity and appearance. Your cutting techniques depend on the cut type and desired finish quality.
For straight cuts, choose between circular and table saws. Circular saws work well with fine-tooth, carbide-tipped blades, requiring proper board support to prevent sagging. Table saws deliver smoother edges when you maintain consistent fence alignment. Always position the textured surface facing up during all cuts.
Cross cuts benefit from miter saws, which handle angled cuts efficiently. Mark your cut line precisely before starting, ensuring blade alignment with the mark.
Regardless of technique, trim factory ends before measuring final lengths to achieve square edges. Clamp boards securely, use sharp blades, and cut slowly for best deck alignment and clean results. Proper cutting techniques work in conjunction with two screws per joist fastening methods to ensure your deck maintains both structural integrity and a polished appearance. Similar to how protective covers safeguard materials during transport, using proper blade guards and safety equipment protects you during the cutting process.

Up to 3X life* designed for improved finish quality**

SPECIFICATION: Diameter: 6-1/2 inch circular saw blade(165 mm); Arbor size:5/8 inch(15.8 mm) ; Max Rpm: 8000; Carbide Teeth: 24 T & 60T

SPECIFICATION: Diameter: 7-1/4 inch circular saw blade(185 mm); Arbor size: 5/8 inch(15.88 mm) ;Max Rpm: 8000; Carbide Teeth: 24 T
Rip Cuts and Width Reduction
As your deck project progresses toward completion, you’ll inevitably encounter situations where boards don’t fit perfectly within remaining spaces—this is where rip cuts become essential. Unlike cross cuts that trim length, rip cuts reduce board width along the entire length, enabling flexible deck design without concerns about board fit within your substructure.
A table saw delivers the most consistent and precise rip cuts for composite decking. Alternatively, circular saws with proper blades and guides accomplish effective width adjustment. For ideal results, select fine-tooth carbide-tipped finish blades or standard rip blades with 24 teeth—these handle composite material’s stringiness better than other options.
Always use push sticks when feeding boards through table saws, and mark the back before circular saw cuts to prevent visible surface chipping. Install rip-cut boards promptly after cutting to minimize material movement from expansion and contraction.

Heavy-Duty Construction - Thick kerf and reinforced plate deliver maximum stability and flatness, ensuring long-lasting performance and durability in demanding cutting applications.

Specs: Arbor 5/8", Diameter 10", Grind TCG, Hook Angle 12°, Kerf .091", Plate .071", Teeth 30

Up to 70% more cuts per charge compared to standard blades
Advanced Cuts and Curved Designs
Once you’ve mastered straight rip cuts, you’ll find that curved designs and intricate pattern creation demand different tools and techniques. Jigsaws excel at executing curved design techniques with their superior maneuverability and precision. Select a fine-tooth finish blade specifically designed for composite materials to minimize chipping and achieve smooth edges.
For intricate pattern creation, mark your cutout areas meticulously using templates or chalk lines before beginning. Support your board fully on a stable work surface to eliminate vibration and guarantee accuracy. Cut slowly and steadily, letting the blade do the work—rushing causes overheating and material melting. Proper board support with sawhorses prevents bending and ensures precise cuts throughout the process. After cutting, smooth rough edges with light sanding or filing for a professional appearance. While working with composite decking, consider how your design will integrate with hidden fastener systems to maintain the seamless aesthetic of your finished deck. These techniques transform your composite decking into custom designs with polished, finished results.
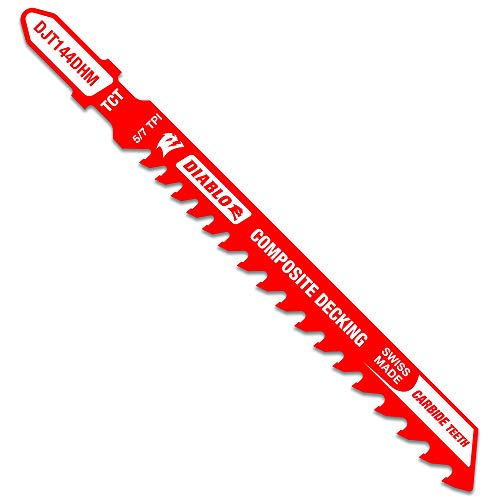
Extreme Durability - Provide up to 50X longer cutting life compared to standard blades, making them ideal for composite decking materials, wood, PVC, and other demanding applications.

Optimized Blade Design - Reduces heat and pitch buildup. ensuring smooth, efficient cutting and extending blade life. This 4" blade allows cleaner cuts and preventing from overheating.

Cost-Effective Value - This 20-piece set offers up to 48% savings compared to buying individual blades, making it a smart choice for budget-conscious users.
Common Problems and Solutions
Even experienced DIYers encounter predictable challenges when cutting composite deck boards, but understanding their causes and remedies’ll help you achieve professional results consistently. Sharp, fine-toothed carbide blades minimize splinter prevention while slow, steady cutting paces reduce rough edges. For dust management, connect collection systems to your saw—composite particles disperse widely and require effective capture. Support your boards continuously along their entire length on sturdy sawhorses with four strategically positioned blocks near the cut line to prevent blade binding. Mark cutting lines with chalk or speed squares for accuracy. Maintain blade sharpness and proper depth adjustment to guarantee clean, precise cuts. Address clogging issues by removing chip deflectors when working with composites. Consider the climate conditions where your deck will be installed, as extreme weather may affect your material selection and cutting techniques. After cutting your boards, prepare for installation by securing boards with screws spaced appropriately and countersunk flush with the board surface for a professional appearance.
Blade Selection and Maintenance
The quality of your cuts depends almost entirely on selecting the right blade and maintaining it properly throughout your project. You’ll want carbide-tipped blades with 40 teeth for crosscuts and 24 teeth for ripping—the ideal configurations for composite materials. Consider specialized options like the Diablo TrexBlade, engineered specifically for composite decking with higher tooth counts and thinner kerfs that minimize chipping.
Your blade types directly influence your cutting techniques’ effectiveness. Keep blades clean and sharp, inspecting them regularly for wear. Replace or resharpen blades after major projects to maintain precision. Dull blades increase chipping and material damage. Store blades in dry conditions to prevent rust. These maintenance practices extend blade life while ensuring consistently smooth, professional-quality cuts on your composite deck boards. For fastening your cut boards, the sturdiest decks use a combination of both nails and screws to secure the composite material properly. Proper board alignment and hidden fastener placement are equally critical to achieving a seamless finished surface without visible hardware on your deck.
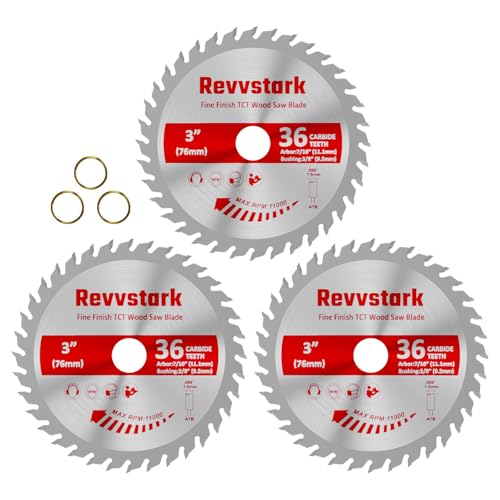
SPECIFICATION: Diameter: 3 inch circular saw blade(76 mm); Arbor size: 7/16 inch(11.1 mm) ; Bushing: 3/8"(9.5 mm); Max Rpm:11000; Carbide Teeth: 36 T
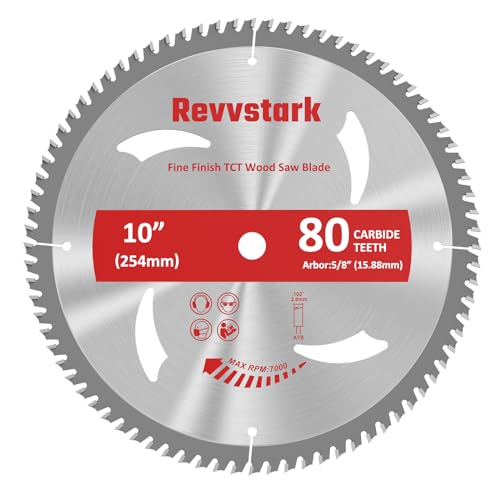
DIMENSIONS: Diameter: 10 inch table saw blades(254 mm); Arbor size: 5/8 inch(15.88 mm) ; Max Rpm: 7000; Carbide Teeth: 80T

SPECIFICATION: Diameter: 12 inch circular saw blade; Arbor size: 1 inch; Max Rpm: 6500; Carbide Teeth: 100T
Measuring and Marking Techniques
Accurate measurements and clear marking form the foundation for precision cuts, and you’ll find that your blade work becomes considerably more effective when you’ve properly prepared your deck layout beforehand. Your measuring accuracy depends on synchronizing all measuring tapes before starting, as variations exist even without the same brand. Use a utility knife to mark cut lines crisply, reducing tear-out and ensuring readable marks. Score your cut line with the knife to guarantee clean edges after cutting. Double-check every measurement before marking to minimize errors. These marking techniques eliminate costly mistakes and wasted composite material. Place your knife at the measurement mark, then slide your square over efficiently. Precision at this stage directly translates to superior cutting results and professional-quality deck installation. For composite boards typically following the 1″ × 5.5″ profile, accurate measurements ensure proper fit and alignment during installation. Maintaining proper board spacing during the layout phase prevents installation complications and supports long-term deck performance.
Professional Finishing Touches
Once you’ve executed your cuts with precision, the finishing touches you apply will determine whether your composite deck looks merely acceptable or genuinely professional.
End cap installation protects your cut edges from moisture infiltration and pest damage. You’ll apply color-matched caps using composite-specific adhesives formulated to withstand temperature fluctuations. Allow proper curing time before exposing the deck to weather.
Fascia board application conceals exposed structural elements and rim joists. Pre-drill fastening holes two inches from top and bottom, alternating every twelve inches. Use composite-specific fasteners that accommodate natural expansion and contraction. Similar to how protective sealants extend the longevity of wicker furniture, proper sealant application on your composite deck’s exposed surfaces will prevent moisture damage and brittleness over time. Installing under-deck drainage systems beneath your composite deck further protects the substructure by diverting water away from wooden components and preventing rot.
For seamless corners, cut the middle section and fold the fascia over for uniform coverage. These professional details transform raw cuts into a polished, durable deck perimeter that enhances longevity and visual appeal.