
How to Install Timbertech Decking With Hidden Fasteners
You’ll install TimberTech decking with hidden fasteners by first acclimating grooved boards for 48 hours, then positioning your first board parallel to the rim joist using a chalk line. Insert CONCEALoc fasteners into the groove at 45° angles, one per joist, maintaining 3mm-6mm side gaps. Slide subsequent boards onto exposed tabs, tap gently with a beater board, and fasten at 16″ centers. Install fascia with perpendicular screws every 12 inches, then conduct final spacing and alignment checks before applying protective finishes. The specific techniques for each fastener type’ll reveal critical installation nuances.
Essential Tools and Materials for Hidden Fastener Installation
Before you’ll need to gather the right fasteners and tools for your specific board type.
Your fastener selection depends on your decking material. CONCEALoc works with grooved composite boards, while FUSIONLoc fits all TimberTech grooved decking. Advanced PVC square-shoulder boards require SIDELoc, and full-profile boards need Cortex fasteners. Fascia installation uses TOPLoc Fascia Fasteners.
Tool requirements vary by fastener type. You’ll want a cordless or pneumatic drill for most applications. CONCEALoc hand-driven packs include T15 star-drive bits, while the FastenMaster TigerClaw Gun handles pneumatic installation. SIDELoc installation demands a variable-speed drill and matching guides for proper alignment. Cortex installations require a 7/32″ pre-drill bit and fascia bit for TOPLoc fasteners.
Like aluminum outdoor furniture, composite decking benefits from resistance to rust and corrosion, making it an excellent choice for long-term durability in various weather conditions. Proper fastener placement and consistent spacing across joists ensures your composite deck boards sit flush with no visible hardware. Gather all materials before starting your project to guarantee efficient installation.

【Heavy-Duty Performance】 – Die-cast aluminum body with ball bearing system ensures durability and smooth operation under high-load conditions.

VERSATILE TOOL: The AD-104 Reversible Air Drill is a traditional drill that produces higher free speeds and consumes less air, while effectively reducing noise for safer and easier use.

【High Quality Material】Each Double Headed Skirting Seamless Nail is made of high quality galvanized 45 gauge steel with galvanized surface, rust and wear-resistant, sturdy and sharp, strong penetration, not easy to bend or fall off. It can meet your long-term use needs. Nail length: 0.67+0.39inches; Diameter: 0.098inches
Preparing Your Boards for Grooved Fastener Systems
Once you’ve gathered your fasteners and tools, you’ll need to properly prepare your boards to guarantee successful hidden fastener installation. Start with board acclimation by letting your boards sit at the installation site for at least 48 hours before you begin work. This allows them to adjust to local temperature and humidity conditions.
For board storage, keep your boards flat and elevated off the ground using spacers to prevent warping and moisture absorption. Never stack boards directly on top of each other without spacers between them. Avoid cutting boards and leaving them unattached overnight, as temperature fluctuations cause length changes. Instead, cut and fasten boards immediately after cutting to maintain dimensional stability throughout your project. Proper surface preparation before installation will also help ensure your boards are ready for optimal fastener performance. As your boards acclimate, they will naturally shrink and settle, so understanding moisture drainage and airflow patterns will help ensure proper spacing and prevent gaps from forming excessively over time.
Positioning the First Board Correctly
The first board sets the foundation for your entire deck’s appearance and structural integrity, so you’ll want to position it with precision. Start by measuring the distance from the first deck board edge to the rim joist at both ends to verify proper alignment. Strike a chalk line parallel to the rim joist, then check the board is square using a speed square. Position the board flush with or slightly set from the deck edge for a clean finish. Before fastening, confirm the board is level and doesn’t bow or twist. Frequently check alignment using a string line to maintain straightness over the joists, making adjustments as necessary before securing. Proper positioning prevents cumulative misalignment of subsequent boards.
Installing CONCEALoc Hidden Fasteners
Installing CONCEALoc hidden fasteners requires you to use clips specifically engineered for TimberTech’s grooved decking boards, along with a cordless drill or pneumatic gun equipped with an adjustable clutch to control screw torque and prevent damage. Insert each fastener into the grooved edges, pressing downward until the clip’s teeth fully engage the board groove. Align the screw hole with your joist’s center for proper load transfer. Space fasteners evenly—one per joist intersection beneath each board. Drive screws at a 45° angle with steady downward pressure, maintaining flush positioning. Like the Trex system, maintaining consistent spacing gaps between boards allows for proper airflow, drainage, and expansion throughout your deck. The hidden fastener benefits include concealed hardware and improved aesthetics, while fastener compatibility with TimberTech’s specifications guarantees structural integrity and longevity. Use only pre-drilled holes to avoid splitting and weakening fastener engagement. Proper board spacing is essential for deck longevity and helps prevent moisture damage and warping that can compromise your installation over time.
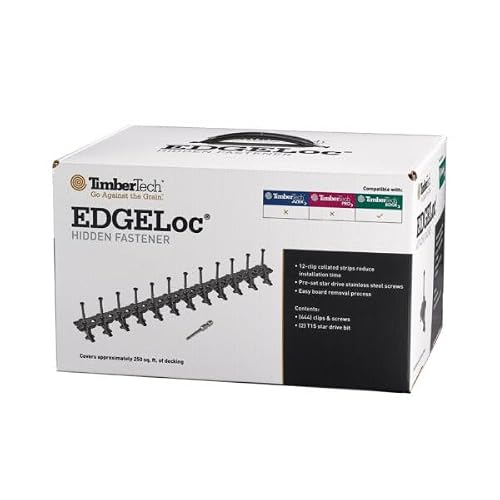
12 Clip Collated Strips for easy installation

Exclusively for use with TimberTech decking
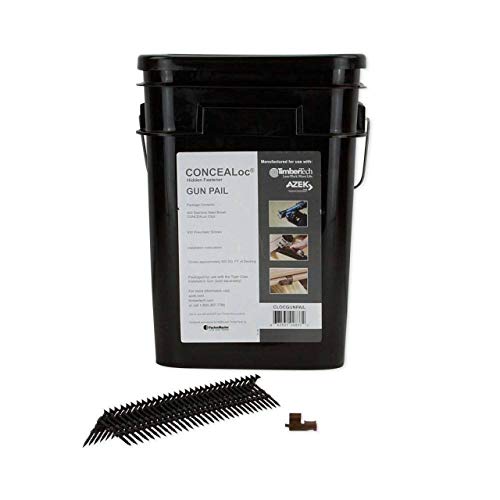
Box contains 900 CONCEALoc fasteners and 930 screws
Installing Cortex Hidden Fasteners and Plugs
For a truly screw-free deck surface, you’ll turn to Cortex Hidden Fasteners, which combine specially engineered screws, grain-matched plugs, and a precision setting tool to create a seamless, concealed fastening system.
Begin by pre-drilling TimberTech boards with a 7/32″ drill bit, verifying the hole’s clean and dry. Insert the Cortex screw into the pre-drilled opening, then attach the setting tool to your drill. Drive the screw until the tool automatically releases—this prevents overdriving and verifies correct depth.
For plug installation techniques, hand-place the plug into the recessed hole, aligning its grain with the deck board’s direction. Gently tap it flush using a hard plastic hammer. The Cortex fastener benefits include added stability when using two screws per joist, particularly valuable for stairs and perimeter applications where traditional fasteners prove impractical.

Each Box Includes 224 Screws, 240 Collated Plugs, & 3 Setting Tools – 100 Lq/Ft of Coverage!

Compatible with Trex Decking

Includes 100 screws, 105 plugs, 1 counterbore tool, & 1 setting tool – 50 linear feet of coverage
Maintaining Proper Board Spacing and Alignment
While your Cortex fasteners hold the deck together structurally, you’ll find that proper board spacing and alignment determine whether your deck looks professionally installed and performs well over time. Maintain side-to-side gaps between 3 mm and 6 mm, depending on your TimberTech product line. Use spacer tools to guarantee consistency. End-to-end butt joints require 1/8″ to 3/16″ spacing to accommodate thermal expansion without buckling. Verify joist spacing at 12″ to 16″ on center—closer spacing reduces movement that causes misalignment. Use string lines to confirm joists remain level and in plane. Check joists for straightness before installation. Install blocking every 4 to 6 feet to prevent twisting. Evenly spaced joists help maintain a uniform deck surface and prevent excessive gapping between boards. Once installation is complete, proper maintenance with deck coating products will protect your investment and extend its longevity. These practices protect your investment and simplify long-term deck maintenance.
Fastening Subsequent Boards to Your Deck
Once you’ve verified your initial board placement and spacing, you’re ready to attach the next board using ConceaLoc hidden fasteners. Start by inserting fasteners into the grooved edge of your installed board, ensuring clip teeth fully engage. Align the screw hole with your joist’s center, positioning the fastener clip at 45° for excellent grip. Press downward firmly to guarantee tight engagement.
For installation tips, slightly raise the new board’s outer edge to slide its groove onto the exposed tabs. Slide forward until the spacer tab contacts for proper alignment. Gently tap with a 2×4 beater board to fully engage the spacer tab. Maintain consistent spacing per manufacturer recommendations. These hidden fastener systems are engineered to eliminate visible screws and nails while maintaining structural integrity throughout your deck. Before fastening, ensure the deck surface is properly prepared by removing any debris or obstructions that could affect even fastener seating.
Fasten at every joist—typically 16″ on center—using one fastener per joist. Drive screws at 45° angles while applying downward pressure. Avoid overdriving; the Cortex setting tool releases at correct depth automatically. Clean holes beforehand and inspect clip seating thoroughly.

【What You Will Get】50 x Hidden Fasteners Nylon Clips. Each fastener is equipped with a metal countersunk square slotted screw, sufficient quantity can meet your use and replacement needs, provide you a clean and neat deck appearance.
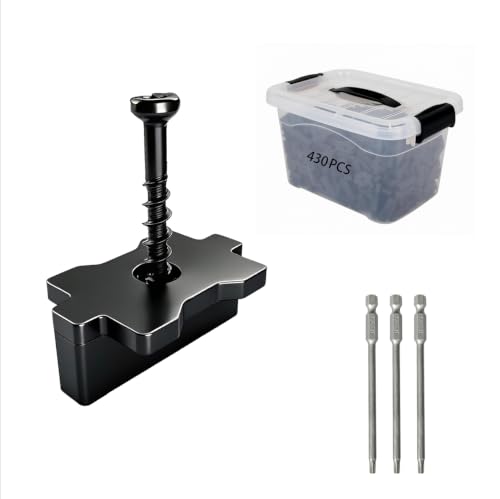
【Anti rust coating】: Our star hole screws are coated with three layers of anti rust coating, which has high corrosion resistance and is suitable for external and internal projects. It provides reliable anti rust and anti-corrosion protection while reducing friction during use, ensuring smooth installation and long-lasting performance.

Maximizes the aesthetic appeal of decking by installing into the side grooves.
Installing and Securing Fascia Boards
How you prepare your deck’s support structure determines the success of your fascia installation. You’ll need a solid wood backer—ideally a 2×12 rim board—running the entire width. Before beginning fascia preparation, confirm your deck frame is structurally sound and double-joist all butt seams.
For fascia alignment, position boards flush with your deck’s top surface using a chalk line as your guide. Maintain consistent spacing at joints to allow for expansion and contraction. Pre-drill fastener holes using the correct fascia drill bit, then install three screws per 12-inch section: one near the top edge, one near the bottom, and one centered. For cedar fascia boards, 316 stainless steel screws are recommended to prevent tannin staining and ensure long-term durability.
Drive fasteners perpendicular to the surface, staying ¾ inch from side edges and ½ inch from ends. Never fasten through fascia into deck boards—always penetrate rim joists for holding strength. Before finalizing your installation, perform a thorough structural inspection to ensure your fascia is secure and properly aligned with your deck frame.
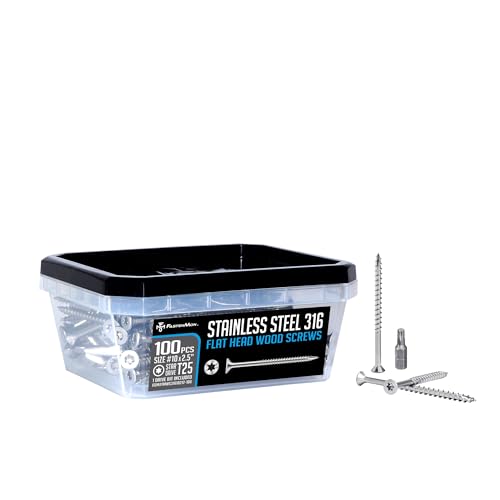
PACKAGE CONTENT: Each package contains 100 pieces of #10 x 2.5 inch stainless steel wood screws, weighing approximately 1.2 pounds, and includes a T25 star drive bit for easy installation.

BUILT TO LAST WITH 316 GRADE STAINLESS STEEL - These stainless steel wood screws are made from premium 316 Marine Grade Stainless Steel for superior strength. No more rust on your timber projects! Ideal for long-lasting performance in decking, fencing, and all types of outdoor woodwork. This steel prevents ugly rust streaks and stains on outdoor timber, keeping your structures looking clean, polished, and professional season after season.

【Package Contents】:Each package contains 100 #10 x 3-inch 316 stainless steel flat-head wood screws and one T25 Torx screwdriver bit.
Final Checks and Finishing Touches
As your TimberTech deck nears completion, you’ll need to confirm that every board sits perfectly aligned and spaced before moving forward with final fastening and finishing. Check all boards maintain consistent 3/16-inch spacing and square alignment with framing. Verify that fasteners meet setback requirements—no hardware within 3/4 inches of board ends or edges.
Conduct a thorough final inspection of the entire deck surface, testing boards for movement and looseness by walking across different sections. Remove any debris, sawdust, or protruding fastener clips that compromise aesthetics. Clean all surfaces following TimberTech guidelines using mild soap and water only, and promptly wipe away any stains with a damp rag to prevent permanent marks.
Address any installation damage like scratches or dents through recommended touch-ups. Verify deck flatness and uniformity, resolving gaps before project completion. Ascertain perimeter and stair fasteners remain secure and hidden. For composite decking surfaces, applying UV filters and fungicides during finishing will help protect your deck from mold, mildew, and color fading over time.