Professional Pergola Installation: What You Need to Know
You’ll need permits for attached structures and utility line inspections before digging. Select materials based on climate durability, then prepare your site with accurate measurements and proper drainage. Install footings below the frost line using corrosion-resistant brackets and laser levels for alignment. Frame your pergola with appropriate fasteners, verify all angles and levels, and choose roofing that suits your climate. Complete finishing with UV-protective coatings and regular maintenance plans. The specifics of each phase—from foundation dimensions to material specifications—require careful attention to guarantee compliance and longevity.
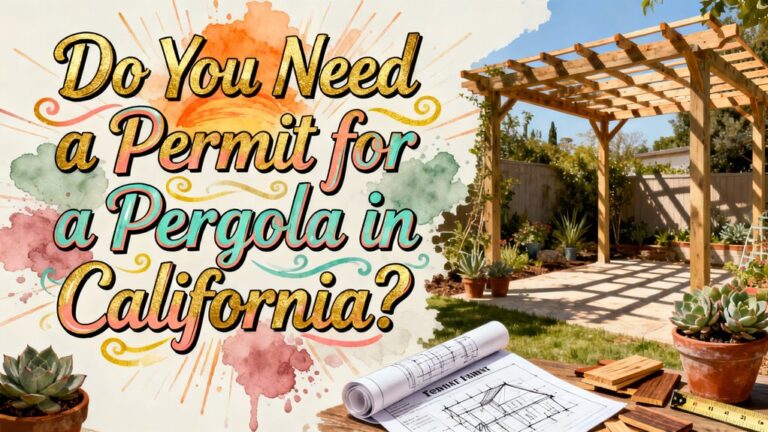
Planning and Permits
Before you install a pergola, you’ll need to determine whether your local jurisdiction requires a permit. Most freestanding pergolas below certain size thresholds don’t require permits, but attached structures almost always do. You’ll need to consult your local zoning regulations and building codes, which vary considerably by location.
Key factors influencing permit necessity include your pergola’s size, whether it’s freestanding or attached, and its proximity to property lines. If you’re in an HOA community, you’ll likely need approval regardless of local requirements. Most jurisdictions require freestanding pergolas to meet wind load requirements of at least 105mph to ensure structural safety.
Contact your local building department to clarify permit types applicable to your project. You may need to submit structural plans, especially in high-wind or snow-prone areas. Application fees typically range from $150 to $800, with approval timelines spanning two to four weeks or longer.
Site Selection and Measurements
Selecting the right location and taking precise measurements are critical steps that determine your pergola’s long-term performance, safety, and functionality. You’ll need professional soil testing to evaluate load-bearing capacity and composition, ensuring your foundation can support the structure reliably. Assess site drainage carefully—avoid low-lying areas where water accumulates, as poor drainage undermines structural integrity over time.
Measure your pergola footprint accurately using precise tools, then verify post hole locations for symmetry. Check local building codes for required hole depth (typically 30 inches minimum) and diameter specifications. Clear vegetation and debris from the installation area completely. For optimal stability, ensure your footing depth extends below the local frost line to prevent shifting and structural failure during freeze-thaw cycles.
Before digging, locate and mark all underground utilities to prevent damage. Level sloping sites as needed, adjusting foundations accordingly. A properly positioned pergola can also support climbing plants for natural shade while maintaining structural integrity. Consider soil type and frost depth to prevent frost heave and maintain long-term stability.
Utility Line Inspection
Once you’ve selected your installation site and taken precise measurements, you’ll need to identify all utility lines that could interfere with your pergola’s footprint and foundation. Contact 811 before any digging to notify utility companies and request underground line markings. Your compliance checks must include reviewing the plat of survey to locate main utility supply lines and easements.
Above-ground utility line clearance requirements vary by voltage and area type. Service-drop conductors require minimum 2.5-meter clearance above roofs, while residential driveways need 3.7 meters for low-voltage systems. Public streets demand 5.5 meters clearance.
Incorporate utility line locations into your final site plan. Professional contractors can identify permit needs and guarantee your installation meets all regulatory standards. Permanent markers documenting utility placements protect future excavation activities on your property.
Material Selection
After you’ve guaranteed your site meets all utility clearance requirements, you’ll want to focus on selecting materials that’ll perform reliably throughout your pergola’s lifespan.
Your material comparisons should weigh durability against maintenance requirements. Extruded aluminum pergolas resist corrosion and weather without fading or splintering, demanding minimal upkeep. The tough protective layer created by powder coating on aluminum prevents oxidation, fading, chipping, and scratches, allowing your pergola to withstand diverse weather conditions for 10 to 25 years or more. Vinyl options provide longevity but command premium pricing due to superior weather resistance. Cellular PVC remains virtually maintenance-free with 100% termite resistance and nonexistent upkeep beyond periodic cleaning.
If budget drives your decision, pressure-treated wood offers affordability but requires regular staining, painting, and protective treatments. Steel delivers heavy-duty durability with minimal deterioration across climates. For longer pergola spans, consider engineered lumber options like LVL that can safely support 20-foot spans without excessive sagging.
Consider your regional climate carefully. Vinyl brittleness in frigid conditions and softening in extreme heat may limit suitability. Ultimately, balance initial investment against long-term maintenance costs and performance expectations.
Site Preparation and Layout
Before you break ground on your pergola installation, you’ll need to thoroughly review and prepare your site to guarantee a stable foundation and trouble-free construction. Start by assessing topography, soil conditions, and existing features for landscape integration. Call 811 to locate underground utilities before digging. Clear vegetation and debris, then level the ground to create a stable base. Mark post positions precisely using tape measures and levels, ensuring even spacing and proper alignment. For drainage solutions, verify water won’t pool beneath the structure. Excavate holes to local frost-line depth—typically 28–48 inches—with 8×8 inch diameters minimum. Add 4–8 inches of gravel for drainage. Verify all measurements before excavation to prevent costly errors. Confirm building codes and permit requirements align with your installation plan. Standard pergolas typically use 6×6 inch support posts to properly support the structure and ensure long-term stability. Ensure posts are securely anchored in concrete to create a sturdy foundation that will support your pergola for years to come.
Foundation and Footings
With your site properly prepared and post positions marked, you’ll now shift your focus to installing the foundation system that’ll support your pergola’s weight and resist environmental forces. Your foundation types choice depends on your pergola’s size and soil conditions. Small pergolas work well with isolated pad footings or slab foundations, while larger structures need point or strip foundations for adequate support. Footing dimensions matter considerably—aluminum pergolas typically require 40 cm x 40 cm x 40 cm footings, whereas wooden pergolas often need 24 inches deep, especially in colder climates. Always place footings below the frost line to prevent heaving. Use concrete with minimum 3,500 PSI compressive strength and rebar with 40,000 PSI tensile strength, maintaining at least 3 inches above ground level. Ensure posts are plumb and properly braced during installation to maintain structural integrity. For larger wooden pergolas using 6×6 posts, secure the posts to the footing using approved hardware such as post anchors to ensure proper load transfer and prevent structural failure.
Frame and Post Installation
Your pergola’s structural integrity depends on precise post placement and alignment before you secure anything permanently. Use string lines and laser levels to verify all posts are square and properly spaced according to manufacturer specifications and local building codes. Install corrosion-resistant anchor brackets on concrete or wood surfaces, then secure posts with self-drilling screws or structural bolts. Brace each post temporarily with 2x4s to maintain plumb during installation. For beam attachment, lift main beams with at least two people and secure them using beam brackets with appropriate fasteners. Use framing squares to confirm 90-degree angles. After assembling all connections, verify plumb and level throughout the frame, tighten all fasteners, then remove temporary braces only when the structure achieves full stability. Before finalizing your installation, inspect all connection points and wood surfaces for any damage or imperfections that could compromise performance, just as thorough surface inspection is critical in exterior wood projects. Proper fastener spacing and fastener placement throughout your pergola frame will ensure secure connections and long-lasting performance, similar to hidden fastener techniques used in professional deck installations.
Roof and Accessories
Once you’ve secured the pergola’s frame, selecting and installing the right roof system becomes critical to the structure’s functionality and longevity. You’ll choose from aluminum, polycarbonate, wood, fabric, or vinyl options—each offering distinct advantages. Aluminum resists corrosion and requires minimal maintenance. Polycarbonate panels provide superior durability, UV protection, and roof insulation for energy efficiency. Retractable features, whether motorized louvers or fabric systems, grant you flexible light and weather control.
Consider your climate and maintenance capacity. Metal and polycarbonate roofs withstand harsh conditions longest. For maximum adaptability, motorized louvered systems allow you to adjust shading based on weather conditions and time of day. Proper installation of metal roofing panels requires overlapping them correctly and fastening with screws featuring rubber washers to prevent leaks. Add integrated LED lighting, gutter systems, and UV-protective coatings to enhance usability and protection. Vinyl and PVC options last 15–20 years with basic care, while wood requires regular treatment every few years. Strategic accessory selection maximizes your pergola’s performance and durability.
Finishing and Quality Inspection
As your pergola nears completion, the finishing and quality inspection phase determines whether your investment delivers both aesthetic appeal and lasting durability. Your contractor applies finishing touches—sanding rough edges, staining or sealing wood, and painting metal components—to protect against UV damage and weather deterioration. Quality assurance involves rigorous inspections of structural alignment, joint tightness, and fastener corrosion resistance. All components are verified for level and plumb positioning, ensuring stability and safety compliance with local building codes. Your contractor documents inspection results and confirms manufacturer specifications before final handover. Once inspections pass, they’ll remove debris, explain maintenance protocols, and address any questions. For wood staining and sealing, proper surface preparation with adequate drying time between applications ensures optimal finish absorption and even coverage on your pergola’s wooden elements. For outdoor structures exposed to the elements, regular mild soap and water cleaning helps maintain the finish and appearance over time. This thorough approach guarantees your pergola’s longevity and peak performance.