Building Plans for Gazebos and Pergolas: DIY Guide
You’ll need precise structural planning, quality materials, and methodical assembly techniques to build a durable gazebo or pergola that enhances your outdoor space. Start by selecting your structure’s size and shape—gazebos range from 8×8 to 16×16 feet, while pergolas maximize usable area with rectangular designs. Establish a solid foundation using concrete pads or gravel, then frame with pressure-treated lumber and galvanized hardware. Proper post spacing, beam alignment, and roof installation guarantee weather protection and longevity. The specifics of foundation depth, fastener placement, and weatherproofing techniques will transform your vision into a lasting outdoor addition.
Gazebo Size and Shape Options
How do you choose the right gazebo dimensions for your yard? You’ll need to assess your available space and intended use. Standard wood gazebos range from 8×8 feet to 16×16 feet, while hardtop options extend to 14×24 feet for larger gatherings.
Regarding gazebo styles, square and rectangular shapes dominate residential installations due to structural efficiency and ease of construction. Octagonal and hexagonal designs offer aesthetic appeal for traditional settings but require more complex framing. Pagoda-style gazebos with multi-tiered roofs provide distinctive visual interest while maintaining structural stability.
Consider clearance requirements carefully. A 10×10 gazebo demands minimum 12×12 feet of yard space. Larger 14×20-foot structures need 16×22 feet. Standard residential heights range from 8 to 10 feet, accommodating typical furniture arrangements while maintaining proper sightlines and ventilation.
Foundation and Base Construction
Once you’ve finalized your gazebo’s dimensions and shape, you’ll need to establish a solid foundation that supports your structure’s weight and withstands ground movement. You’ll choose from several foundation types based on your climate, soil conditions, and permanence goals.
Gravel foundations offer quick installation with excellent drainage—excavate 4 inches, extend 6–12 inches beyond your structure’s perimeter, and compact 3/4-inch stone evenly. For permanent installations, concrete pads provide superior stability; excavate 6 inches deep, add 4 inches of crushed rock base, then pour 3–4 inches of concrete within a 2×4 frame.
In cold climates, concrete footings poured below the frost line prevent shifting. Reinforce with minimum 40,000 PSI rebar for durability. For structural posts like 6×6 supports, use post anchors or saddles to securely fasten posts to footings and ensure proper load transfer. Before finalizing your foundation design, consult with local building authorities to ensure your installation meets all regulatory requirements. Your base materials determine longevity—select carefully according to your environment and structural requirements.
Materials and Lumber Requirements
Because your foundation establishes the structural baseline, selecting appropriate lumber and hardware becomes the next critical step in ensuring your gazebo’s longevity and load-bearing capacity.
Your wood selection determines durability and maintenance requirements. Pressure-treated pine offers budget-friendly rot resistance, while cedar and redwood provide premium aesthetics. For superior durability, consider tropical hardwoods or modified wood products, though these carry higher costs. Western red cedar and Douglas fir are particularly recommended for their excellent performance in outdoor structures.
Standard post dimensions are 6×6 or 6×8, with beams and rafters ranging from 2×8 to 2×12. A typical 10×10 structure requires six posts and four to six beams. Slats space 12–24 inches on center.
Fastener types include 6-inch lag screws for post-to-beam connections and 4-inch deck screws for beam-to-rafter joints. Use galvanized or stainless steel hardware to prevent corrosion. Post bases anchor posts to concrete foundations, essential for structural integrity. For exposed deck surfaces and high-traffic areas on your gazebo, consider applying sand and stain techniques to create non-slip surfaces that enhance safety without compromising the wood’s appearance.

Diameter: 3/8" | Length: 2-1/2" | Head width: 9/16"
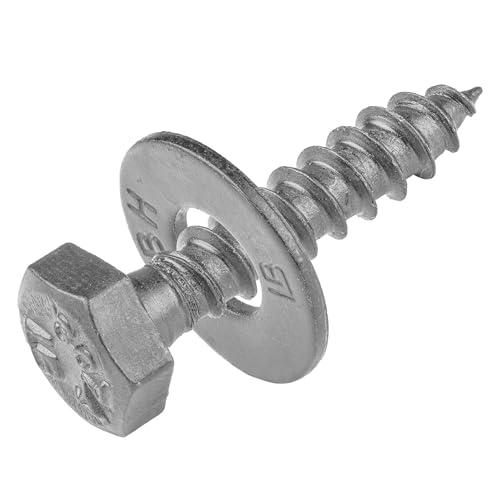
Diameter: 1/4" | Length: 1" | Head width: 7/16"
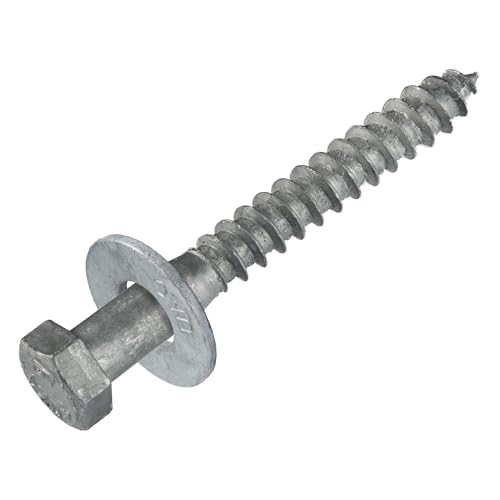
Diameter: 3/8" | Length: 4" | Head width: 9/16"
Framing and Structural Assembly
With your materials selected and foundation set, you’re ready to assemble the frame that’ll support your entire structure. Your framing techniques must prioritize structural integrity from the start.
Begin by setting posts plumb using temporary braces, then verify square layout with the 3-4-5 rule. Anchor 4×4 or 4×6 pressure-treated posts securely with galvanized bolts or lag screws. Attach horizontal beams atop posts using galvanized bolts for lasting joints, positioning them to carry rafter loads effectively. For added stability, consider using steel base brackets to firmly anchor posts into concrete footings.
Install rafters at 12-inch spacing, cutting half-lap joints for maximum surface contact. Add angled 45-degree braces between posts and beams—attach two or more per post for lateral stability and wind resistance. Similar to hidden fastening systems used in composite decking, ensuring fastener placement is methodical and consistent throughout your structure will maintain both aesthetics and long-term durability. Clamp all components during assembly, checking squareness repeatedly before final bolting. This methodical approach guarantees your gazebo or pergola maintains structural soundness for years.

Precise 3-Way Tee Pipe Connector - This metal T-shaped fitting is designed to join three poles at a 90-degree intersection commonly used to add cross bracing or horizontal supports within a canopy frame

Designed to Receive, Tighten and Support 1-5/8-Inch Steel Pipes
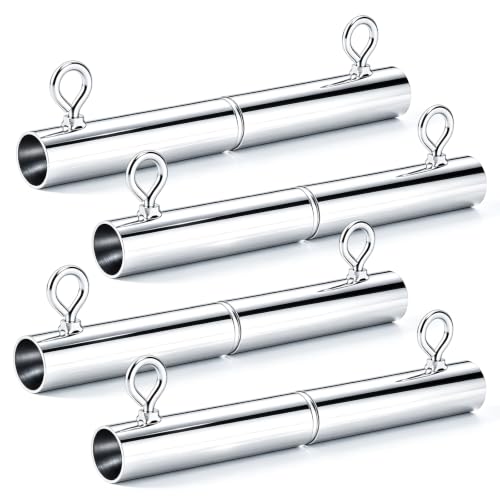
Perfect 1" EMT Pipe Fit: these 2-way joiner pipe connectors are specifically designed to fit 1-inch EMT pipes with an outer diameter (OD) of approximately 1 3/16 inches (30.2 mm); The sleeve-style design smoothly slides over the pipe ends, making them excellent 1" canopy fittings for structural extensions; Please measure your pipe's OD before purchasing for a seamless fit
Roof Design and Installation
Your roof design determines both the aesthetic and functional performance of your structure, so selecting the right configuration before installation begins is essential. You’ll choose from flat, slatted, lattice, or solid panel roof styles, each offering different shade levels and weather protection. Installation techniques require precise measurements of your pergola dimensions, including roof area, overhang, and pitch for proper drainage. You must account for material weight and verify frame compatibility before fastening. Before beginning your project, check with your local zoning and construction code offices to determine if a building permit is required for your specific pergola design. Pre-drill holes in panels and beams to prevent cracking, then attach using corrosion-resistant screws with rubberized washers. Space fasteners strategically—every other section on edges, every third in center areas—allowing material expansion while maintaining structural integrity. Overlap closure strips carefully to seal joints and prevent water infiltration. For enhanced protection and adjustability, consider louvered and motorized systems that allow you to control shading based on weather conditions and time of day.

PREMIUM ALL-WEATHER STAINLESS STEEL: Made from heavy-duty stainless steel with baked e-coating for superior strength and rust prevention; withstands harsh outdoor elements on decks, patios, and pergolas for lasting use

【HEAVY-DUTY METAL & WEATHERPROOF】 Built to Endure, Designed to Last. Craft for the long term with these premium metal louver hardware sets. Featuring robust powder-coated steel for superior strength and rust resistance, this durable deck sunblind system in black is engineered to brave all seasons—a steadfast foundation for your outdoor retreat.

STURDY & DURABLE: Our louvered pergola is made of sturdy steel which is stronger and durable than plastic ones. Metal powder coated surface provides excellent resistance to rust. Long life service
Permits, Tools, and Maintenance
Once you’ve finalized your roof design and completed the installation, you’ll need to address the administrative and practical elements that guarantee your project’s legality and longevity.
Permit requirements vary by jurisdiction but typically apply to structures exceeding 10–15 square metres or those with electrical, plumbing, or heating features. Attached structures require permits for safety compliance. In Victoria, most small freestanding pergolas under 3.6 metres in height and with a floor area under 20 square metres may not require a building permit if they meet specific siting requirements. Your submission must include site plans, foundation details, framing schematics, and elevations. Consulting your local building department ensures compliance with all applicable regulations before beginning construction.
Tool selection directly impacts construction efficiency and structural quality. Prioritize essential items: tape measure, level, circular saw, drill, and impact driver. For post installation, acquire a post-hole digger or auger. Concrete mixing requires a wheelbarrow, shovel, and trowel. Safety gear—gloves, goggles, ear protection—remains non-negotiable.
Maintenance demands annual inspections of roofing materials, structural integrity, and rust development on metal components. Seal wooden surfaces every 1–3 years. Regular cleaning prevents mold accumulation.

⚡ HOLE DIGGER MACHINE– Powered by a high-efficiency brushless motor and dual 18V/21V batteries (series connection delivers 36V/42V). Perfect for installing fence post, deck, planting tree and many other lawn applications and even ice fishing with specialized electric ice augers(must be purchased separately). It's the ideal digging tool for any homeowner or professional landscaper. No gas, no cord – just pure battery-powered digging performance.

Powerful Engine: VEVOR Fuel-powered Auger features a 43CC powerful engine with a maximum rotational power of 9350RPM. The gearbox is constructed with ball-bearing shafts and alloy gears, allowing it to handle various soil conditions. Whether it's sandy soil, forested areas, or farmland, this auger can perform deep drilling. The fuel mixture ratio of gasoline to oil is 40:1, and it can be easily mixed using an oil can. The engine has large cooling holes to ensure long-lasting operation.
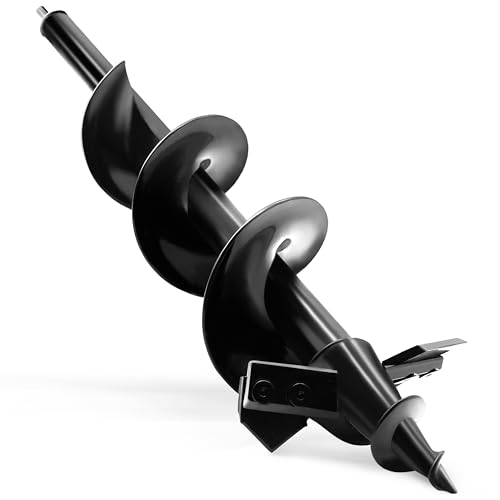
Sharp Upgraded Blades for Effortless Digging – Featuring a reinforced steel design and upgraded cutting-edge blade tip, this auger drill bit tears through tough soil, clay, and even rocky ground with ease. The auger specially designed for hard and rocky soild which others can't do it. Your new favorite tulip planter tool just made digging simpler than ever.
Choosing Between Gazebos and Pergolas
How do you determine which structure best suits your property’s layout and climate? You’ll weigh the pros and cons against your spatial constraints and design preferences. Gazebos demand more yard space due to their polygonal footprints, while pergolas maximize usable area with rectangular designs that attach to existing structures. Consider your climate: gazebos provide complete weather protection with solid roofs, ideal for unpredictable conditions, but require higher maintenance. Pergolas excel in warmer regions, offering adjustable sunlight and superior airflow through open slats. Structurally, gazebos need reinforced foundations for their enclosed design, whereas pergolas integrate seamlessly with decks or patios. Both structures can increase property value when properly designed and maintained. If you choose a gazebo, remember that furniture placed underneath will benefit from protective sealants and covers to prevent moisture damage and brittleness during seasons with heavy rain or humidity. Evaluate your property’s dimensions, your region’s weather patterns, and maintenance capacity before selecting between these distinct architectural solutions.

Easy to Install: installation is a breeze with this shade cover; The tent cover can be easily adjusted and installed, what you have to do is tie the straps at each corner to your gazebo support columns, enjoy your afternoons or party evenings without having to stress over installations

Universal Fit for 10'x10' Gazebos - Designed to fit all domi hardtop gazebo and most 10'x10' hardtop gazebo. For optimal coverage, we recommend verifying your gazebo’s measurements against our detailed size chart before purchase.

⛺【Durable Materials】: The gazebo replacement canopy top cover is made of high-quality material which is UV-protected, water-repellent. Blocks up to 95% of the sun's UV rays, so that it can protect your health and your family’s health. (200g/sqm polyester layer + 2-tier PU coating).
Step-by-Step Construction Process
Building a pergola demands meticulous attention to site preparation and layout, as improper foundation work’ll compromise the entire structure’s integrity. You’ll mark the footprint with string lines, guarantee level ground, and verify local building codes before excavating post holes at least two feet deep.
Next, you’ll install concrete footings and set posts plumb using temporary bracing. Your construction techniques should emphasize securing beams with half-inch bolts and washers, maintaining precise alignment throughout. Use galvanized or stainless steel fasteners to ensure durability and rust resistance in outdoor conditions.
When installing rafters, you’ll space them twelve inches on center, positioning end rafters directly over support posts for maximum structural integrity. Pre-drill all screw holes to prevent wood splitting.
For pitched roof pergolas, you’ll set angled posts or beams to provide the necessary slope for weather protection and water drainage.
Finally, you’ll attach galvanized post bases and diagonal braces, affirming your design aesthetics harmonize with robust structural performance and lasting durability.
Finishing Touches and Weatherproofing
Your pergola’s longevity depends fundamentally on applying protective finishes and implementing thorough weatherproofing strategies before the structure faces prolonged exposure to the elements. You’ll need to seal wood components to prevent moisture ingress that causes rot and warping. Apply stains or sealants during dry weather with a 24-48 hour precipitation-free window for ideal curing. Confirm surfaces are clean, dry, and sanded before finishing. For optimal coverage, plan to use approximately one to four gallons of stain depending on your pergola’s surface area.
You should combine rot-resistant lumber with chemical wood preservatives like Eco Wood Treatment for maximum durability. Maintain proper clearances between floorboards to prevent water pooling. Install decorative treatments—corbels, trim, and latticework—that simultaneously enhance aesthetics while reducing exposed gaps. Similar to deck construction, ensure proper joist spacing and blocking installation underneath your pergola’s support structure to prevent deflection and maintain structural integrity under weather exposure.
Establish maintenance schedules requiring annual touch-ups and gentle cleaning with mild detergent. Reapply finishes every two years, addressing any visible wear or wood checking immediately to preserve structural integrity.